This will allow new clients to fill out missing profile and demographic information when the login to the portal for the first time. Some clinicians see this as a time saving feature while other would rather do it themselves. By default both options are turned off. You can turn on one or the other or both. Turning these on does so for the entire Practice. To enable the feature the Practice System Administrator goes to their settings area and clicks on Client Portal Settings. About half way down this page there is an on/off switch as shown below.
If enabled, here is an overview of what the client will experience and how things will flow.
When a clinician invites a client to the portal they click on the Send Invitation button in the lower right corner of the client's information page. The clinician has the option to send documents and questionnaires to the client at that time.
The client will be sent an email invitation similar to the following:

Clients create a username and password
The client clicks on the first link in the email to create their username and password.
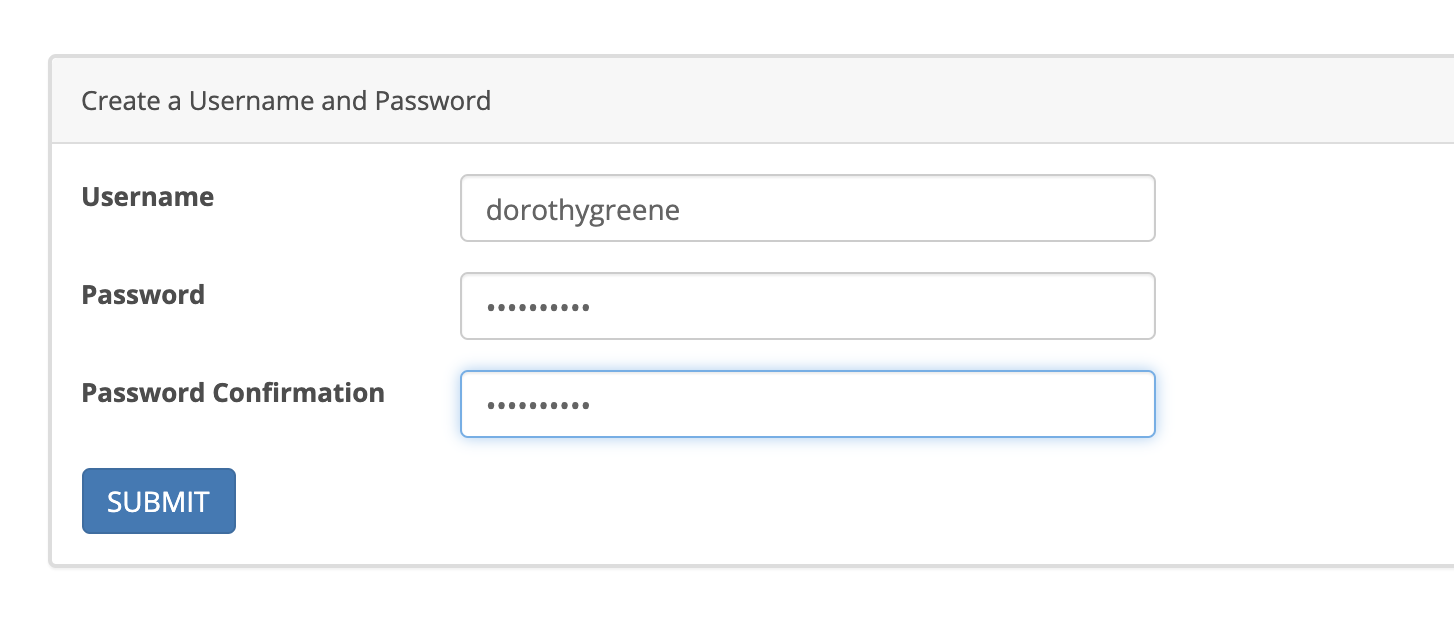
The client enters a username and password. To save their information they click the blue Submit button. When they click the submit button they are immediately logged into the portal.
Please note: The first link in the portal invitation email is only good for one click. This is a security feature. It won't work after that. The second link in the email is customized for each practice and must be used by your clients to login after they have a username and password established.
Client Information Page
When clients enter the portal for the first time they are presented with their Client Information page it that is enabled.
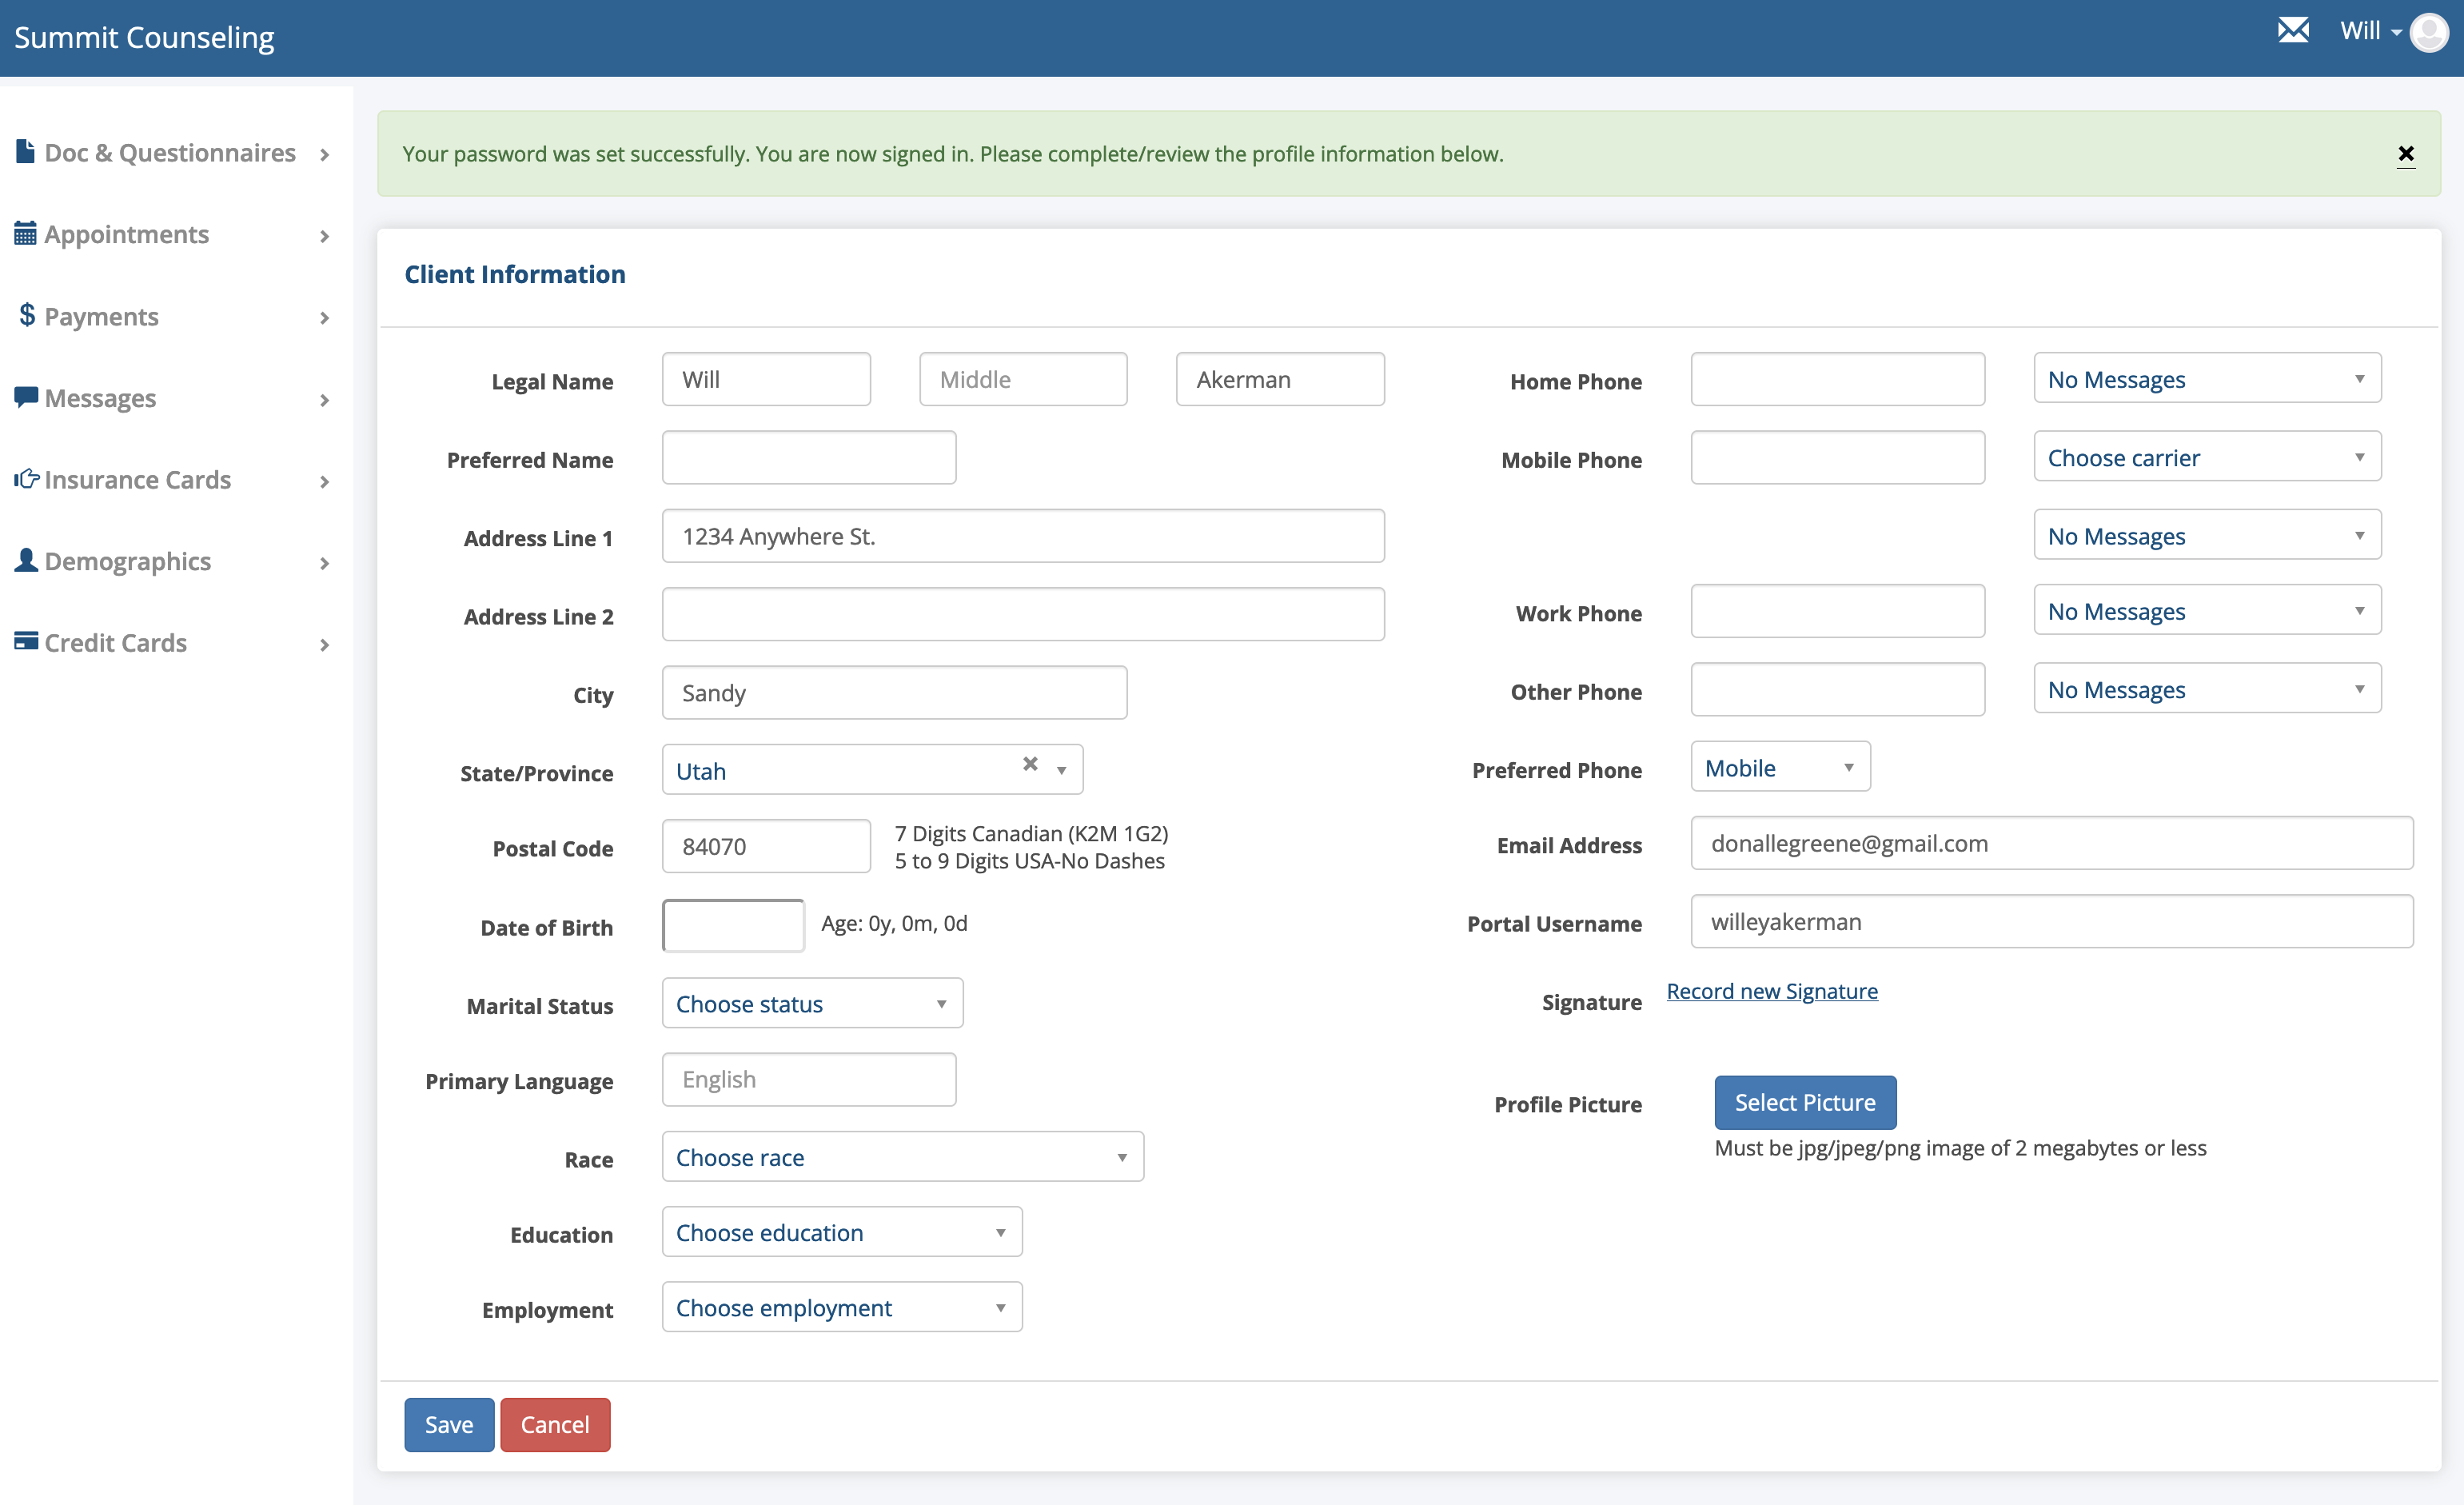
The client can add, change and review the information on this page to make sure it is complete and accurate. They can create a signature that will be use on the documents you send them, but it is not required at this point. The can also upload a photo of themselves if they wish. None of the fields or drop downs on this page are required before the page can be saved.
The information that is added or changed on this page gets saved automatically in the client's chart.
Please Note: The fields and dropdowns that a client sees is a subset of what the clinician can see. For example, the diagnosis drop downs, comments box, portal buttons, other identity and additional contacts is are not shown to the client.
Demographic Page
The next page the client is presented with if it is enabled is their demographic page.
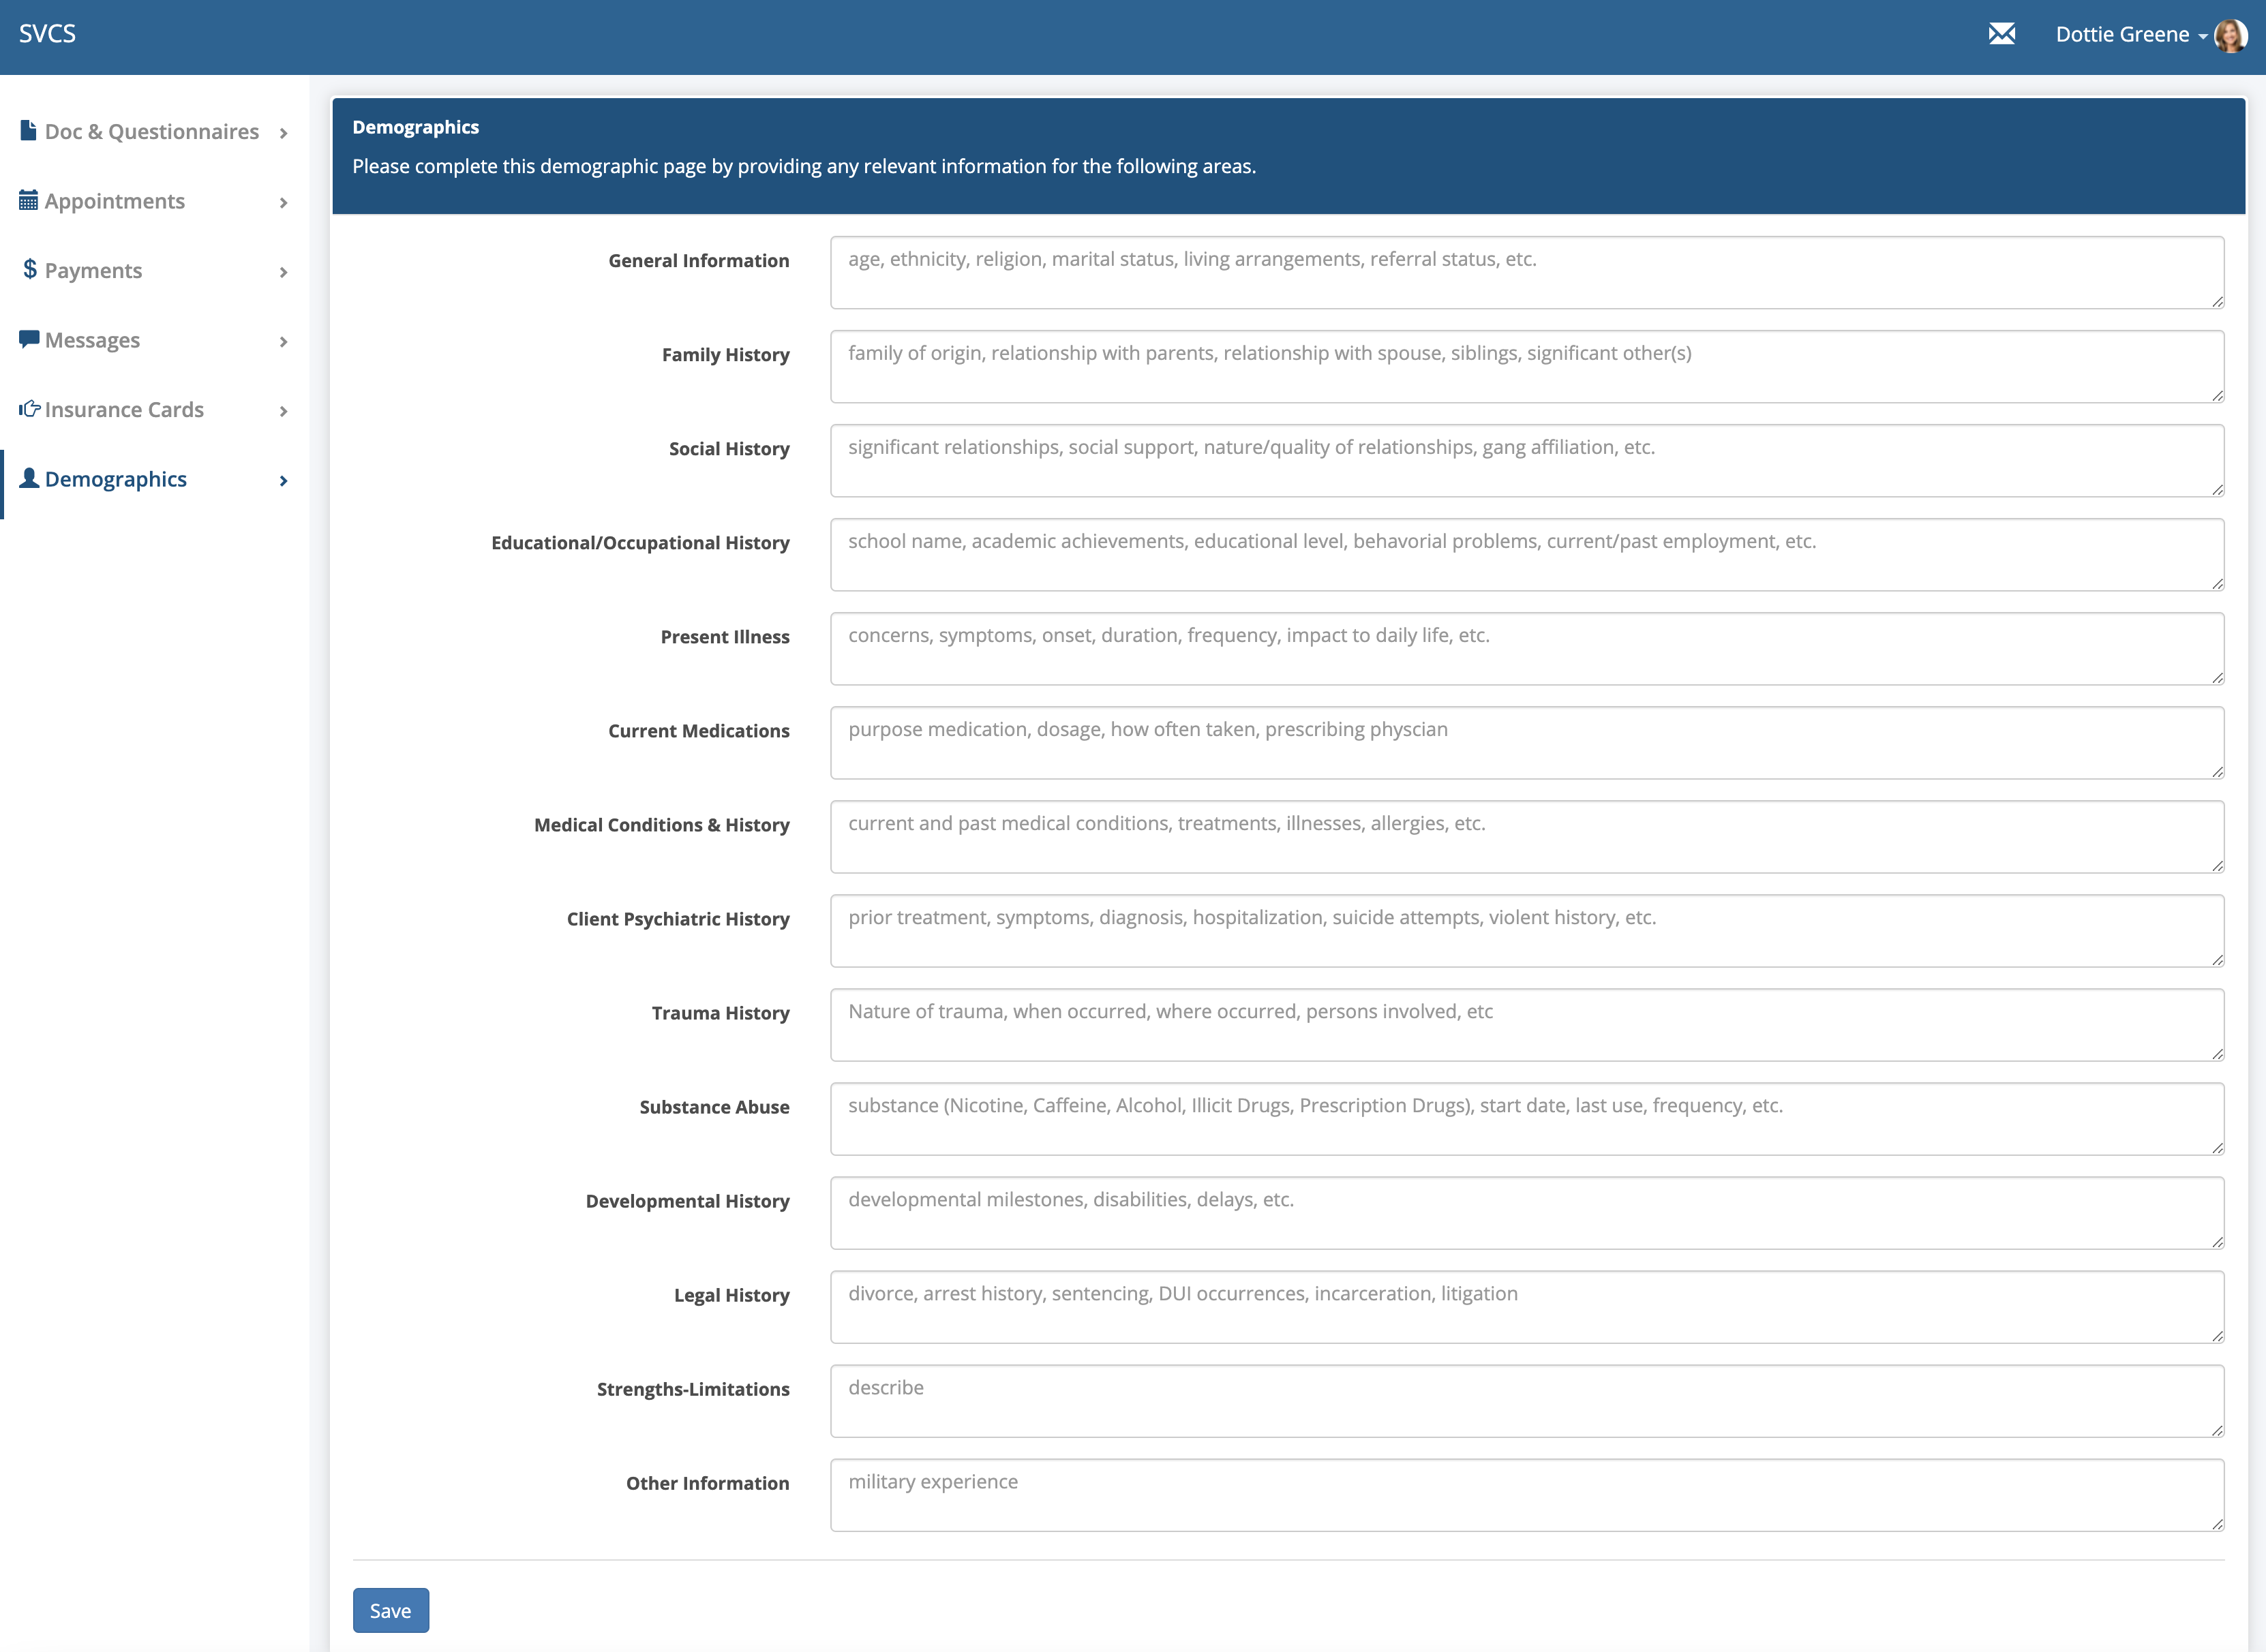
Clients are required to provide this information for every box on the page. If the item isn't applicable the client can type N/A. Each box requires at least 3 characters.
The information is saved automatically to the client's chart on the demographic tab so the clinician can view it. When the client saves their information they will not be able to edit or change the information later. The page is locked. When the client goes to save the page there is a warning telling them they can't make changes later. The clinician can edit and add information to the patient's demographic page from the client's chart. When this is done, the information will be updated and shared with the client to view in the client portal.
When the clinician creates an Intake Note, the information provided by the client and/or clinician automatically populates on the Intake Note in the appropriate fields. The client doesn't not have access to the Intake Note. If the clinician adds additional information to the demographic background boxes on the note, that information does not populated backwards to the client' demographic tab in their chart and it won't be visible to the client if they login to the client portal.
FYI...if the clinician completes the client's demographic page before the client has a chance via the client portal, the client will not be able to contribute any new information via the client portal. The page will already be LOCKED to prevent the data from being overwritten. If the client's demographic page is locked for any other reason, the clinician can UNLOCK the page by clicking on the button shown below:
When the page is UNLOCK, the client can login to the client portal to add informaton, make changes or remove information on their demographics page. Changes made by the client will be reflected in their chart automatically. If an Intake Note has already been done, the changes will NOT display on the note.
Documents & Questionnaires
After the client information and demographics pages are saved, the client can click on the forms under the heading "Please complete the documents below".
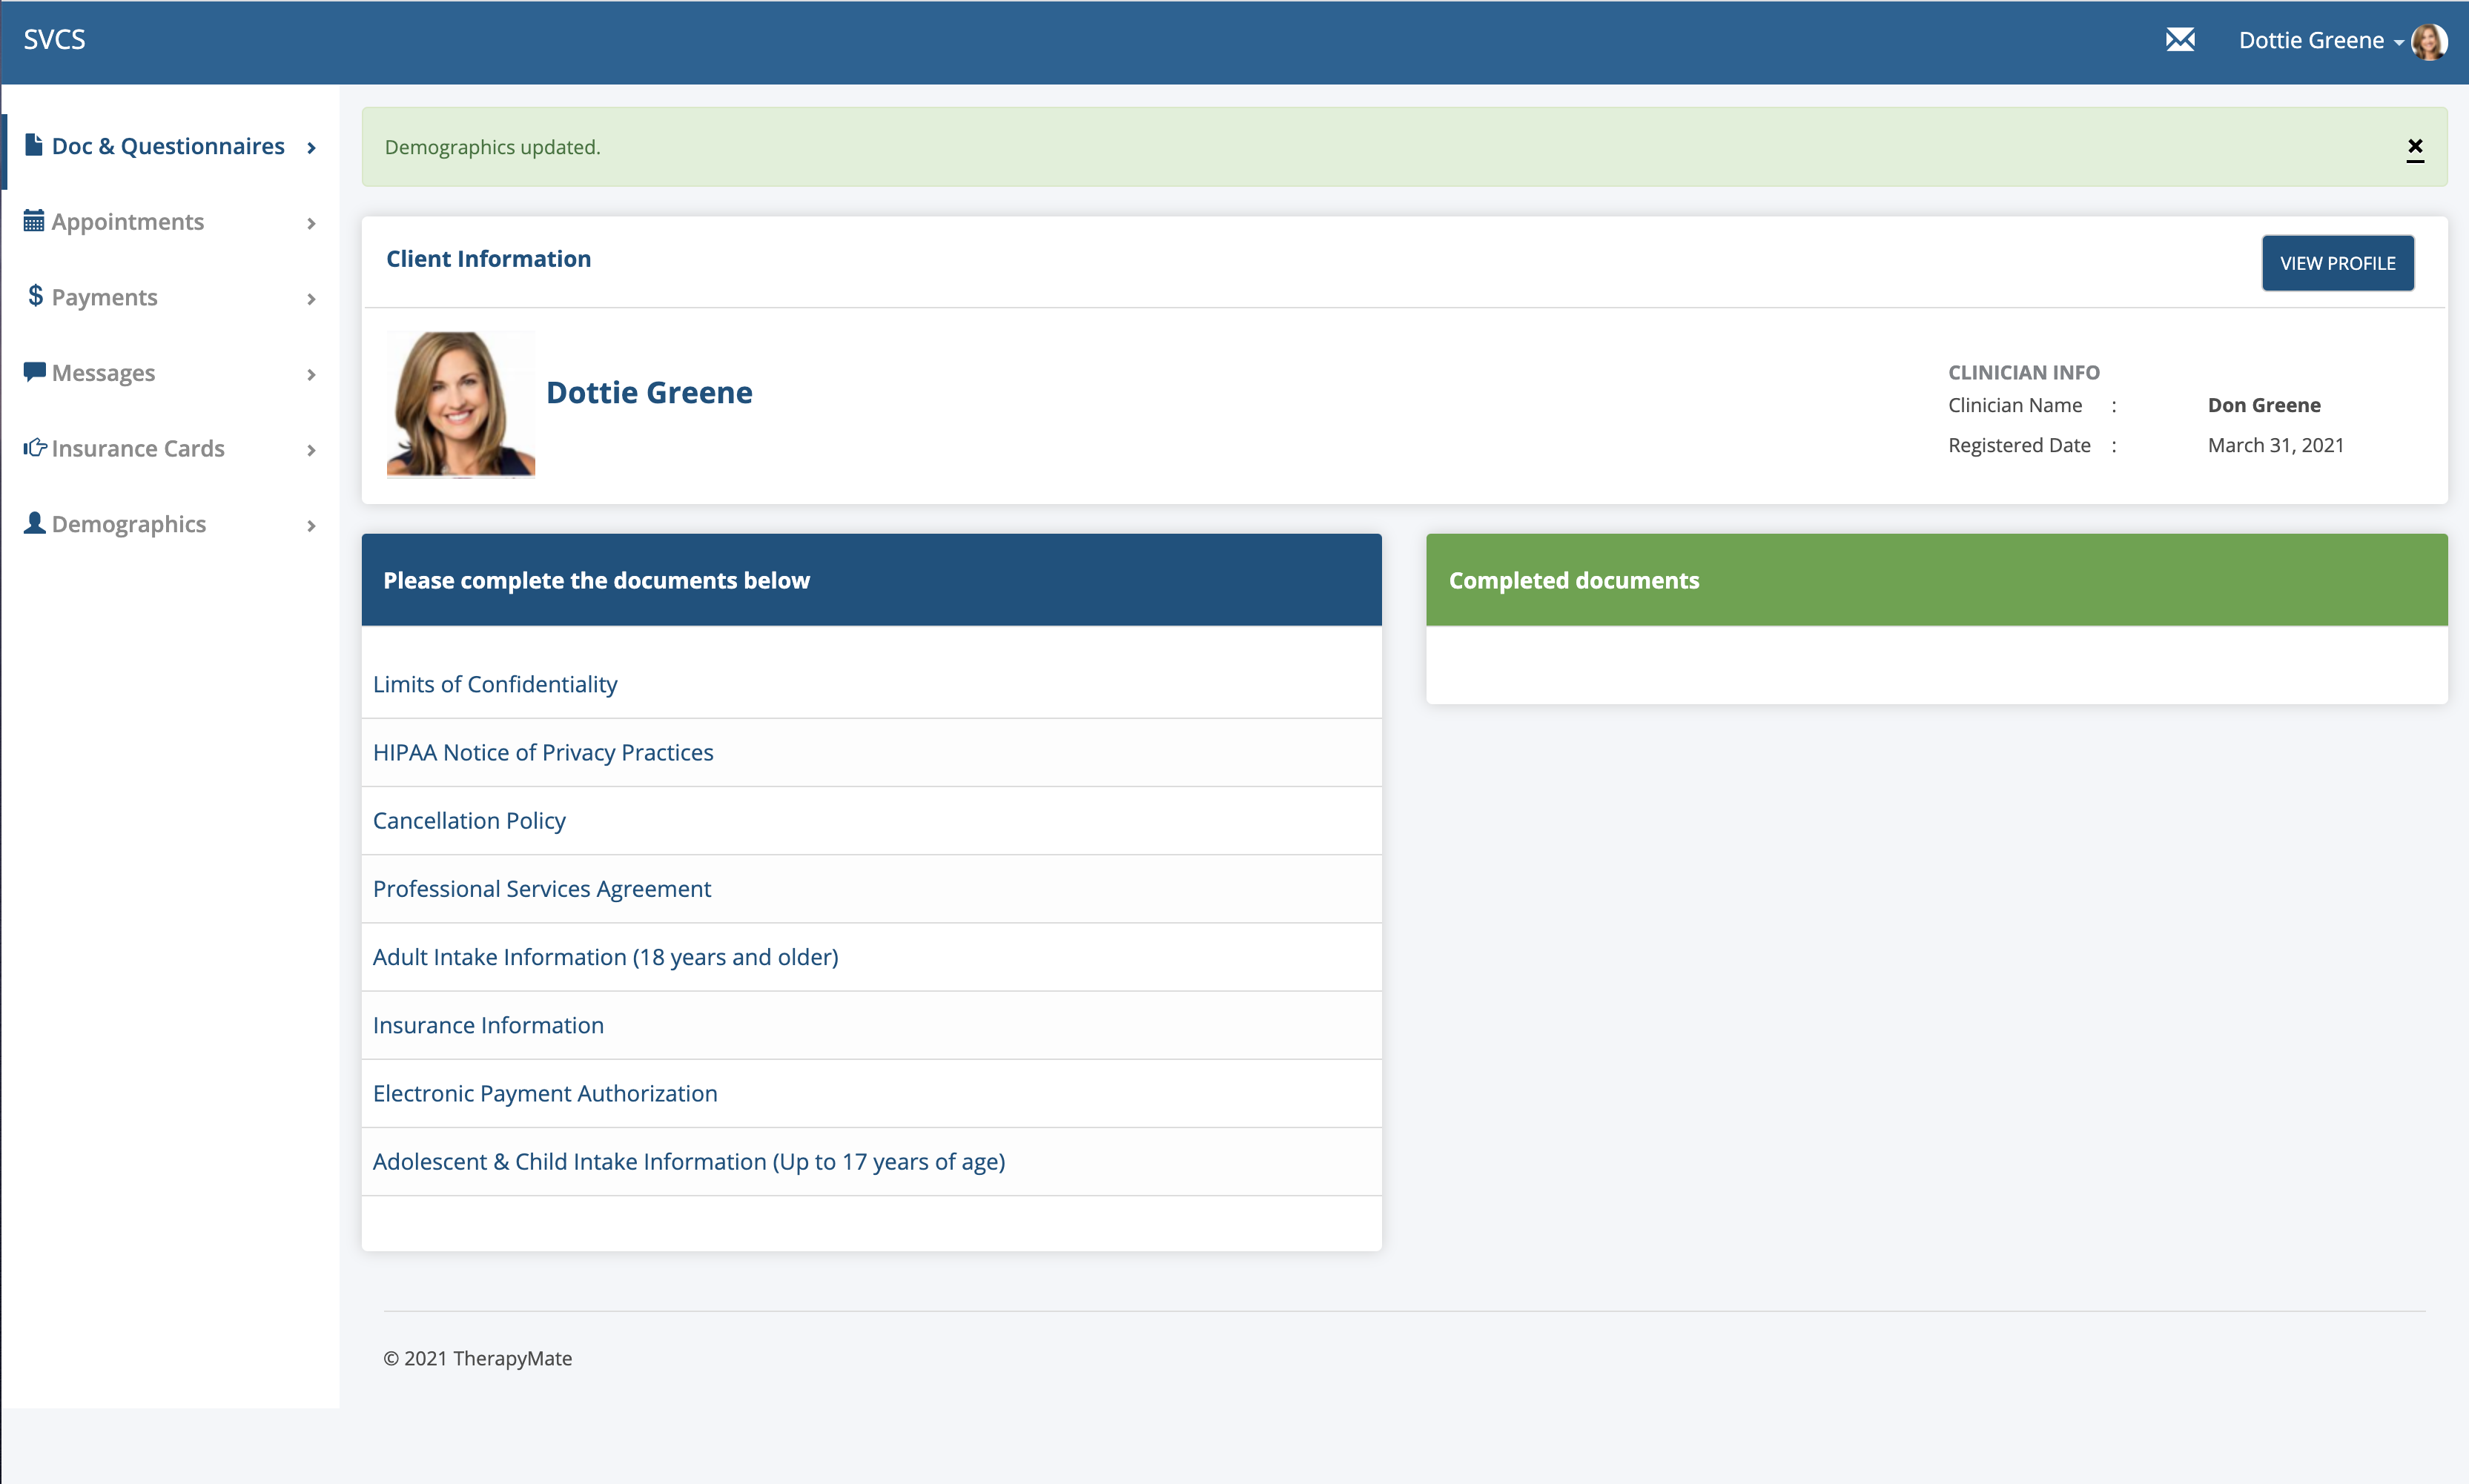
The client clicks on each document, completes them and saves them. When saved, the documents will be displayed under the heading "Completed documents".
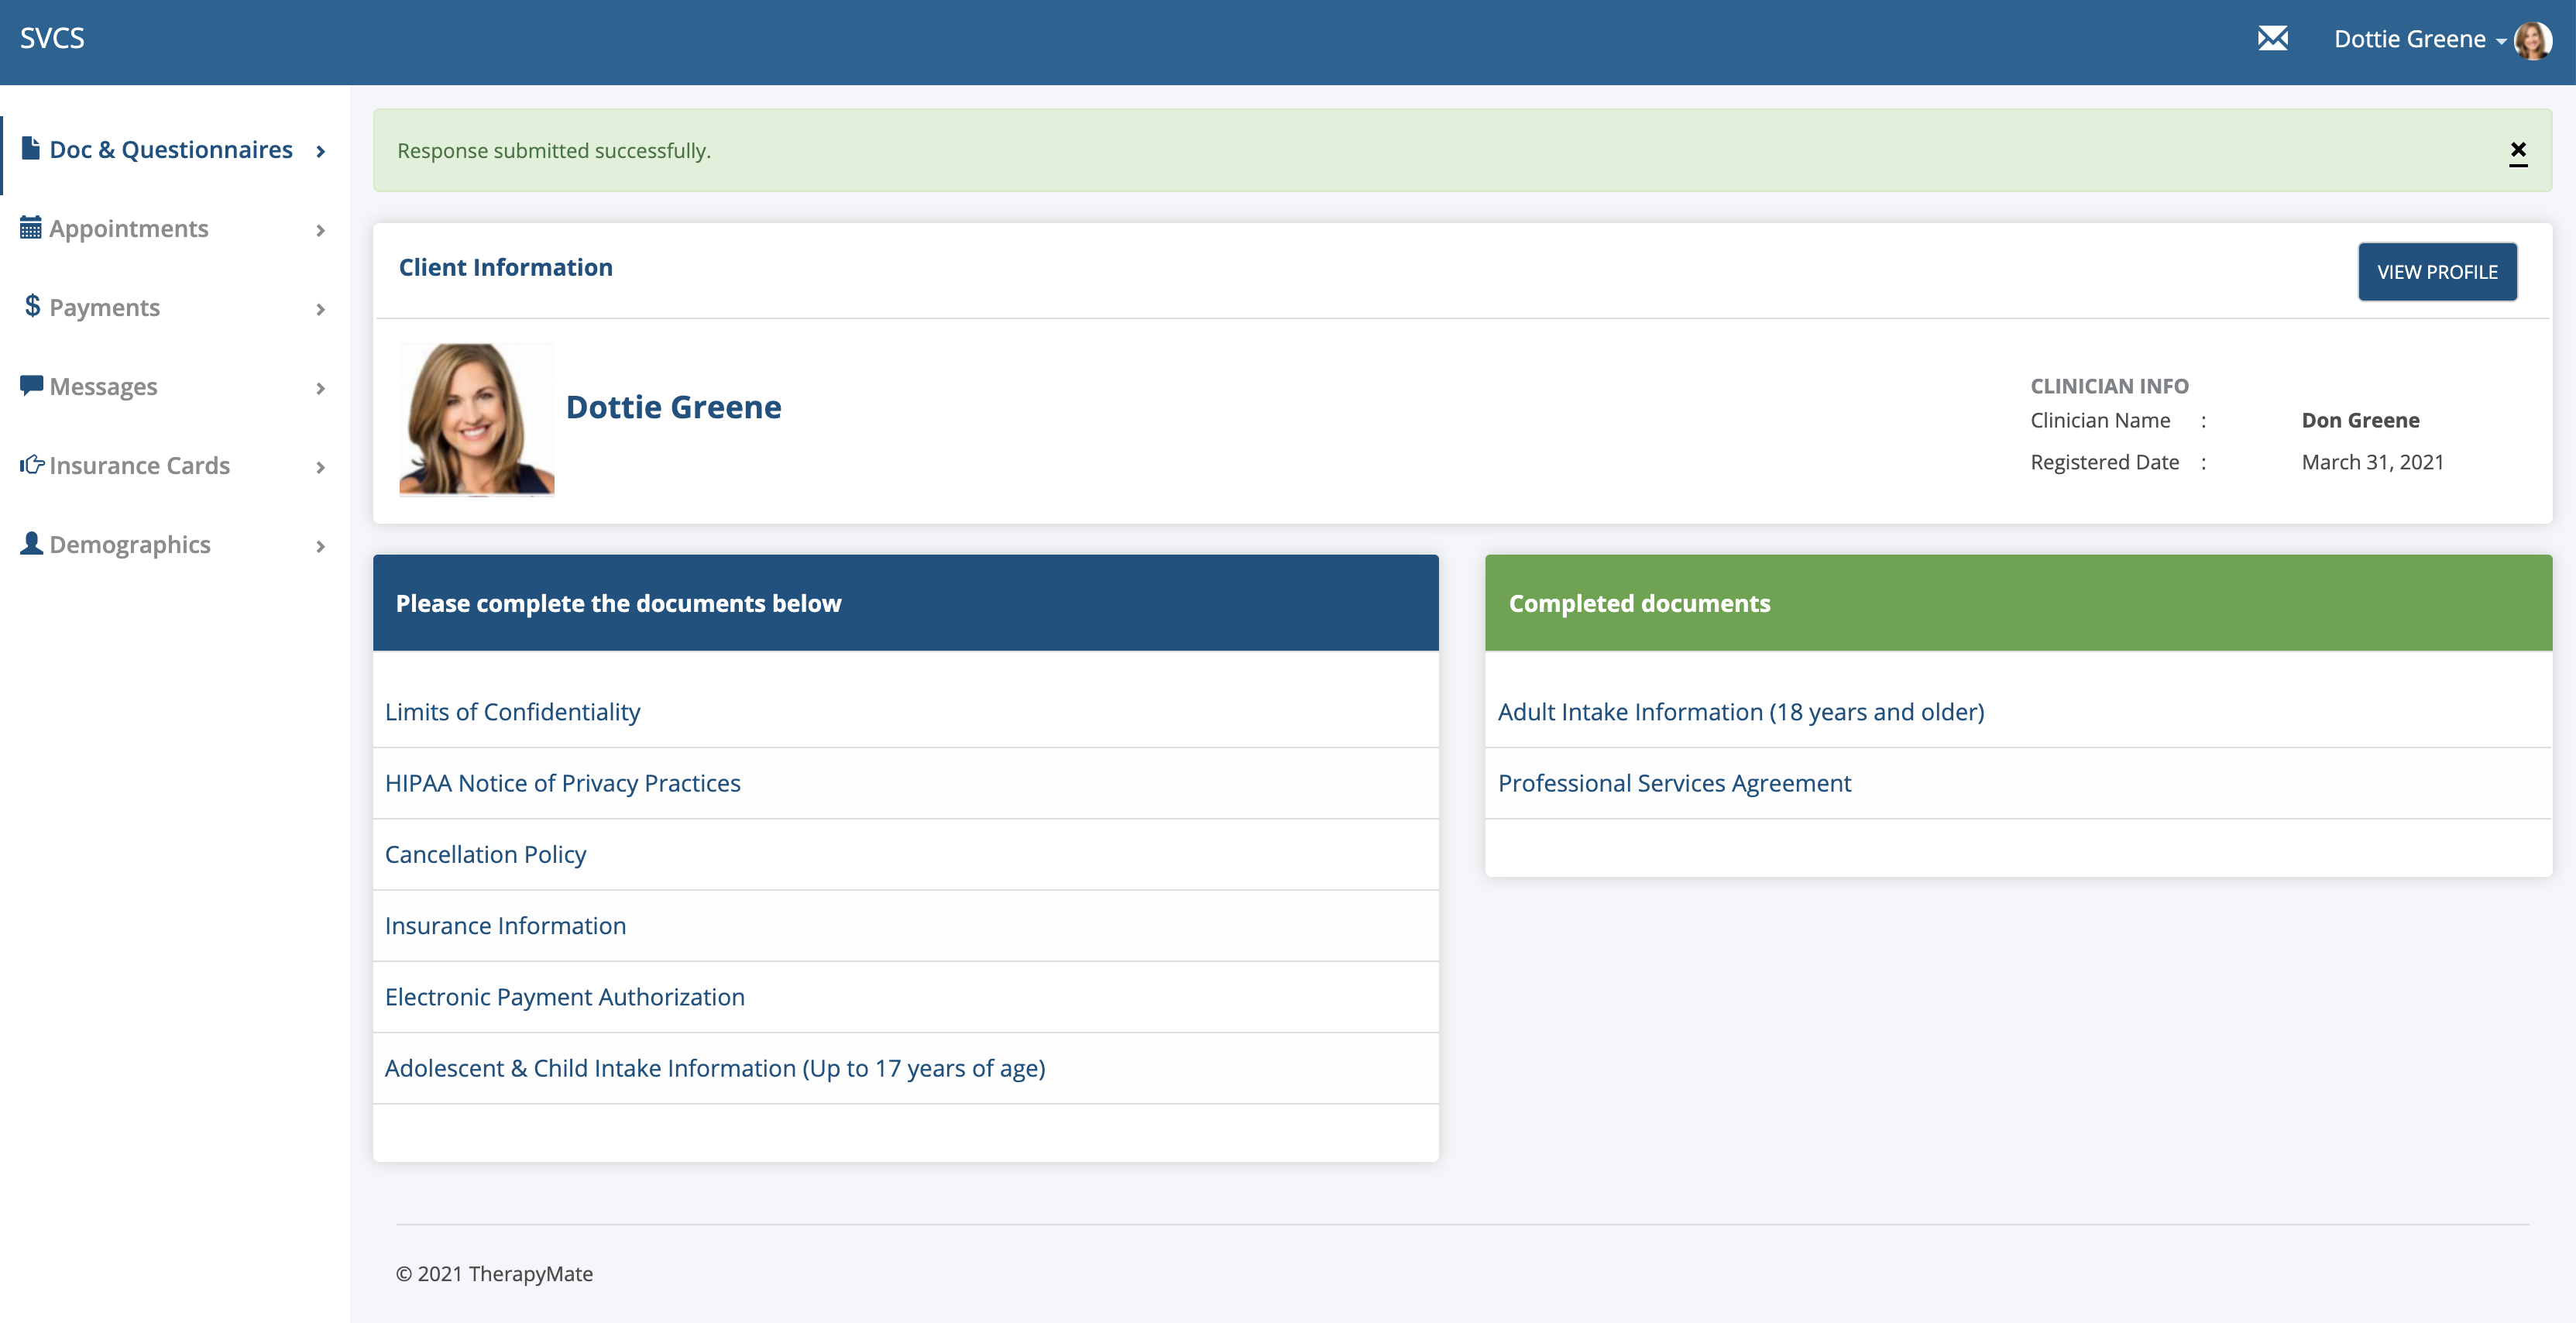
If a client desires to temporarily save a document and come back later to finish it, there is a Save as Draft button at the bottom of the document they are working on. The client will receive a message letting them know that their document has NOT be submitted yet. The client can come back later to complete and submit the document.
Insurance Cards
We increased the file size limit from 1 Megabyte to 20 Megabytes so client can upload pictures of their cards that are taken with their smartphones. If a client can't upload their insurance card, ask them to check the file size to make sure it is 20 megabytes or less.
Credit Cards
On the left hand menu in the client portal there is an option for the client to add their own credit card information. You could instruct them to do this in the Welcome Message they receive inviting them to the client portal.
Recommended Changes to your Portal Invitations
Consider updating your message to include instructions on what the client should do when they enter the portal.
Here is your existing invitation email message:

Here is an example of an invitation email that gives more specific instructions:
