This training document describes how to invite new clients to your client portal. This document assumes that the Practice has already configured the Client Portal Setting for the Practice. You must configure the settings before sending clients an invitation.
Adding a New Client & Sending the Invitation
Click on +Client on the Dashboard. Fill in the clients information page. At a minimum, you need their first name, last name and email address. Click the ADD button.
When you click the Add button the Client Portal Invitation window will appear. It will contain a list of your documents and questionnaires that are used in your Practice.
When you click the Add button the Client Portal Invitation window will appear. It will contain a list of your documents and questionnaires that are used in your Practice.
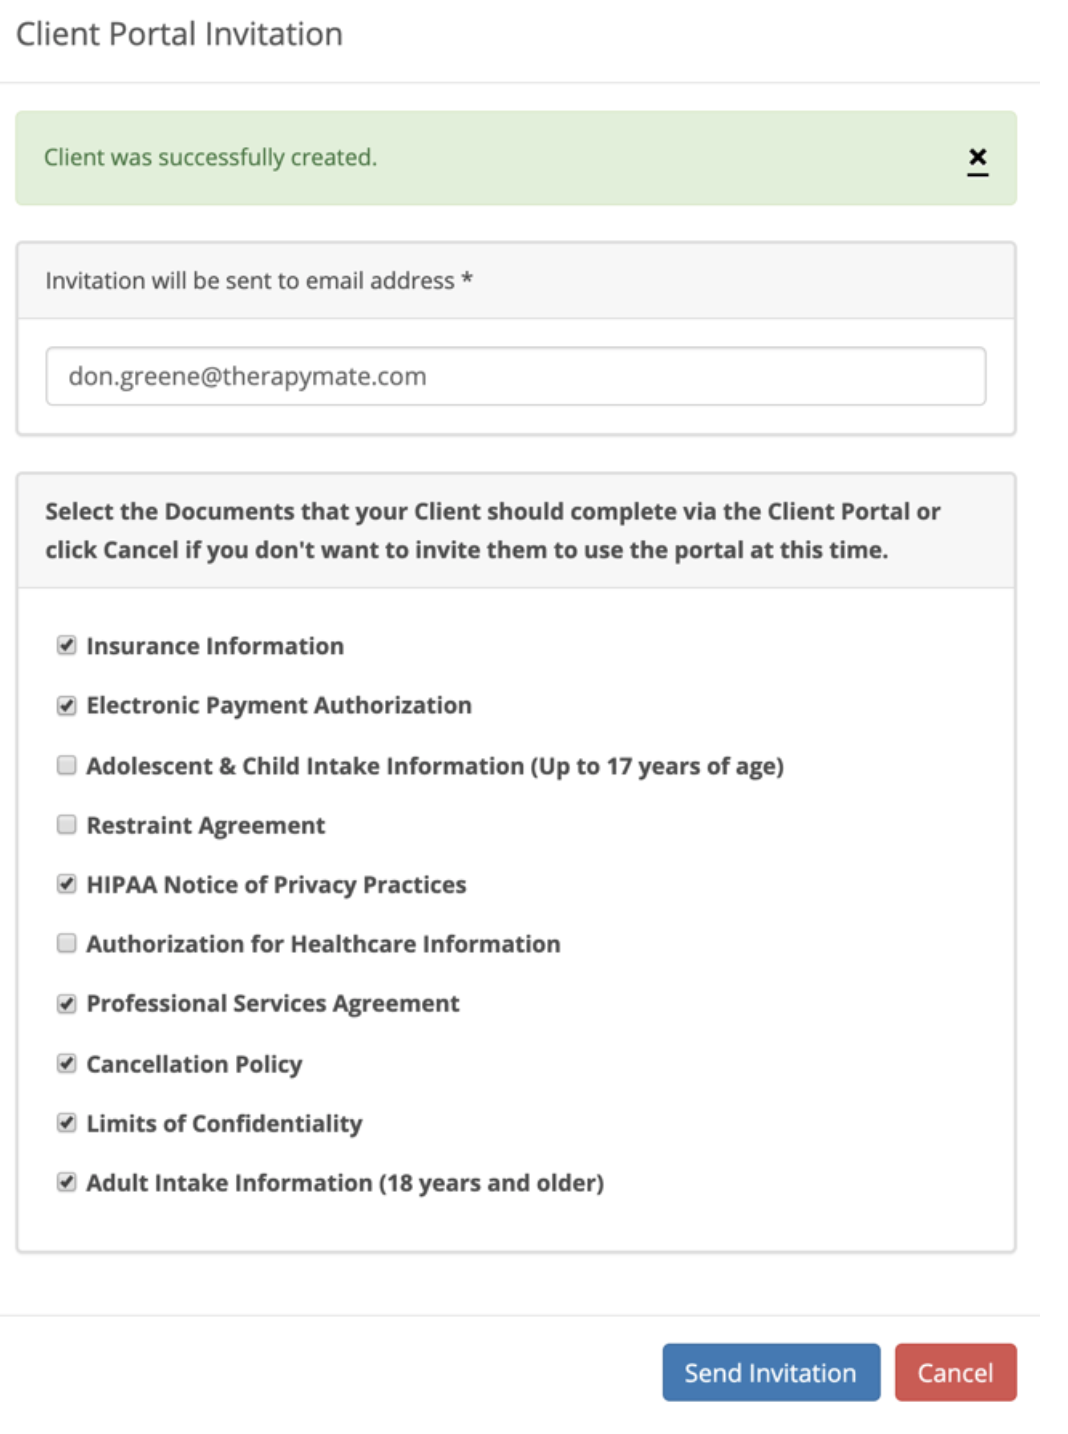
Check the boxes next to the documents you want to send to the client so he/she can fill them out. Click the “Send Invitation” button when done. You are not required to send a client an invitation. Click the Cancel button to bypass this feature.
When the invitation is sent, the client will receive a welcome email inviting them to the portal. If the client doesn't see it in their inbox have them check their spam folder. Here is an example of the invitation email.
When the invitation is sent, the client will receive a welcome email inviting them to the portal. If the client doesn't see it in their inbox have them check their spam folder. Here is an example of the invitation email.
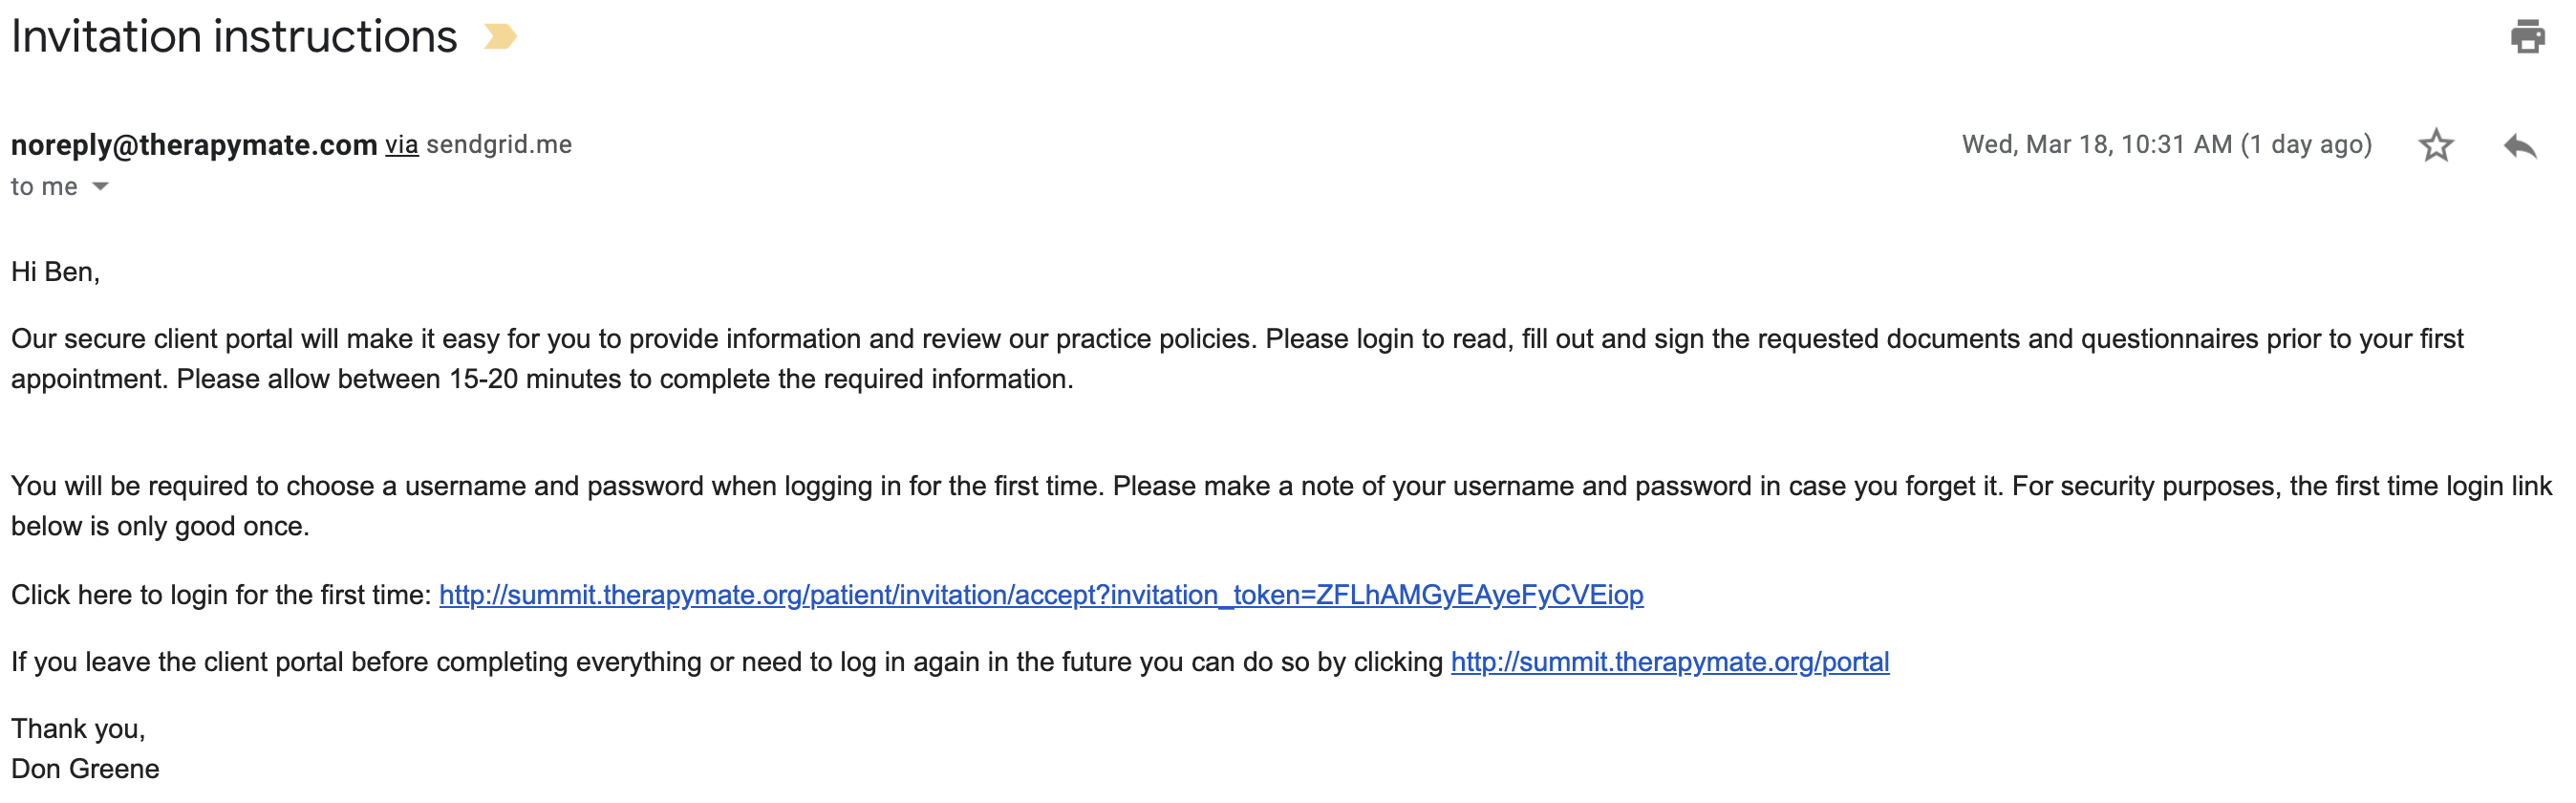
When the client opens the welcome email, it will have a first time web address link that will take them to the Client Portal so they can create a user name and password. The first time link is only good for 4 weeks and can only be clicked on once. It will not work if the client tries to use it again later.
The second link is the web address to your Practice's portal site. Clients can use this address to login anytime they desire after the initial first time visit.
Client Portal usernames can't contain the following characters: letter, numbers or any of these characters _ @ $ # * ! & % ( ) . ^ -
No spaces are allowed in the username.
When the client creates their username and password they will immediately be logged into the portal. The client will be asked to review their client information/profile page. Next, the client will be asked to complete their demographics page. The information the client enters on these two pages will automatically appear on the clinician's pages when the client saves the information.
The contents of this welcome email is somewhat customizable. Customizing the welcome email is covered in the Client Portal Settings training article.
Client Portal usernames can't contain the following characters: letter, numbers or any of these characters _ @ $ # * ! & % ( ) . ^ -
No spaces are allowed in the username.
When the client creates their username and password they will immediately be logged into the portal. The client will be asked to review their client information/profile page. Next, the client will be asked to complete their demographics page. The information the client enters on these two pages will automatically appear on the clinician's pages when the client saves the information.
The contents of this welcome email is somewhat customizable. Customizing the welcome email is covered in the Client Portal Settings training article.