With the Client Portal you and your clinician can connect in a convenient, safe and secure environment. We recommend that you access the portal on your desktop, laptop or tablet PC. Accessing the portal with your smartphone will not work as well.
Your clinician will send an invitation and welcome email to you. Click on the link within the email to create a unique username and password. The link expires after it is used.
Usernames can't contain the following characters: letter, numbers or any of these characters _ @ $ # * ! & % ( ) . ^ -
No spaces are allowed in the username.
Usernames can't contain the following characters: letter, numbers or any of these characters _ @ $ # * ! & % ( ) . ^ -
No spaces are allowed in the username.
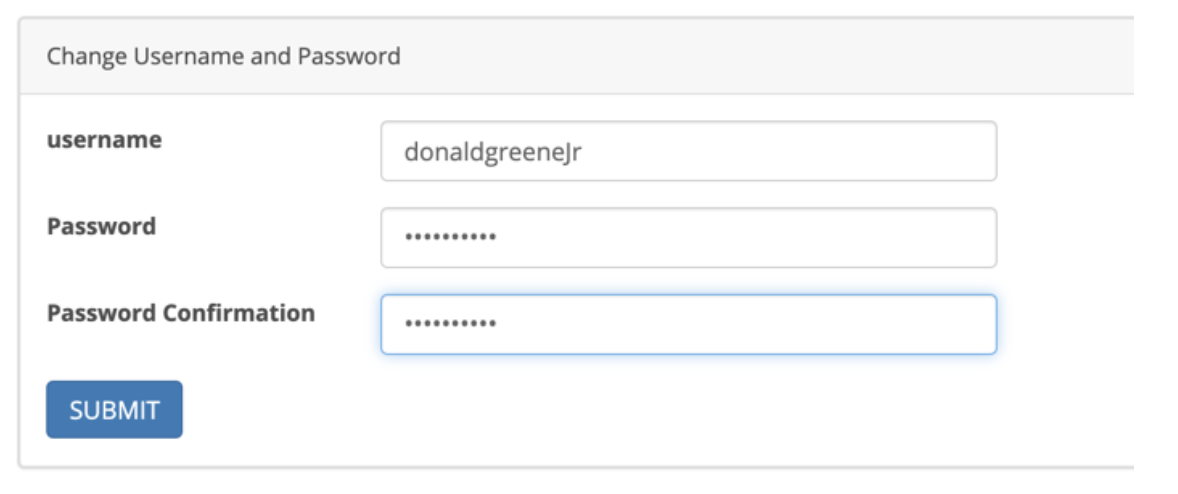
After you create a username and password, click “Submit” to enter the portal. In the portal you will be able to do the following:
- View and update your profile information (if enabled by your Clinician or Clinic)
- Add your demographics information (if enabled by your Clinician or Clinic)
- Complete documents sent to you by your clinician and sign them.
- View, create and change future appointments (if enabled by your Clinician or Clinic)
- Make payments (if enabled by your Clinician or Clinic)
- Upload a copy of your insurance card(s) if applicable
- Send and Receive secure messages
View Profile
If the View Profile feature is enabled, you can check and update your information as necessary by clicking on the blue View Profile button. You can also add an e-signature and profile picture if you want. Be sure to click the “Save” button when done.
Demographics
Please complete each section of the Demographics page if your clinician has enabled that feature. Be sure to click the “Save” button when done.
Documents & Questionnaire
You may be asked to complete documents during the course of your visits. These will appear under the heading Please complete the documents below. Click on the name of each document, read them carefully, fill them out completely and sign and/or save them.
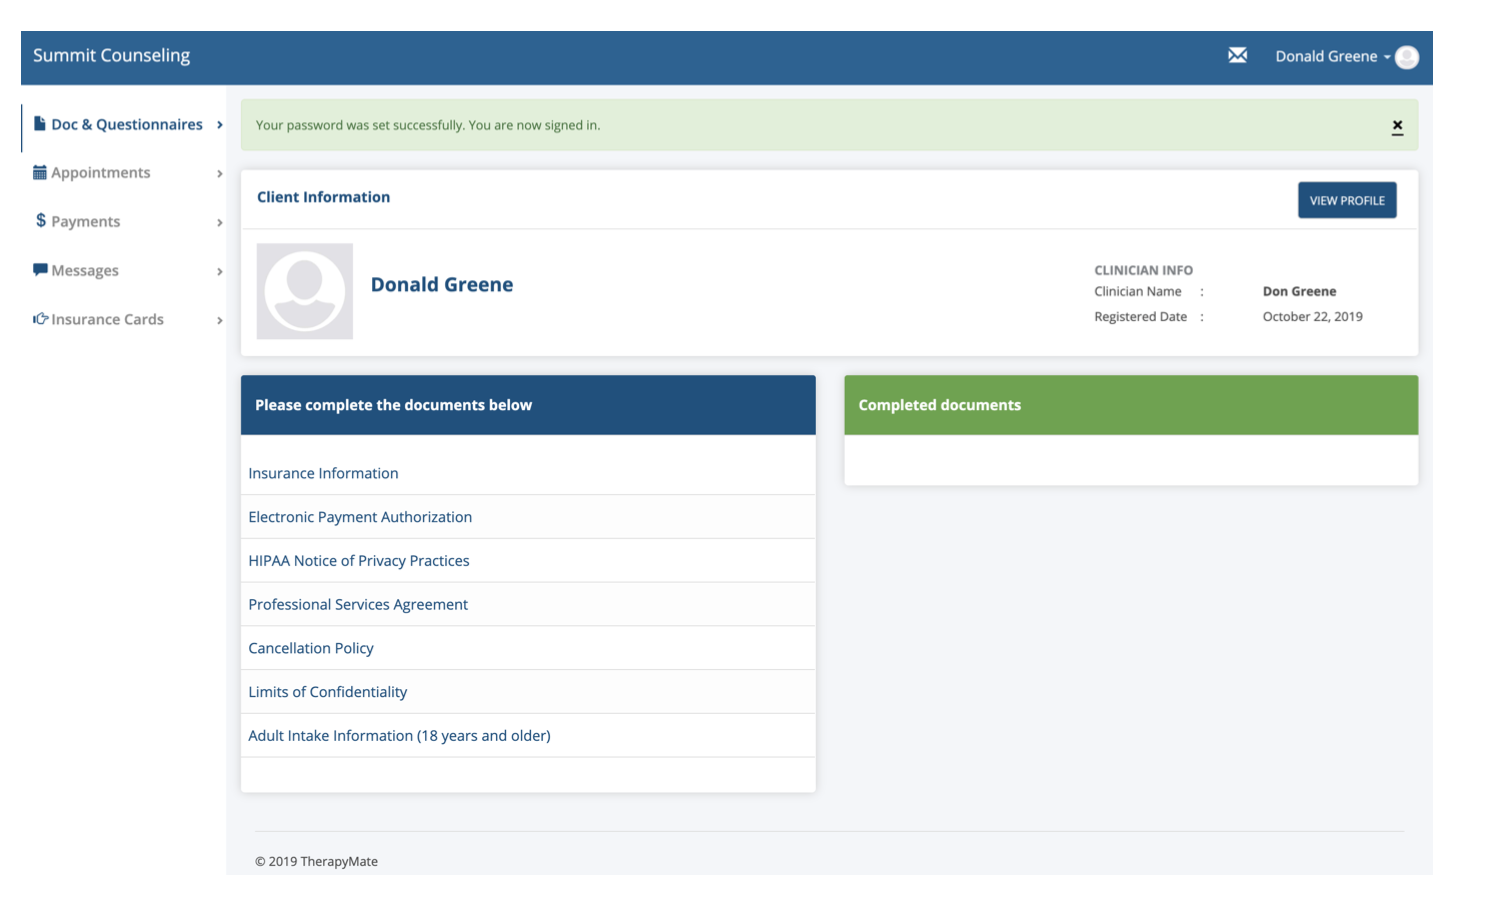
If you need more time to complete a document, you can click the Save as Draft button to save what you've done so far and come back later to finish it. See below:
When you save a document as draft, it will not be submitted to your counselor. You must come back later to finish and Submit it. Once submitted, you will not be able to edit the document any further.
Some documents may require an e-signature. The first time you fill out a document that requires your signature, a signature window will appear where you can type your name in the highlighted box.
As they type it will show a cursive styled signature.
Click the Submit button to save your document. The next time you complete a document your signature will be automatically be used for additional documents.
When all of the documents have been completed, your clinician will be notified.
Completed documents will appear in the box to the right called Completed Documents. You will be able to view these documents at any time.
Appointments
You can view your next and any future appointments if this feature is enabled by your clinician. You can create a new appointment or change an existing one. Certain restrictions may apply to how, when or where and appointment may be scheduled. If the clinician doesn't allow you to schedule or change your appointments you will be able to view appointments that your clinician has created themselves.
Payments
Payments
You can view your payment history. You can also make a payment using a credit, debit or health savings account credit card if this feature is enabled by your clinician.
To view your payment or make a payment click on the $ Payment menu option on the left (highlighted in yellow below).
If any payments have been entered by you or your clinician you will see them listed here.
To view your payment or make a payment click on the $ Payment menu option on the left (highlighted in yellow below).
If any payments have been entered by you or your clinician you will see them listed here.

To make a payment, click on the +$ Payment button as shown above (red arrow). A payment window will appear on your screen similar to the one below:
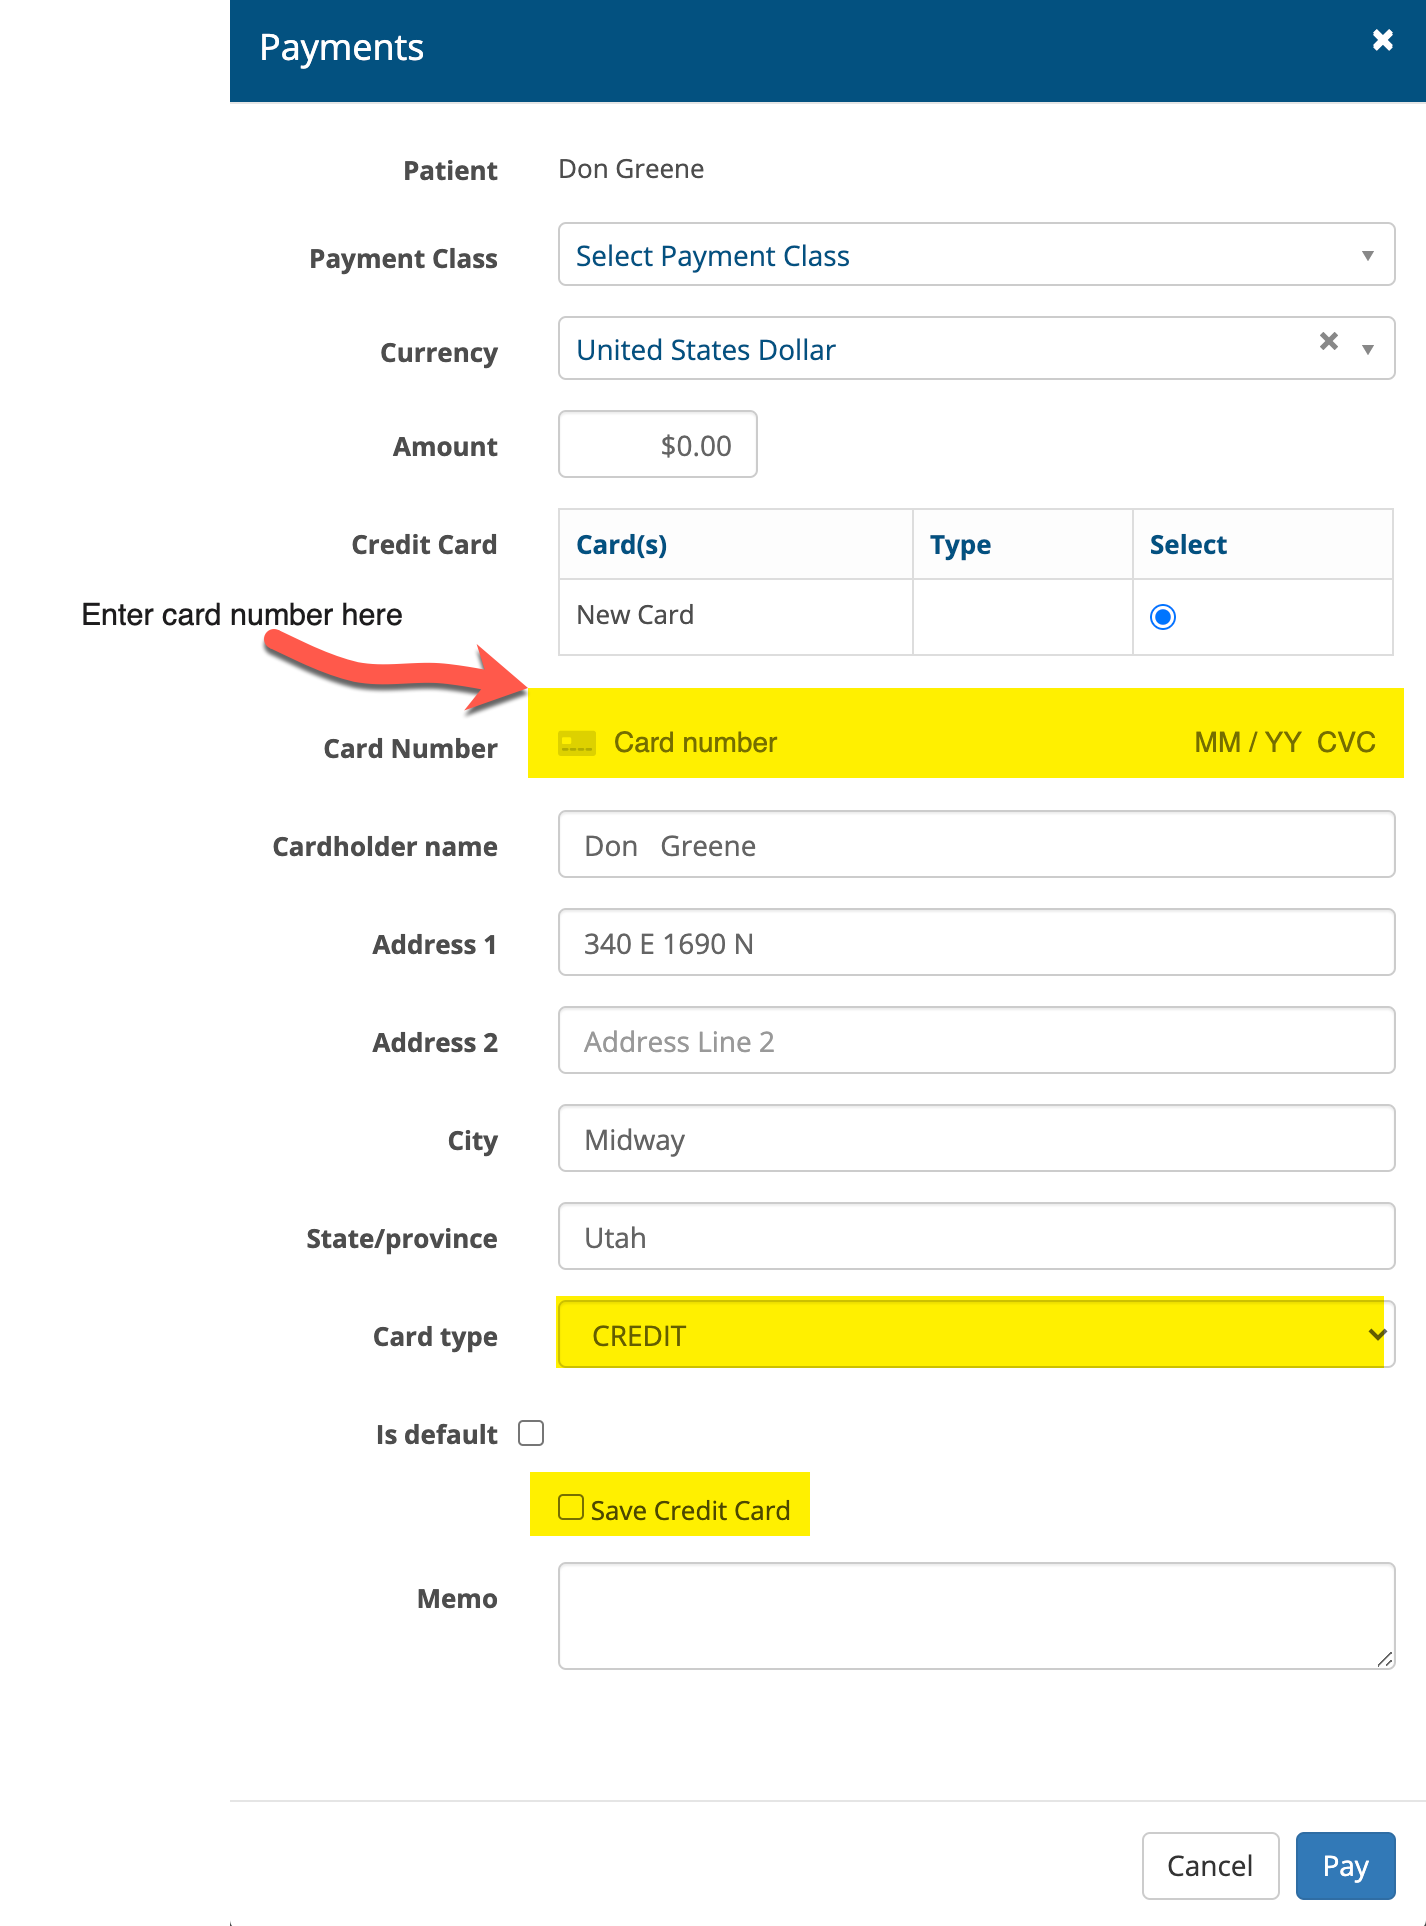
Select the appropriate payment class from the drop down and enter the amount you wish to pay.
If you don't have a credit card on file yet, enter it on the Card Number line including the card expiration and CVC code on the back of the card. If you want your card information saved, check the Save Credit Card check box.
If you already have a card on file you will see an encrypted version of your credit card number on the Card Number line. You can use the same card that is on file or add another one. All of your stored credit card information is securely held and complies with all government and banking regulations.
When you have the payment window completed, click the Pay button to finish the transaction.
If you don't have a credit card on file yet, enter it on the Card Number line including the card expiration and CVC code on the back of the card. If you want your card information saved, check the Save Credit Card check box.
If you already have a card on file you will see an encrypted version of your credit card number on the Card Number line. You can use the same card that is on file or add another one. All of your stored credit card information is securely held and complies with all government and banking regulations.
When you have the payment window completed, click the Pay button to finish the transaction.
Messages
The Messages feature allows the both of you to send messages to each other in a secure manner as needed. You can also attach documents to a message if necessary.
Insurance Cards
Insurance Cards
If you are planning to use insurance to help pay for the services you receive, be sure to take a picture (both front and back) of your insurance card(s) with your smartphone or scanner them on your printer and save them as a file to your computer. Then upload them into the portal by clicking Insurance Cards on the left menu bar. The maximum file size is 20 Megabytes. Supported file types are: docx, doc, odt, png, jpg, jpeg, gif, and pdf.
The information on the card(s) is very helpful and must be provided to ensure your insurance company(s) are billed properly. If you card file fails to upload, it could be that your file size is too large. Try a smaller sized file.
If the Insurance Card option is not available on the menu bar on the left, it means the Practice or your counselor does not accept insurance.
Uploading Your Photo
Uploading Your Photo
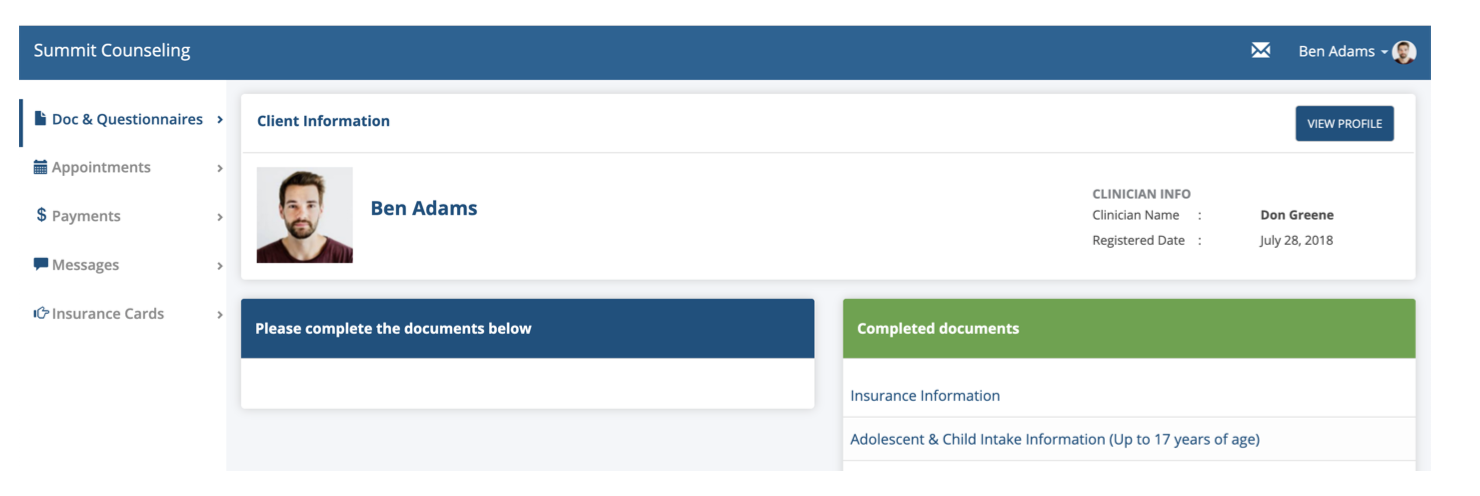
If you want to upload a photo of yourself, you can do that on your profile page. Click on Select Image and browse to your photo on your PC and click on the picture to upload it. When the photo is uploaded it will appear on your portal home page and also in your chart for the clinician to see.
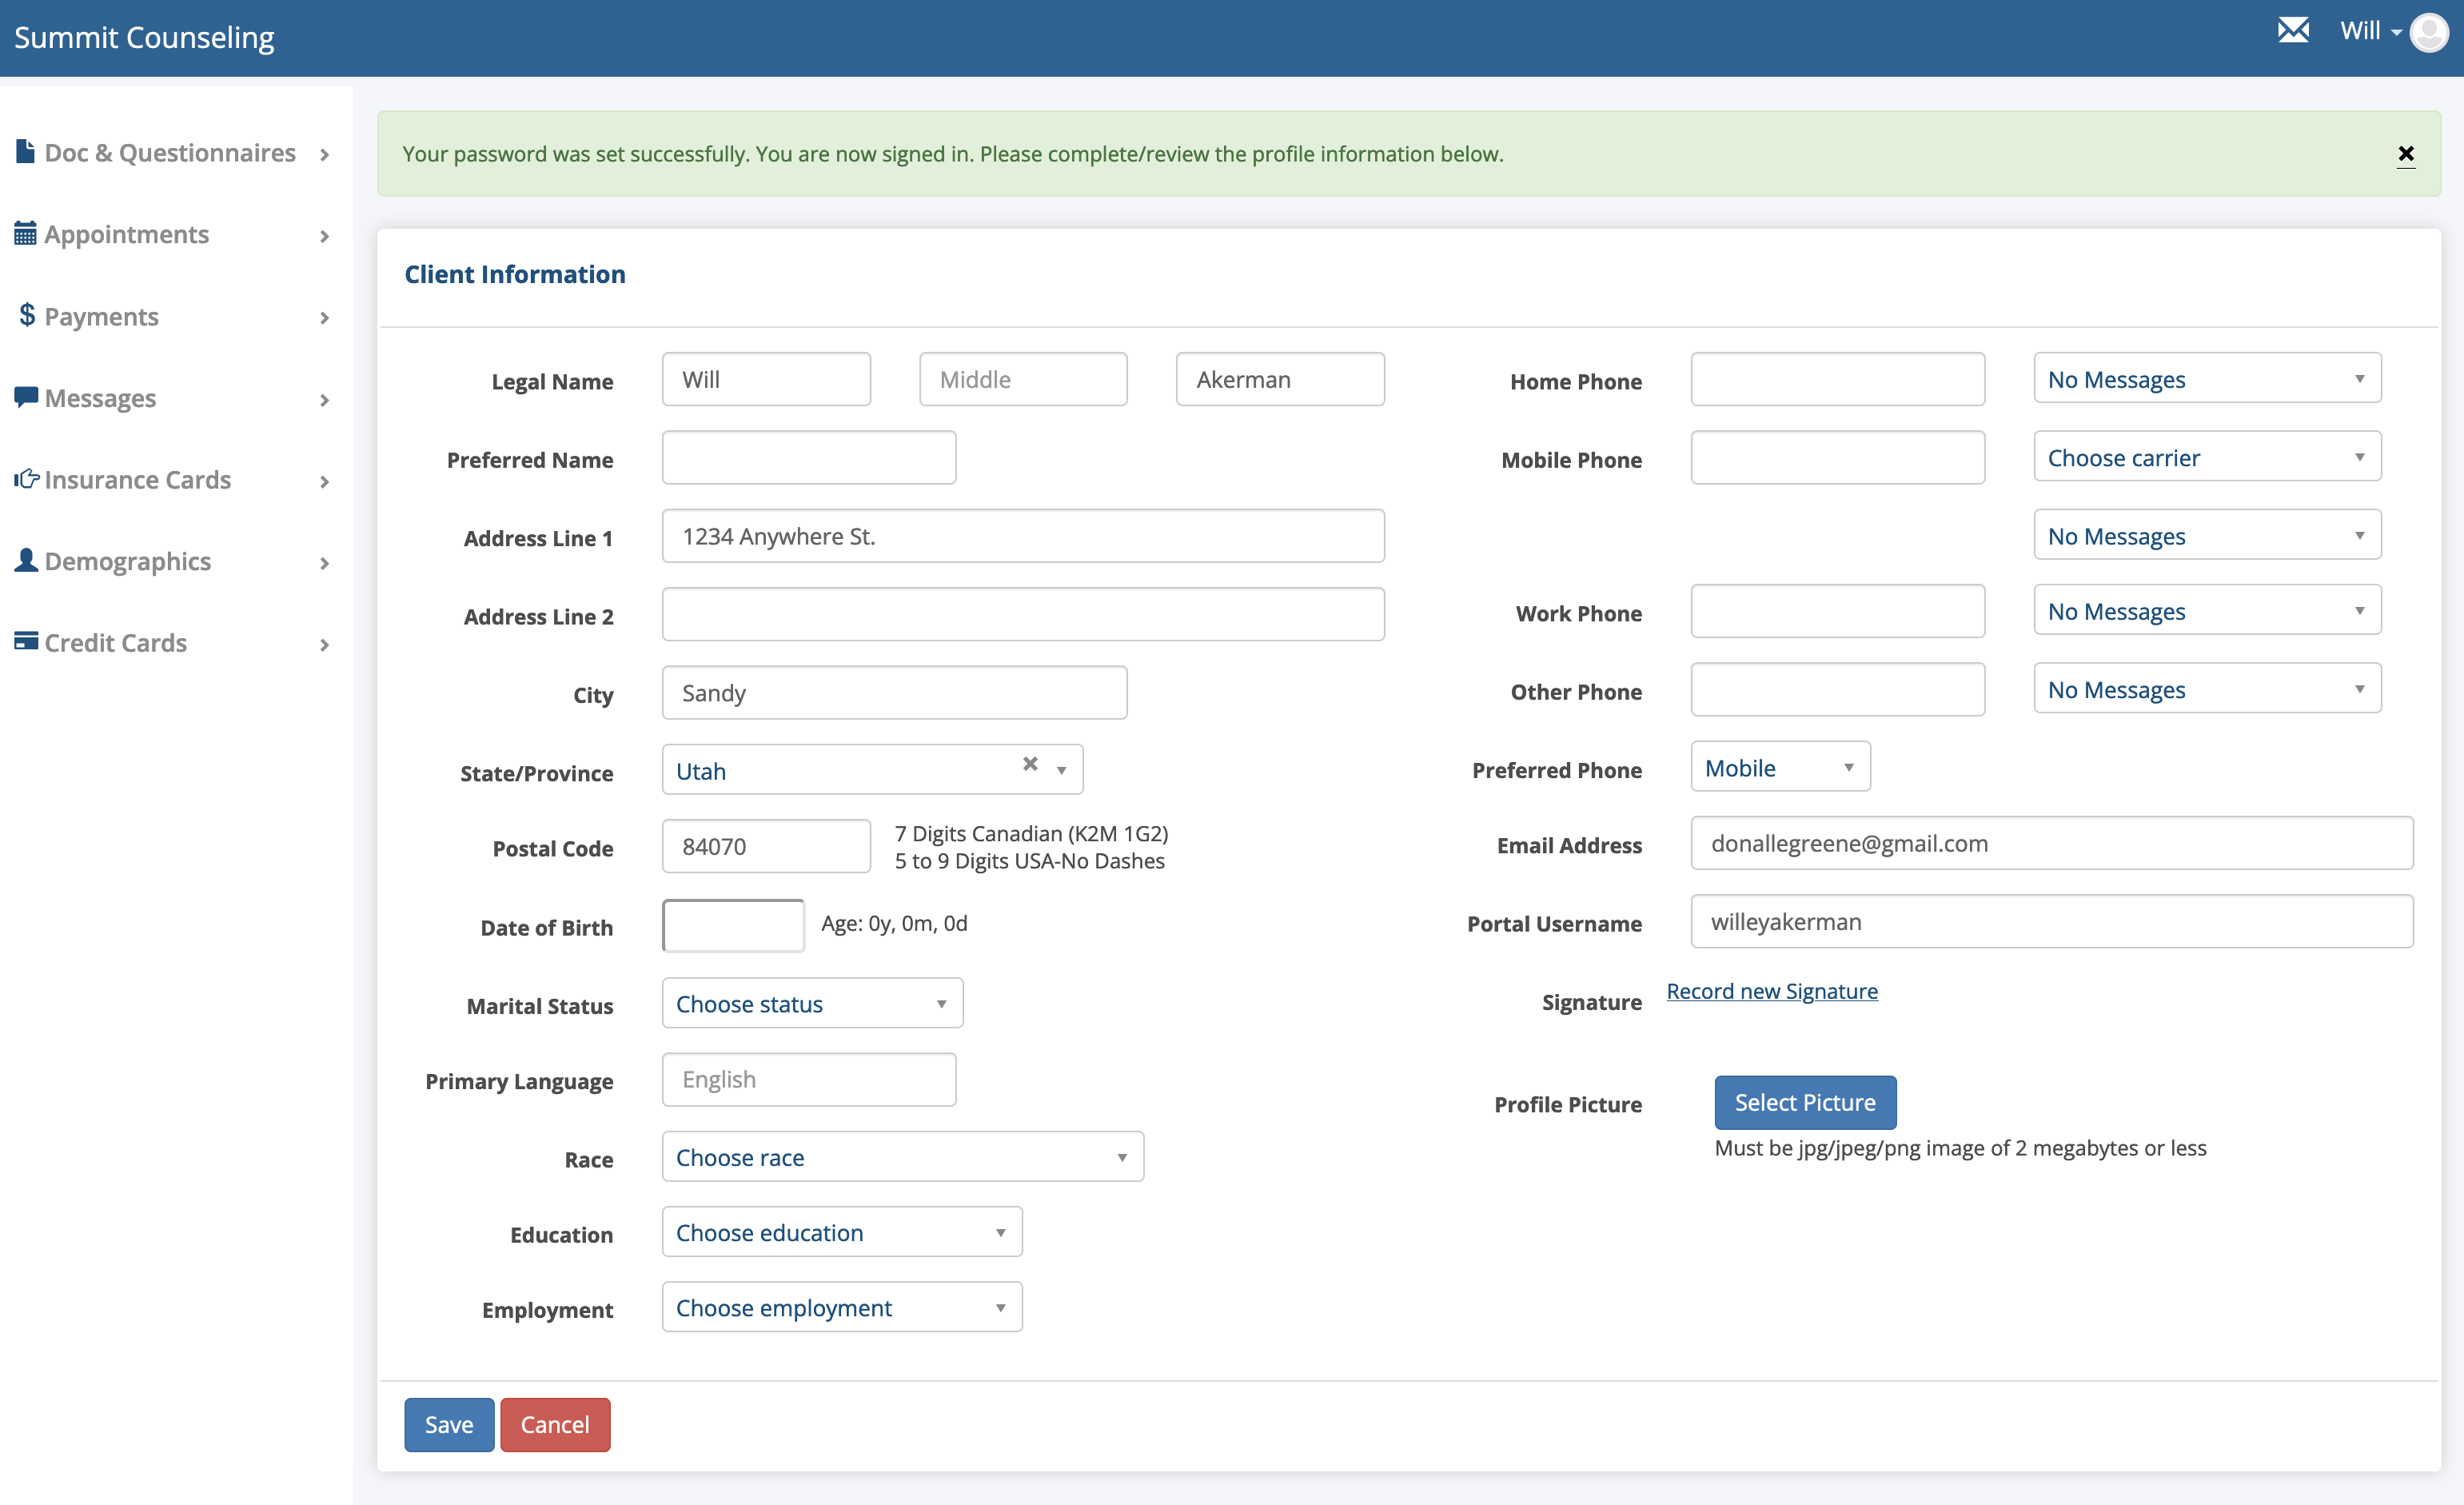
Here is an example of that an uploaded picture will look like in the portal
Deactivated Clients
A client who is deactivated by the Clinician or Practice will no longer have access to the client portal.