In the portal, clients can make online appointments, make payments, fill out documents and questionnaires and send and receive secure messages. You can turn these features on or off if you wish. This training document will help you configure your Practice’s settings for each of these features.
Before you can use the portal, your System Administrator must configure the portal features for the entire Practice. Portal setting can't be different for each clinician. They are Practice wide for all clinicians in the Practice.
Before you can use the portal, your System Administrator must configure the portal features for the entire Practice. Portal setting can't be different for each clinician. They are Practice wide for all clinicians in the Practice.
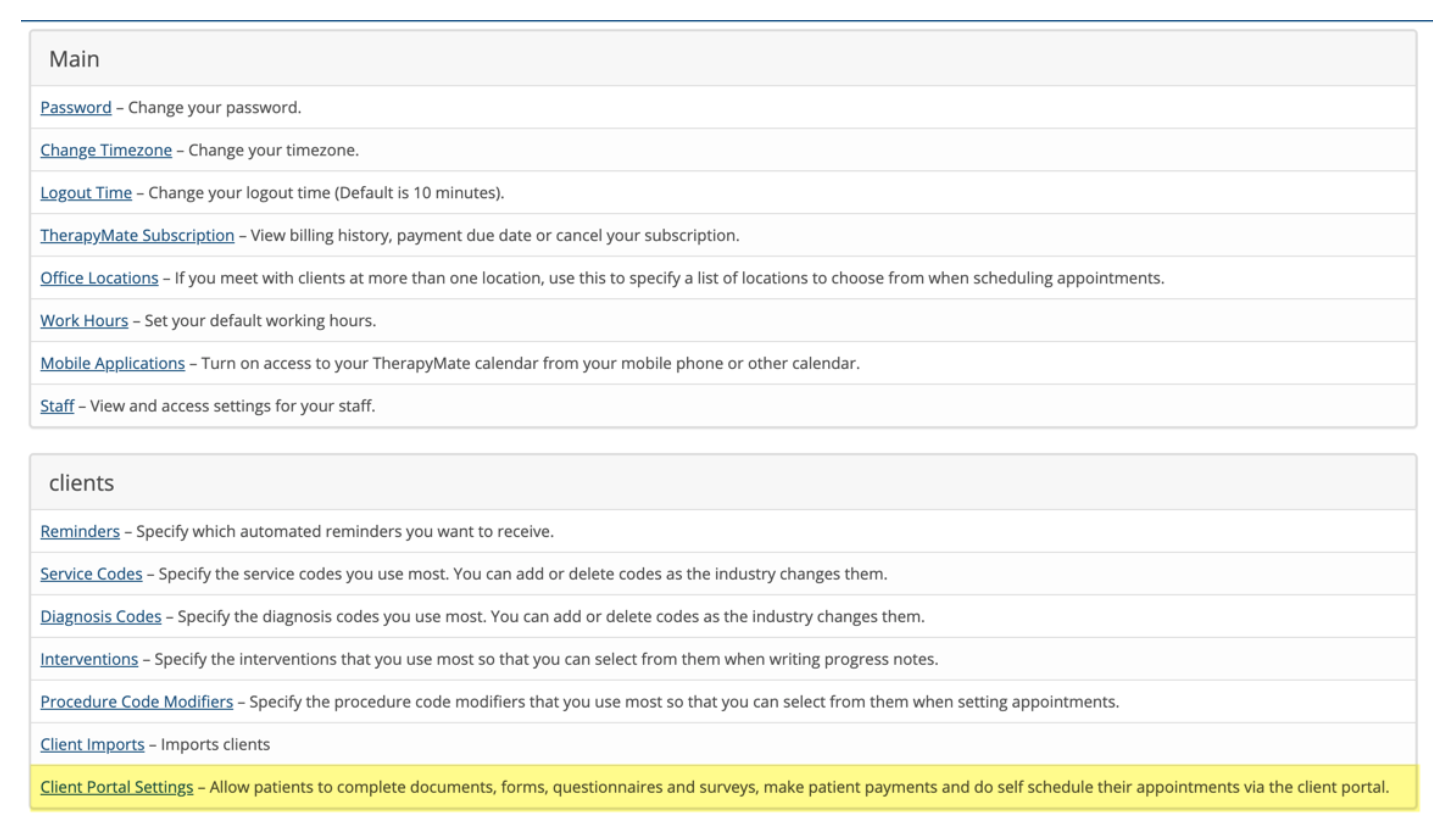
To configure your Practice’s portal settings login to TherapyMate as the System Administrator. Click on the System Admin’s name in the upper right-hand corner of the Dashboard and choose Settings from the dropdown. Then click on Client Portal Settings.
Client Portal Address (URL)
This unique web address (URL) for the Practice is shown at the top of the Client Portal Settings page.
This unique web address (URL) for the Practice is shown at the top of the Client Portal Settings page.
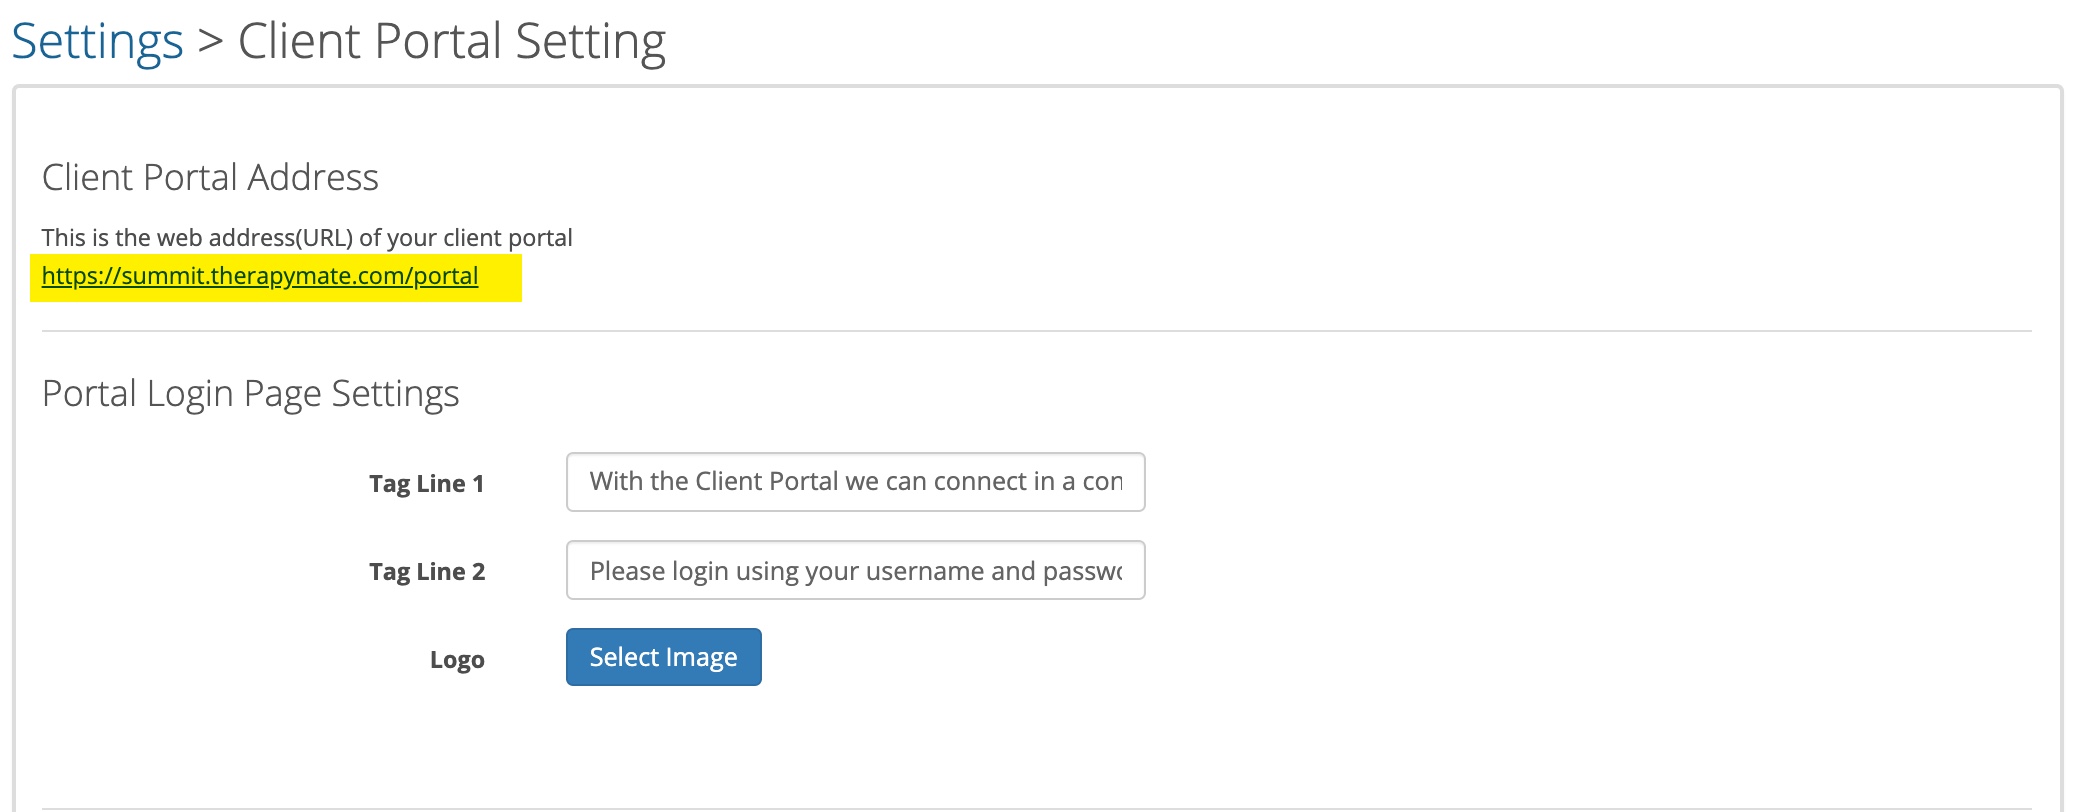
This web address (URL) can be added to your website by adding a button called "Client Login" so clients can gain access to the portal. The URL is also sent to the client in the Welcome email that goes to them.
Customizing the Portal Login Page
Here is an example of a generic Client Portal login page your clients will see.
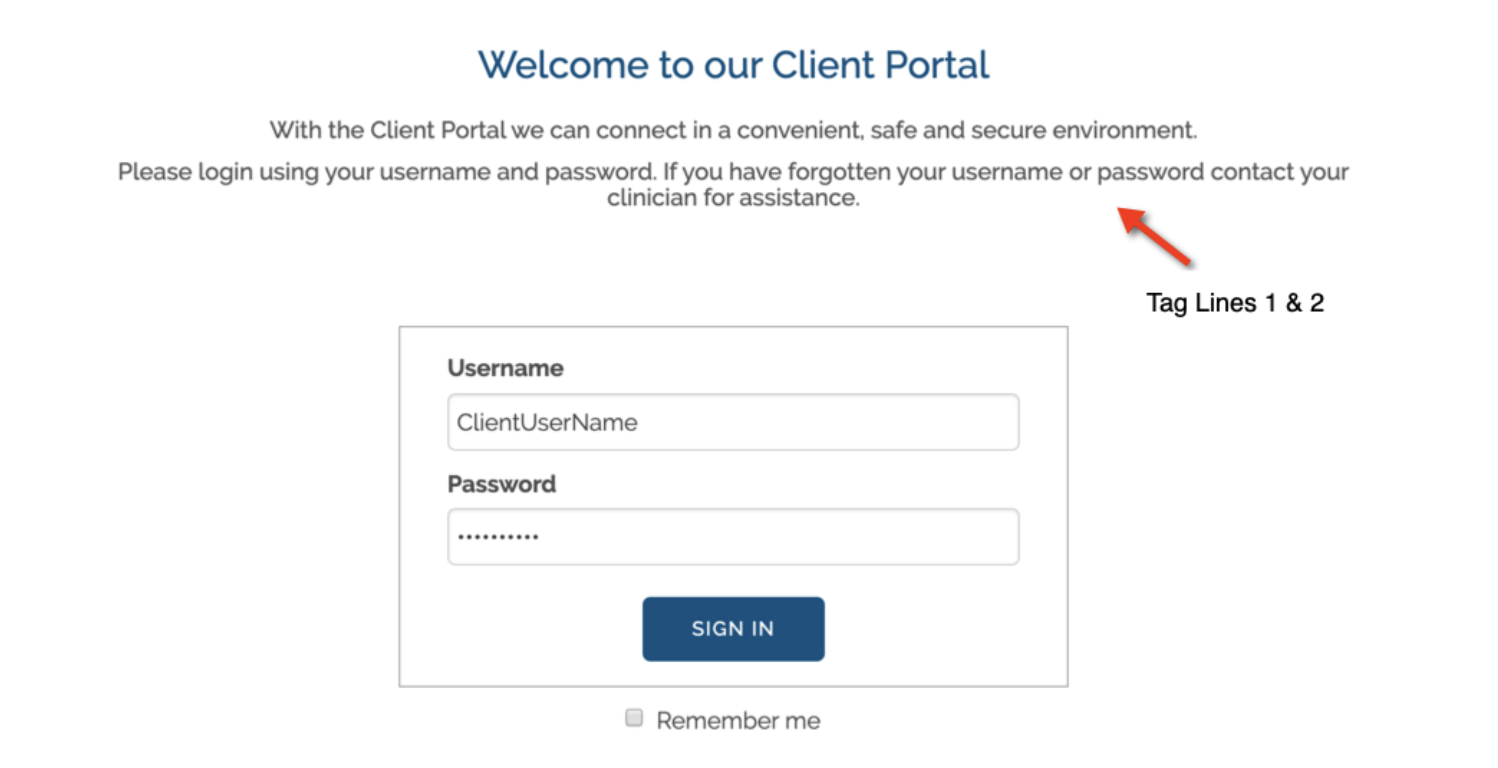
There are two customizable sentences called tag lines underneath the “Welcome to our Client Portal” message.
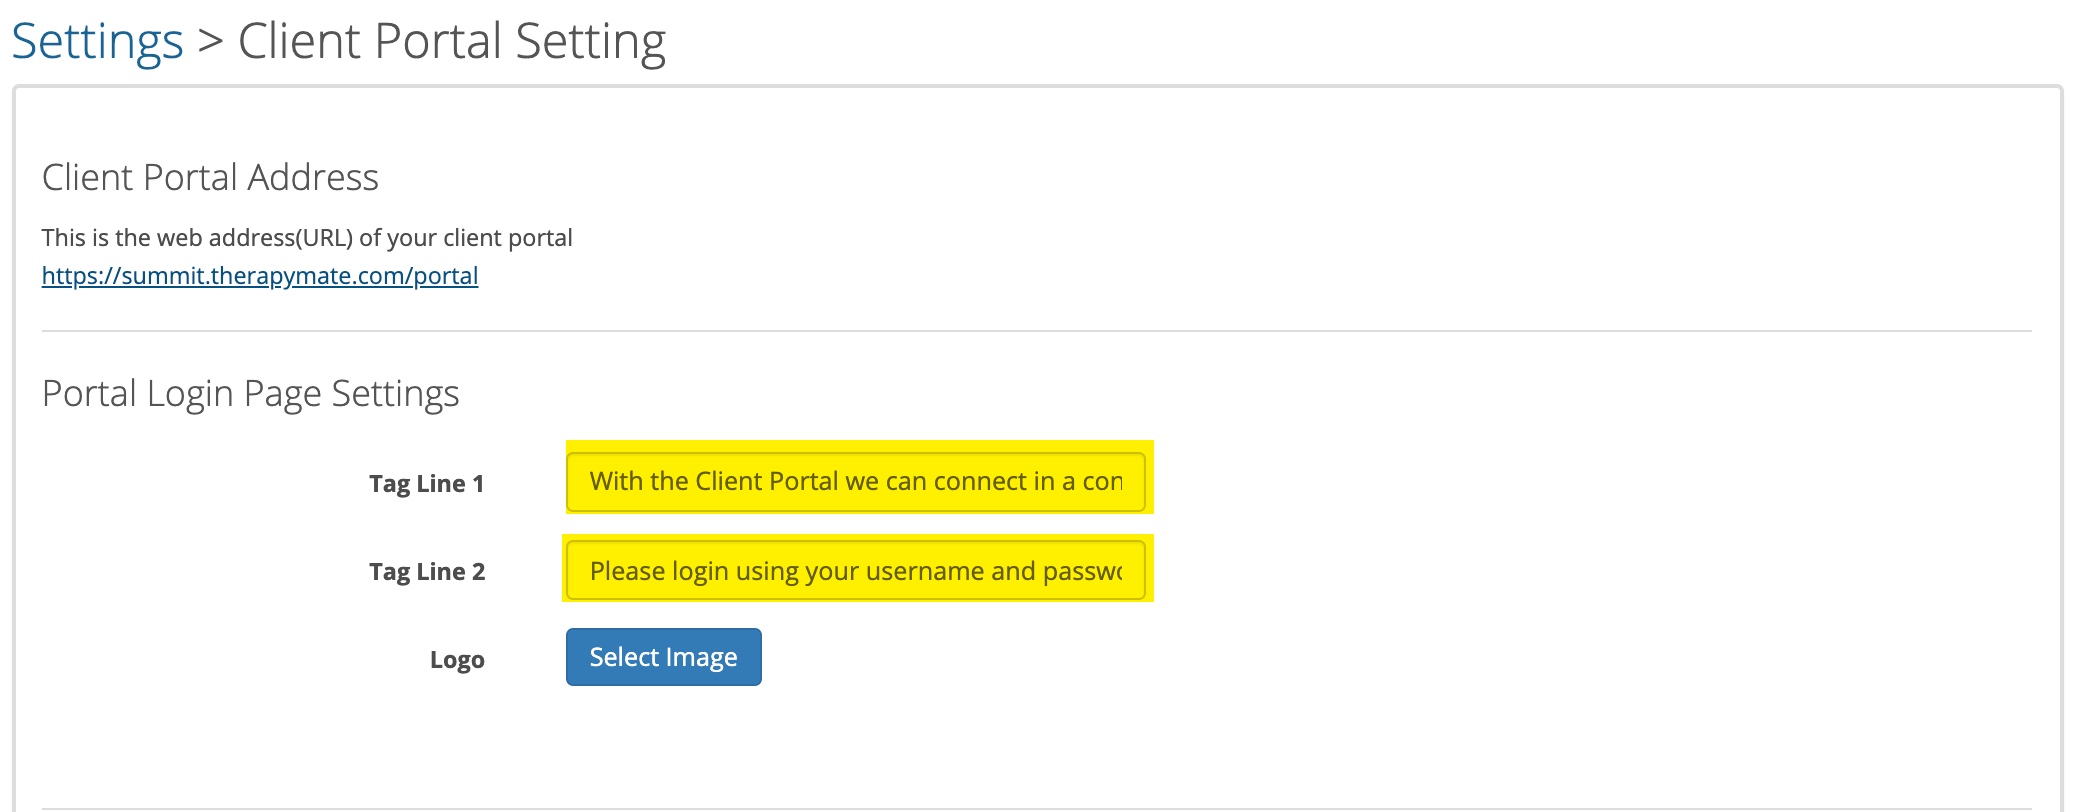
You can also upload your Practice logo which will appear just above the Welcome to our Client Portal text. The logo can be square or rectangular in shape and must be in a png, jpg, jpeg, gif format. PDF files are not allowed. The preferred file size for your logo is 100x100 pixels.
Portal Logout Time
This option adjusts how many minutes can pass before a client will be logged out automatically due to inactivity. The range is 10-60 minutes. The default is 10 minutes.

If you feel like the default is too short for some client you can now increase the number of minutes to give some of your clients more time if they abnormally slow or get distracted and temporarily stop typing.
Online Appointment Booking-Client Self Scheduling
Online Appointment Booking-Client Self Scheduling
You can enable or disable Online Appointment Booking by moving the slider button to the On or Off position. If it is turned on, Your client can login to the Client Portal and schedule their own appointments. If it is disabled, the client can view their appointments but they can't make any changes.
There are two methods available for Online Appointment Booking:
- Client Self Scheduling without Clinician Approvals
- Client Self Scheduling requiring Clinician or Staff Approval
Click Here for details about configuring and using this feature.
Online Payments
You can allow clients to make payments online by sliding the Enable Online Payments button to the On position. You must be connected to a Stripe account to use this feature. Credit cards, debit cards and HSA cards can be accepted via the portal with an active Stripe account.

Client Profile and Demographic
Turning on the Enable Profile and Enable Demographic switches will allow new clients to review and contribute information to their profile and demographic information pages when they login to the portal for the first time. Some clinicians see this as a time saving feature while others would rather do it themselves. By default both options are turned off.
You can turn on one or the other or both. Turning these on does so for the entire Practice.
If you don't want clients to review or see their profile information page when they login to the client portal, turn the Disallow Profile Viewing switch to on.
Insurance Cards
This allows the client to upload a picture of their insurance care via the Client Portal it the switch is in the On position.
If your Practice doesn't not accept insurance you can turn this to the Off position so this option isn't available to clients when they login to the portal.
Pre-Admission Documents & Questionnaires
This feature will allow you to create and send documents and questionnaire to your clients so they can fill them out in the portal electronically.
You can customize and use the forms that are supplied by TherapyMate or you can create your own.
To modify or create a new document (template) click on the Edit Documents & Questionnaires link at the bottom of the list shown below.
On the next page you’ll see a list of sample documents. You can modify and use these documents if you so desire by clicking on the link as shown. You can also delete them and create your own.
If you want to create an entirely new document click on the +Add button in the upper right-hand corner.
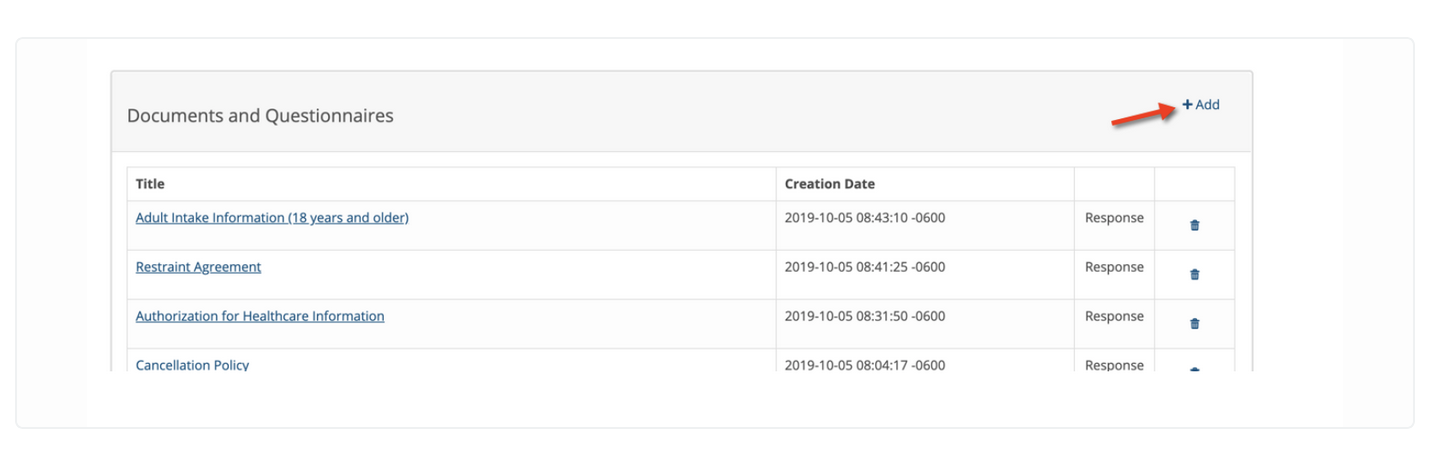
When you click on the +Add button shown above you’ll be taken into our text editor.
Start by giving your document a name in the Title box.
If you require a client signature on this document check the Signature Required check box. This will enable the client to electronically sign your document when they complete it.
Select the Level 1 or Level 2. Level 1 items are sent more frequently and Level 2 items are sent less frequently to clients.
Create your document by adding text, check boxes and input text boxes to the document. These check boxes and text boxes are what a client will use to enter date into your document. When you are done, click the Add button at the bottom to save your work.
Please Note: The documents and questionnaires are templates that you send to clients via the Client Portal. Do not put client specific information on a template and send it to a specific client. Documents & Questionnaires need to be generic for all clients to fill out.
Creating or Uploading Your Own Client Forms
One of the great benefits of a client portal is the ability to have clients fill out documents online. This prevents you from having the capture the information on paper and later scanning them and uploading them manually to a client's chart. That is very time consuming.
A common question we get is "Can I upload my own forms?"
Basically no...you can't do that. Here is the reason why and what you can do instead.
Even if you could upload your own forms they wouldn't be usable because they wouldn't contain input fields. Input fields are required so you can capture data in an online electronic format. For example, your document might have something that looks like this:
First Name: ______________Last Name: __________________
The lines that you see above are not input fields in the on-line electronic world.
What you can do is copy the contents of your existing forms and paste the contents of your existing form into the TherapyMate text editor and then reformat
Please Note: We recommend that the text from the other document is in plain text format before copying the information for best results. Copying and pasting directly from a Microsoft Word formatted document will contain hidden formatting information and can cause your Therapymate template to not work properly. You can save your Word document as a plain text file and then copy and paste the contents to eliminate the hidden formatting information.
Here is an example of a document that was pasted into the text editor:
Here is an example of a document that was pasted into the text editor:
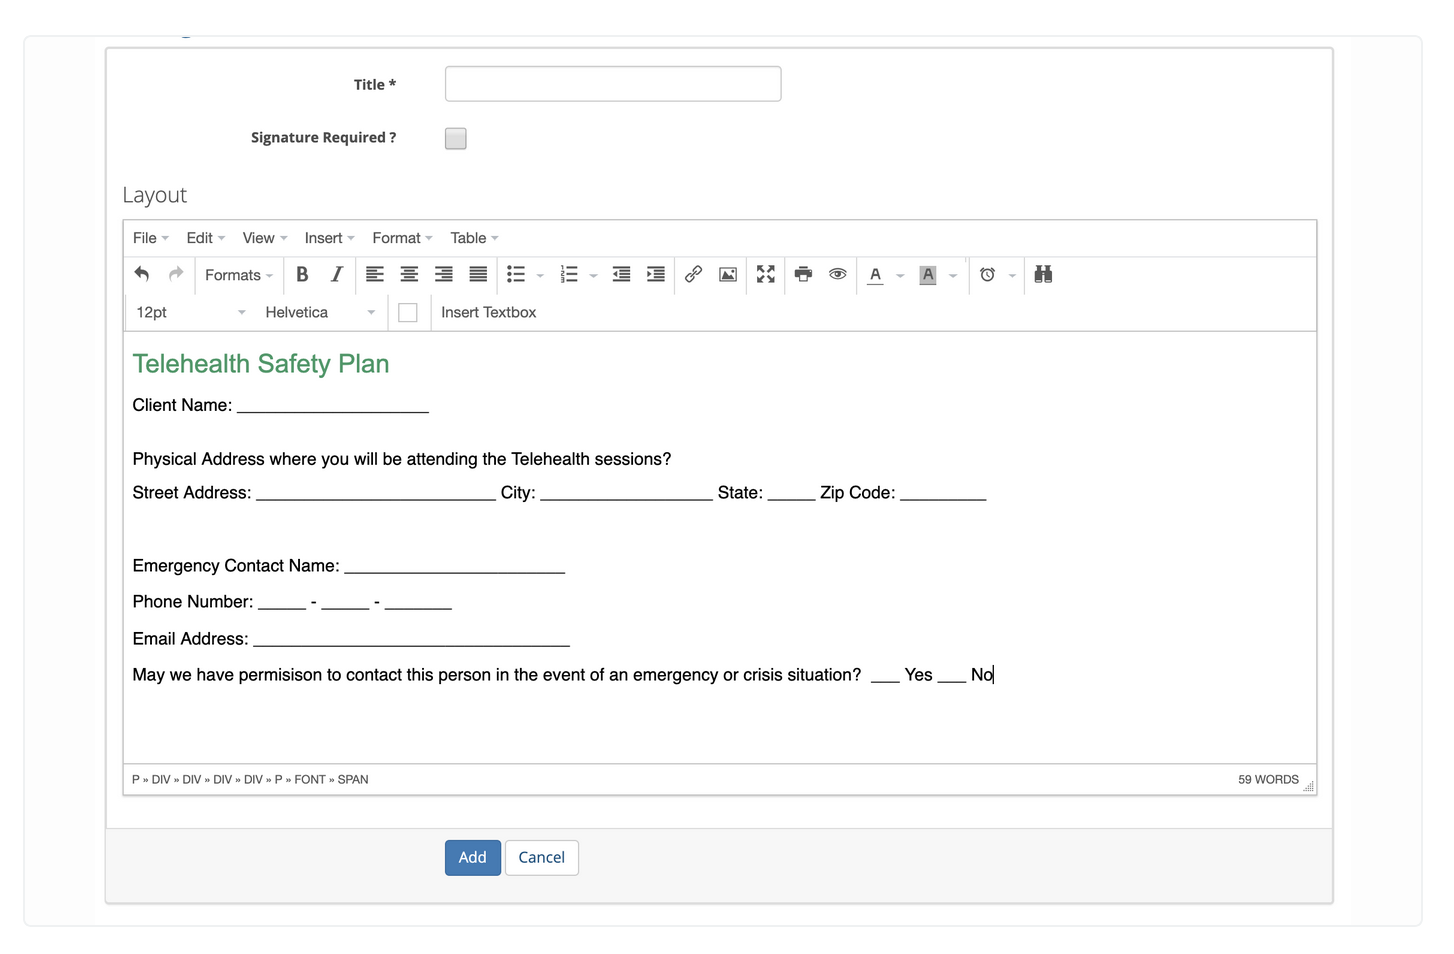
It contains lines that normally a client would write on if this was a paper document. To make these lines useful in an online electronic format we would replace the lines with input text boxes and checkboxes. See the converted example below:
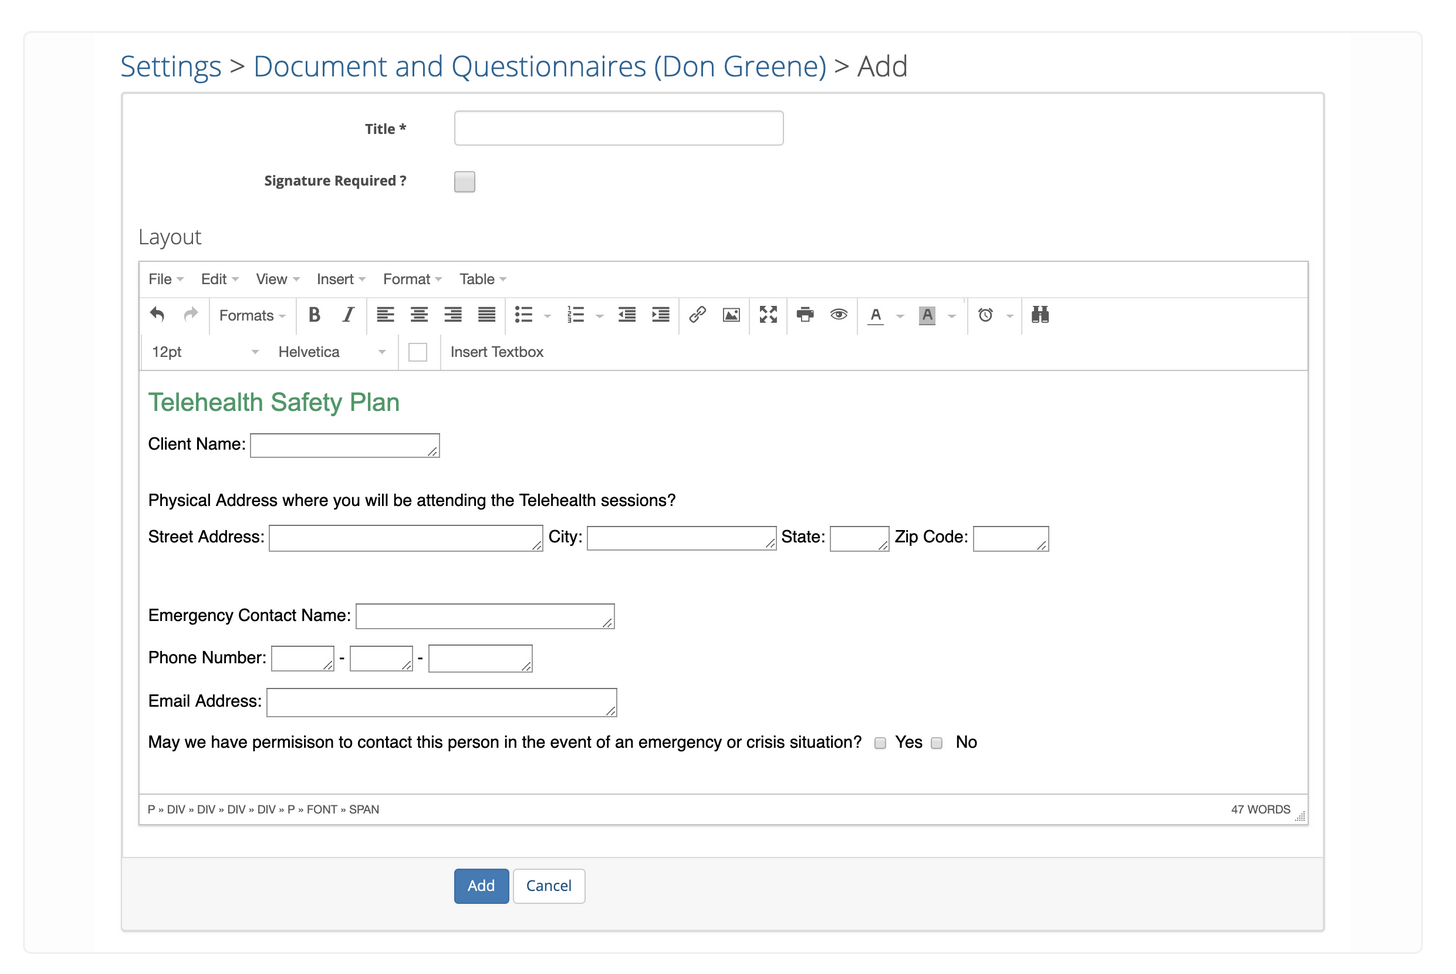
After you have created your new document click the Add button. The new document will now get added to your master list. You will now be able to send it to clients after you test them.
Testing your Documents and Questionnaires
It is very important that you test your documents and questionnaires templates before you sent them to clients.
1. Create a test client. Put your own email address in the client chart.
2. Invite the test client to the Client Portal by selecting some of the documents you want to test (see below)
3. Login to the client portal as the test client using the username and password you entered when you to invited via email.
4. Click on the template you sent to yourself and test it.
5. Try completing the template and try saving it.
6. If you get an error there is something wrong with your template. You'll need to debug.
7. If you don't get an error, Congratulations! The saved version of the document will appear on the right side of the client's portal page or at the bottom of their notes page in TherapyMate.
Sending Documents & Questionnaires to Clients
Select the documents and questionnaires you wish to send to the client by checking the check boxes on the left next to each item. You can send them from one or both levels at the same time if needed. When the client logs into the Client Portal they will see their list of items in the "Documents to be Completed" area.
Welcome Message
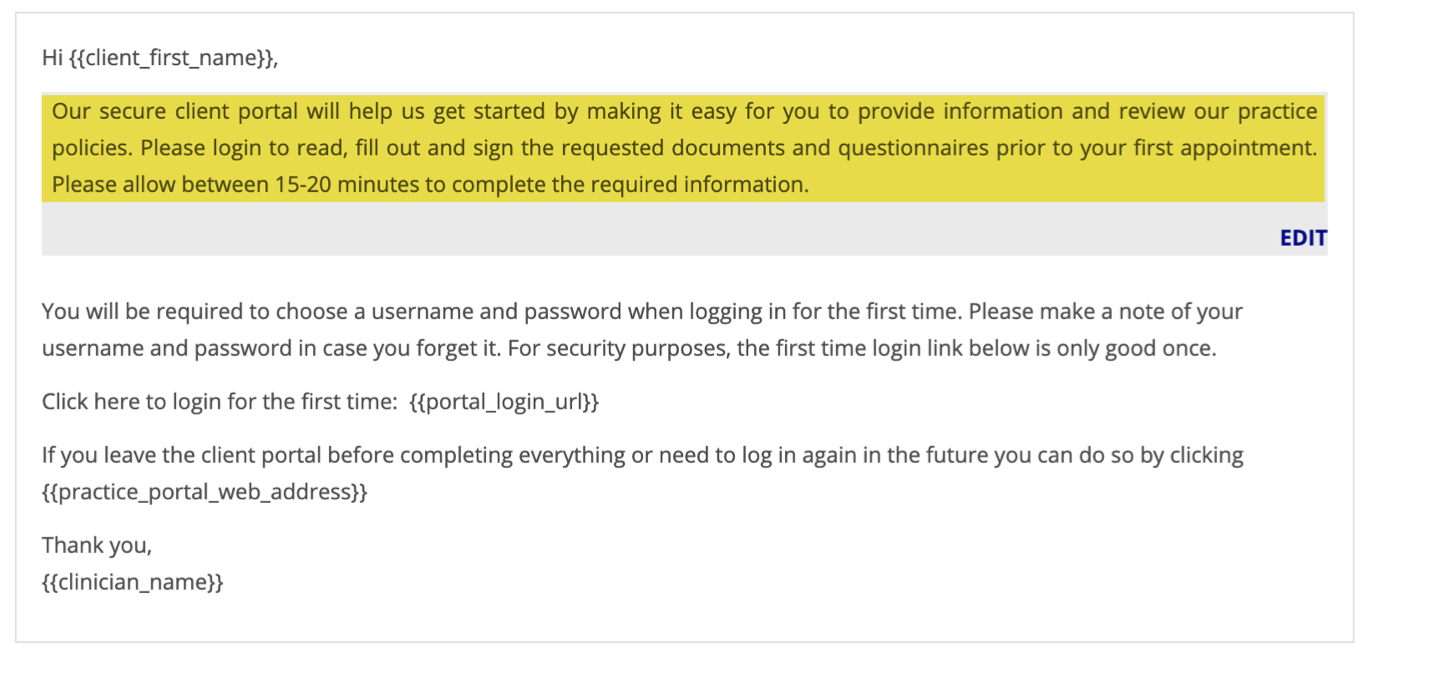
When you invite a client to use the portal, they are sent a welcome email. You can customize the body of the welcome email message that all clients will receive with Practice specific instructions. The area that is highlighted in yellow below can be customized by you. Click the EDIT button to modify the contents if you wish to do so.
To save all of your portal changes and settings, click the blue “Update Portal Settings” button.
Support
You can customize the Support menu option with your contact informations so client's know who to contact if they need help with the client portal. Please edit and update the information shown below. Then turn on the feature by sliding the switch to the right.
The Practice or Clinician is responsible for providing Client Portal support for their clients. TherapyMate should not be the client's first contact. Please don't add any TherapyMate information in this area that would allow a client to contact us directly.