One of the great benefits of a client portal is the ability to have clients fill out documents on-line. This prevents you from having the capture the information on paper and later scanning them and uploading them manually to a client's chart. That is very time consuming.
A common question we get is "Can I upload my own forms?"
A common question we get is "Can I upload my own forms?"
Basically no...you can't do that. What you can do is take that information from your forms and copy and paste it into TherapyMate's text editor. We recommend that the document you are copying from is in a plain text format for the best results.
Here is the reason why and what you can do instead.
Even if you could upload your own forms they wouldn't be usable because they don't contain input fields that would be required to capture data in an online electronic format. For example, your document might have something that looks like this:
First Name: ______________Last Name: __________________
The lines that you see here are not input fields in the on-line electronic world.
What you can do is copy the contents of your own forms and paste the contents into the TherapyMate text editor and then reformat it to add the check boxes and text input boxes that you need to make the document functional.
Adding Your Own Document
Only the System Admin can do this for the Practice. When a new document is added by the System Admin, all other Clinicians in the Practice will be able to use the document.
The System Admin logs into TherapyMate and clicks on their name in the upper righthand corner of the Dashboard and chooses Settings from the dropdown.
Scroll down the settings page to Client Portal Settings and click on that.
Even if you could upload your own forms they wouldn't be usable because they don't contain input fields that would be required to capture data in an online electronic format. For example, your document might have something that looks like this:
First Name: ______________Last Name: __________________
The lines that you see here are not input fields in the on-line electronic world.
What you can do is copy the contents of your own forms and paste the contents into the TherapyMate text editor and then reformat it to add the check boxes and text input boxes that you need to make the document functional.
Adding Your Own Document
Only the System Admin can do this for the Practice. When a new document is added by the System Admin, all other Clinicians in the Practice will be able to use the document.
The System Admin logs into TherapyMate and clicks on their name in the upper righthand corner of the Dashboard and chooses Settings from the dropdown.
Scroll down the settings page to Client Portal Settings and click on that.
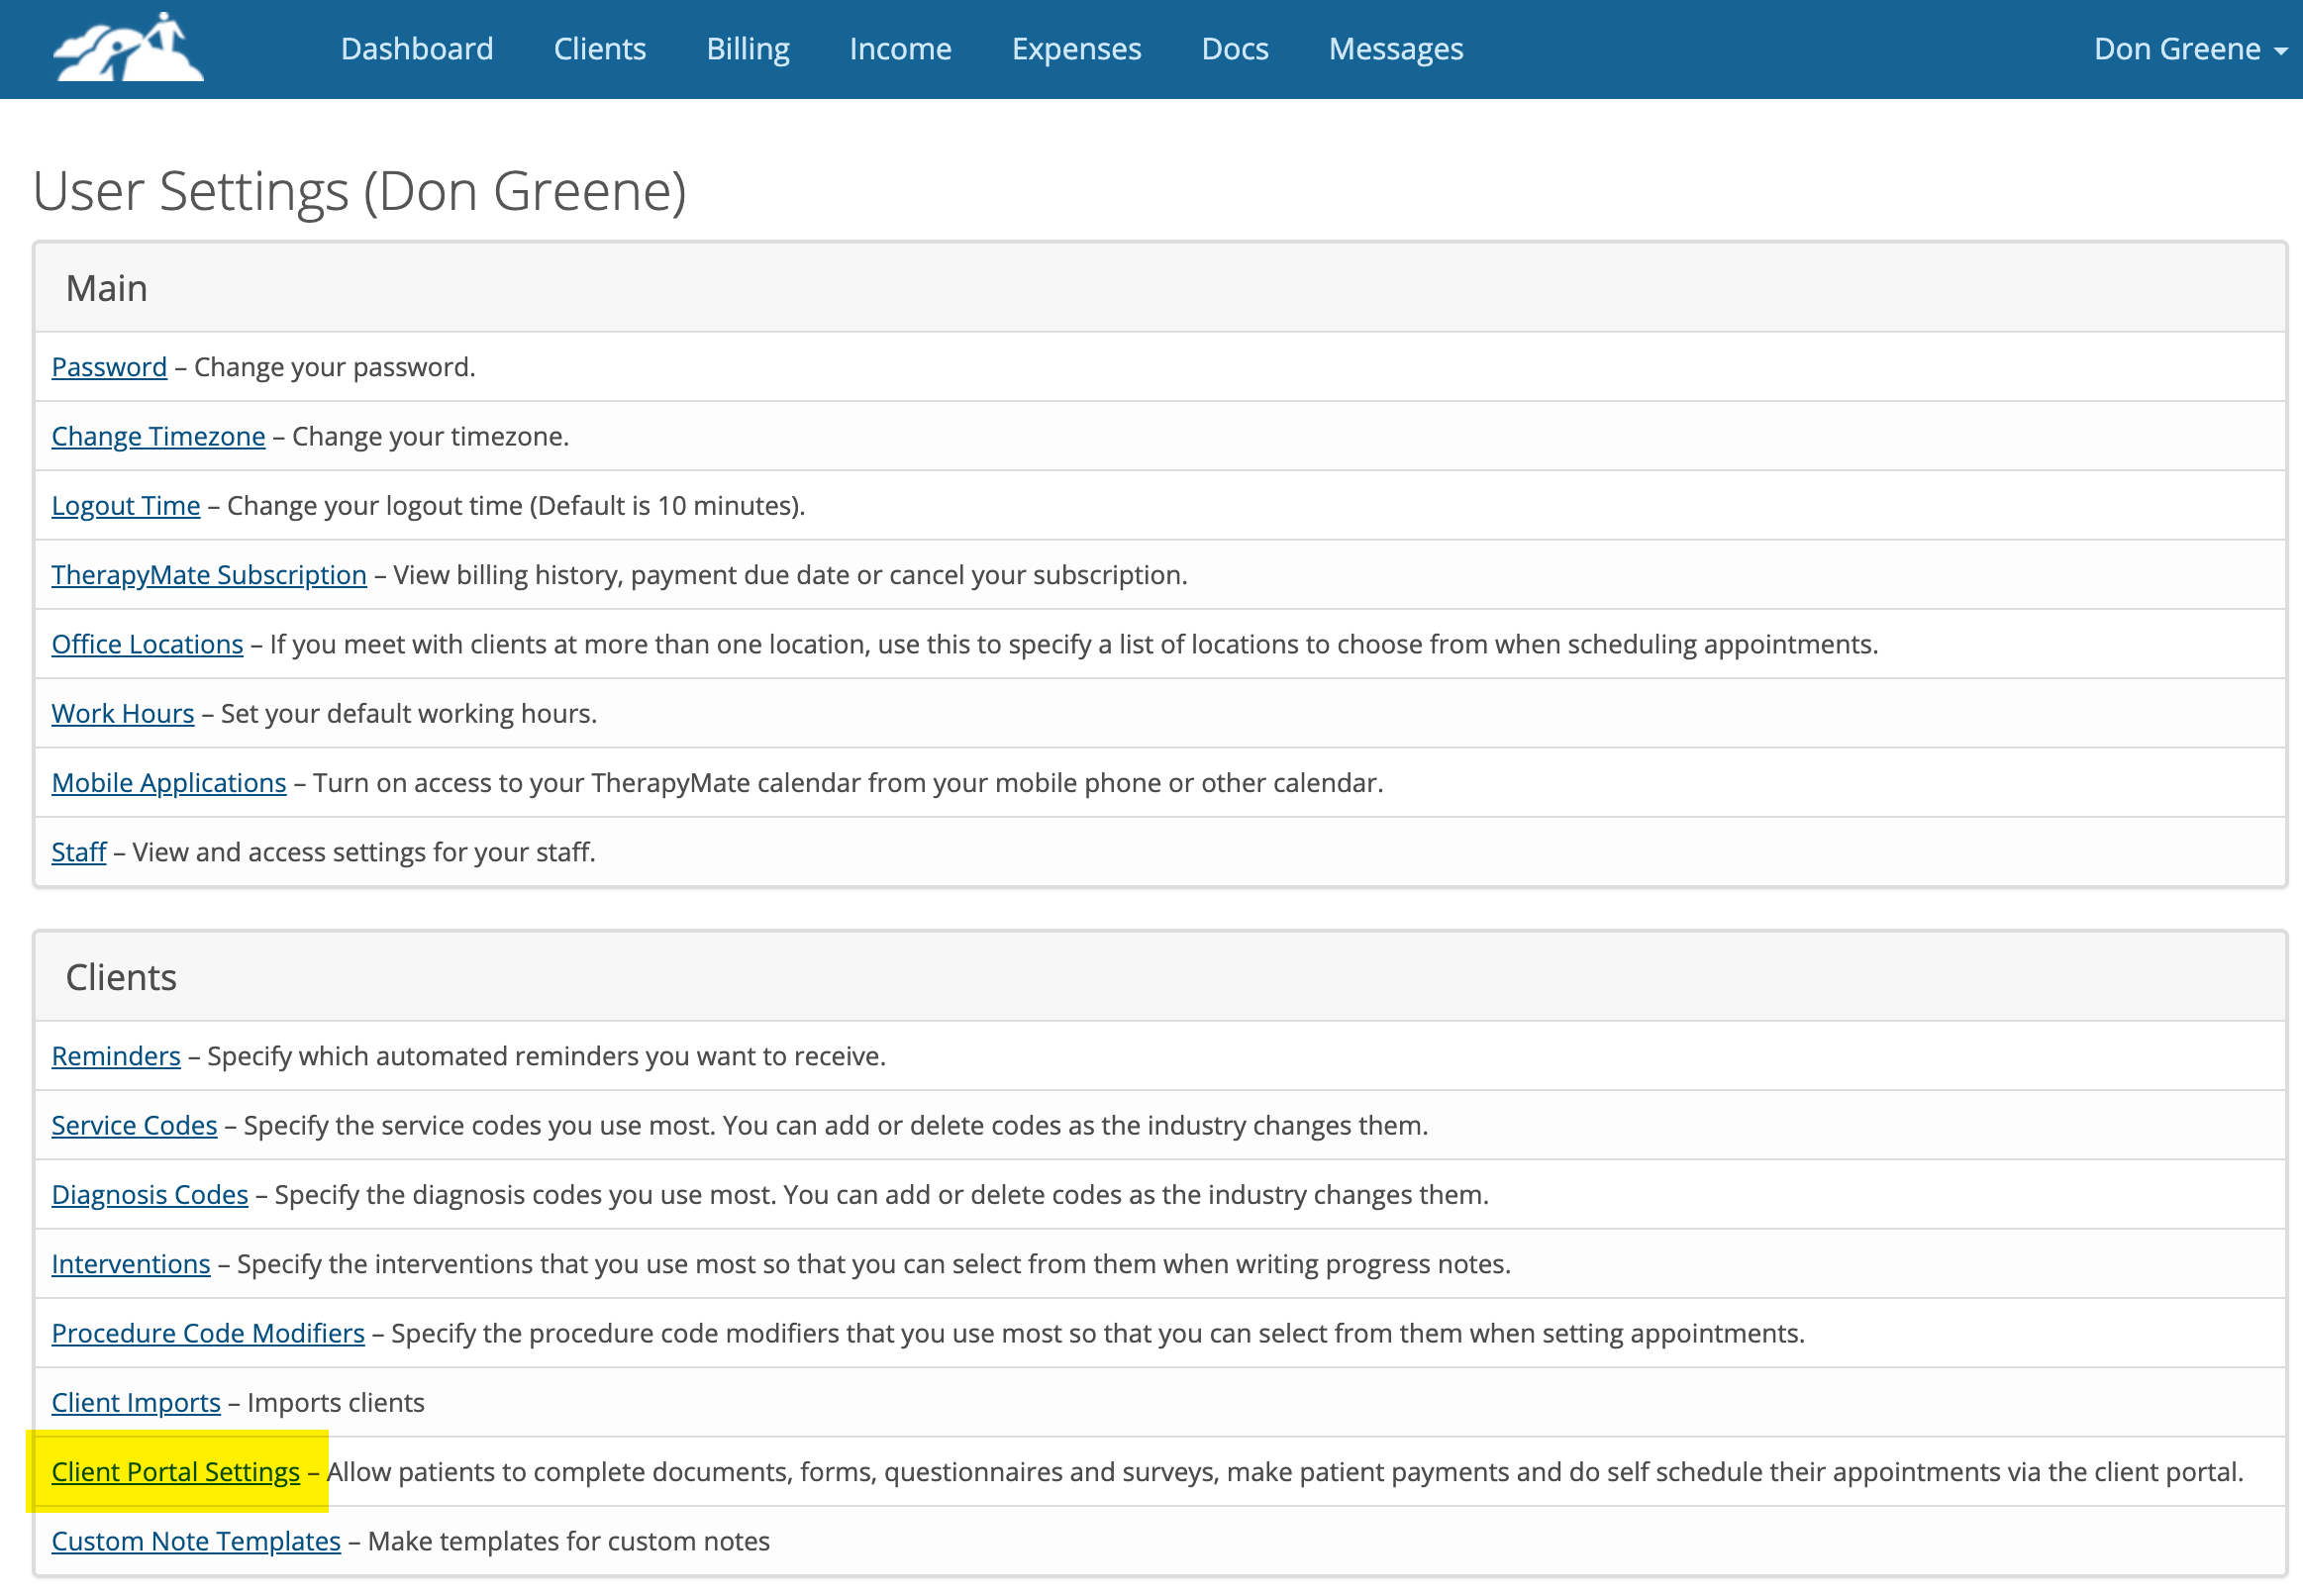
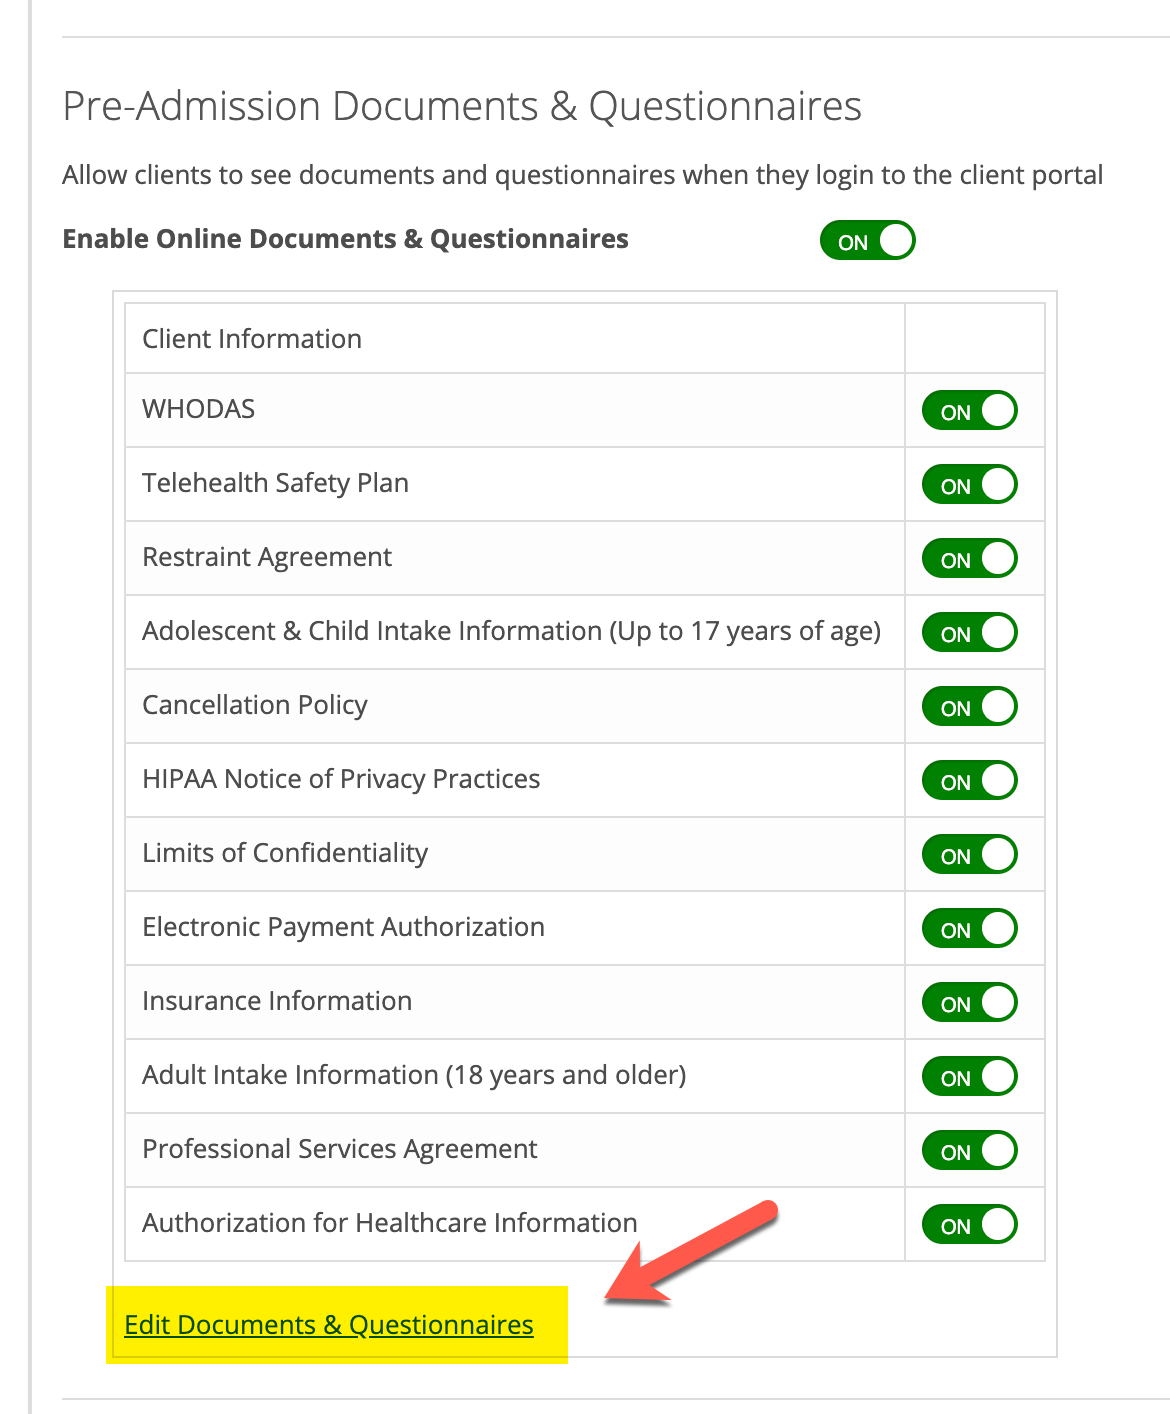
Scroll down the Client Portal Settings page until you find the Pre-Admission Documents & Questionnaires area. Click on the Edit Documents & Questionnaires link shown below:
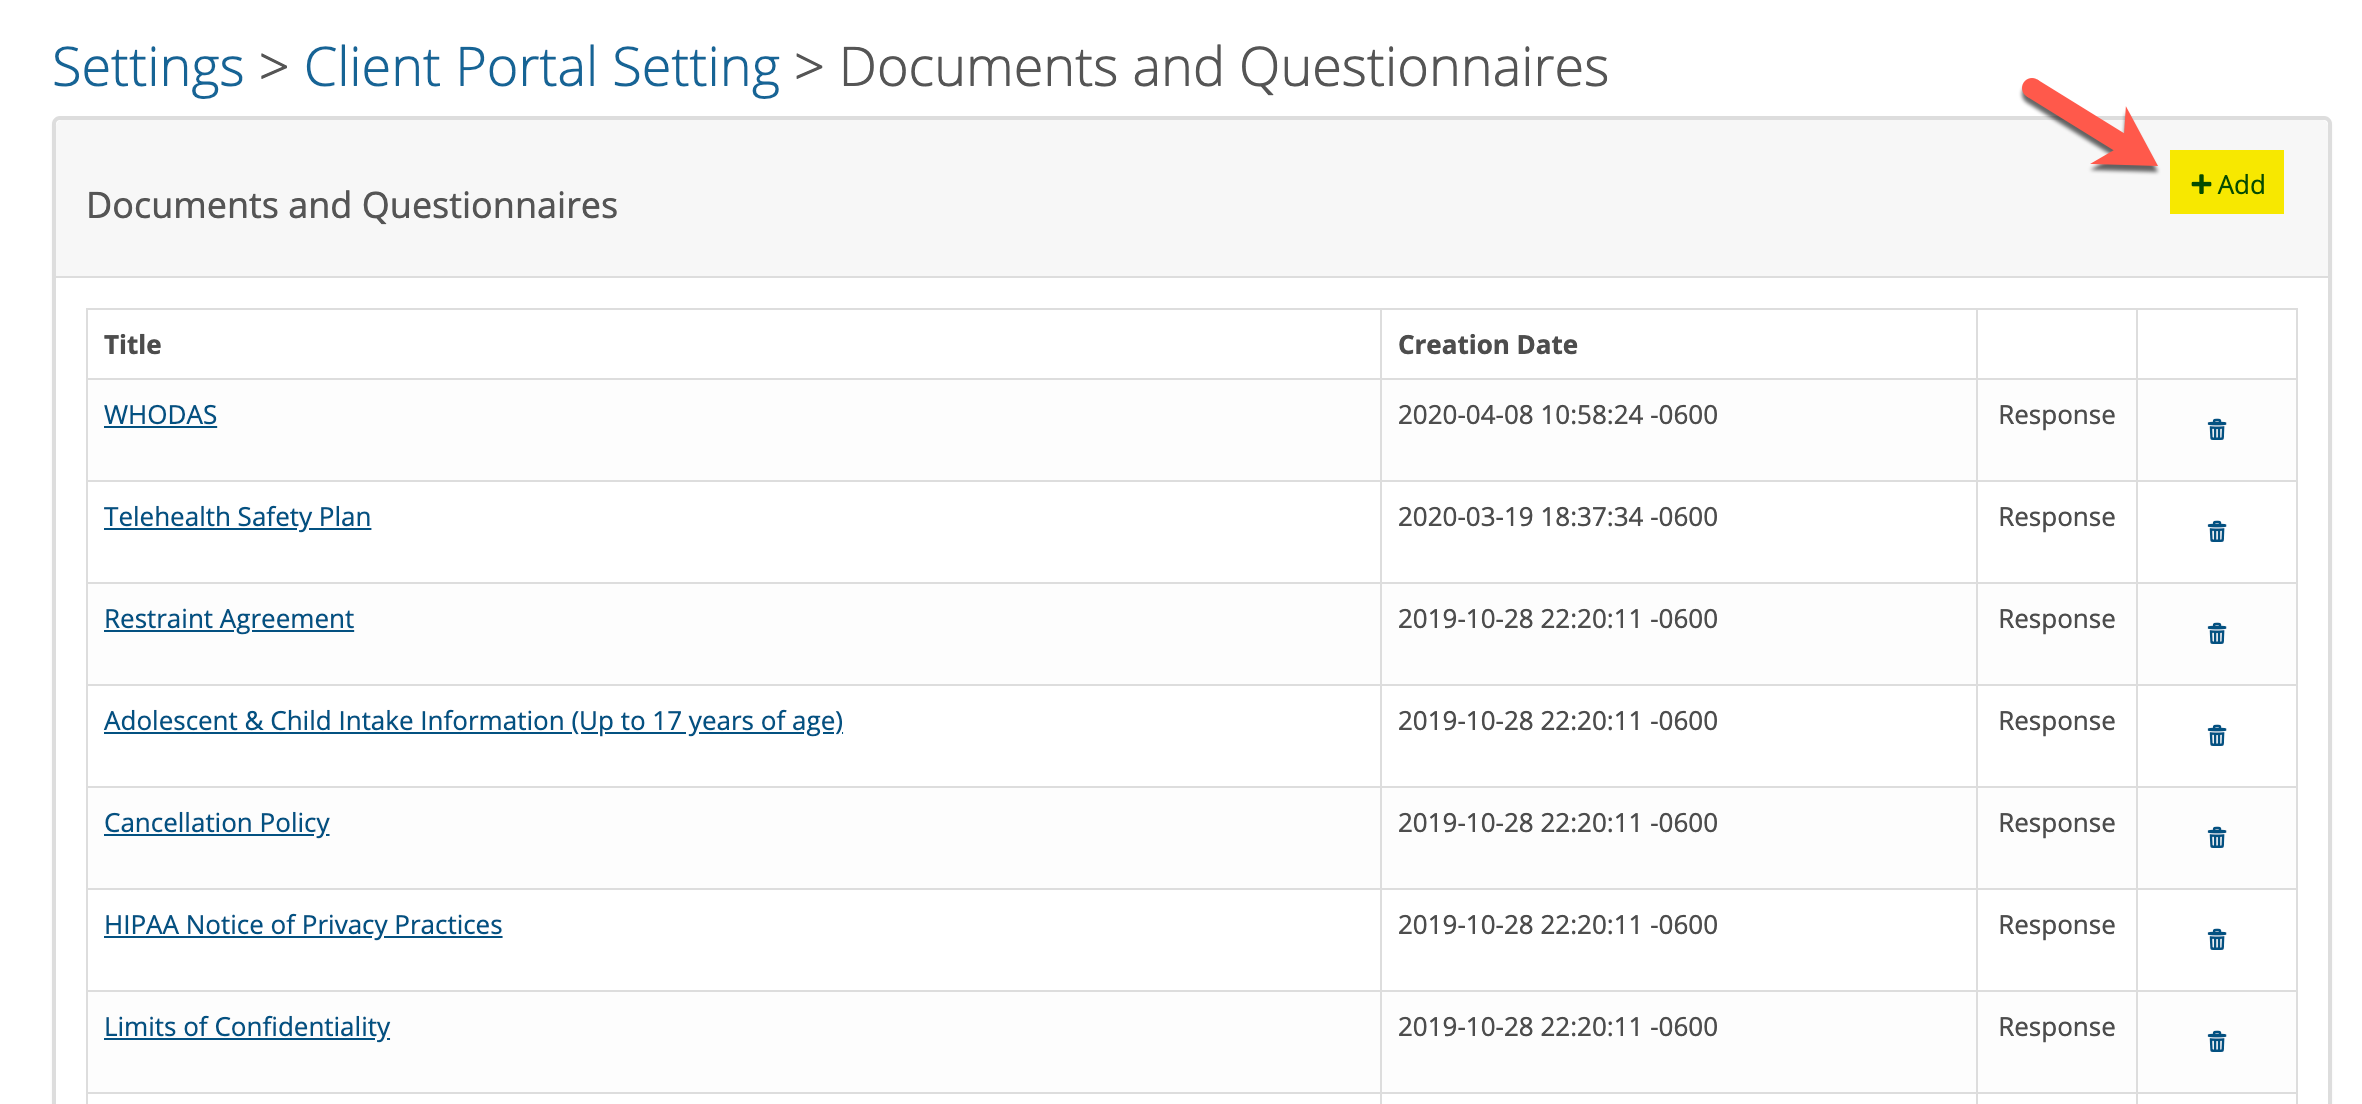
On the next page you'll see the sample documents that came with TherapyMate. To add a new document to the list, click on the + Add button shown below:
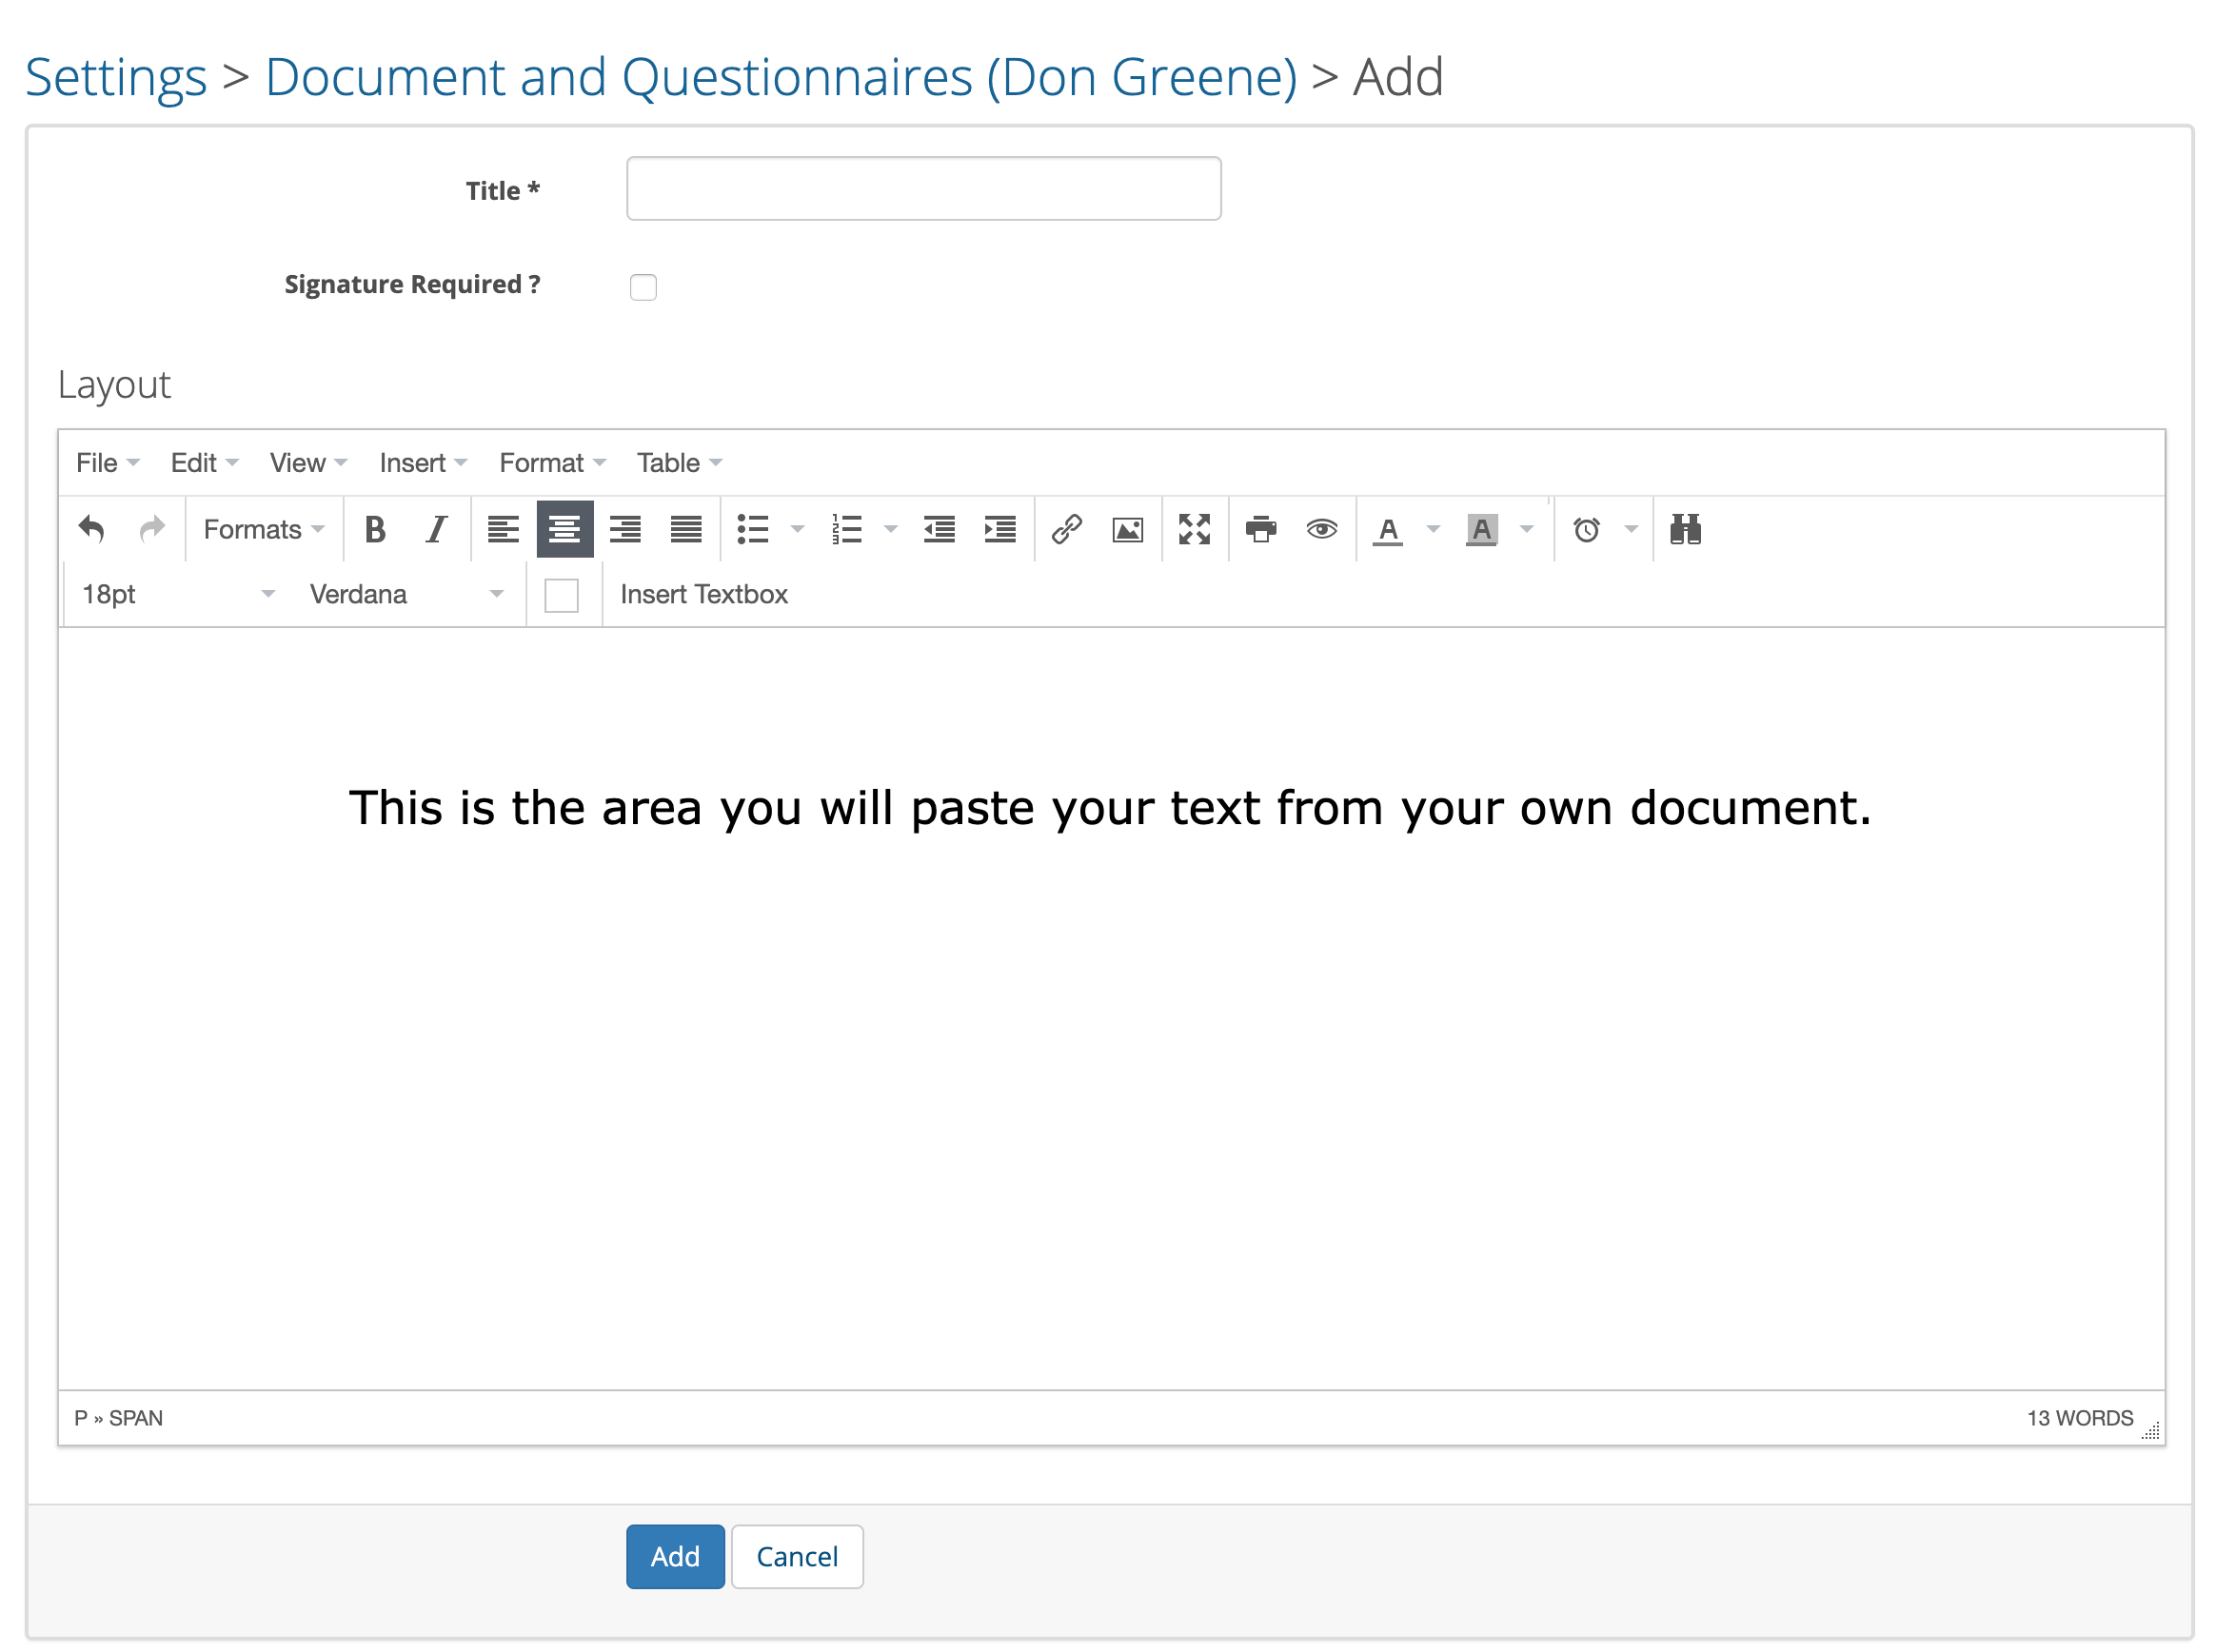
After clicking the + Add button, you will see a text editor window. This is where you can past the contents of your word or PDF document so you can customize the contents for the online format.
Here is an example of a document that was pasted into the text editor:
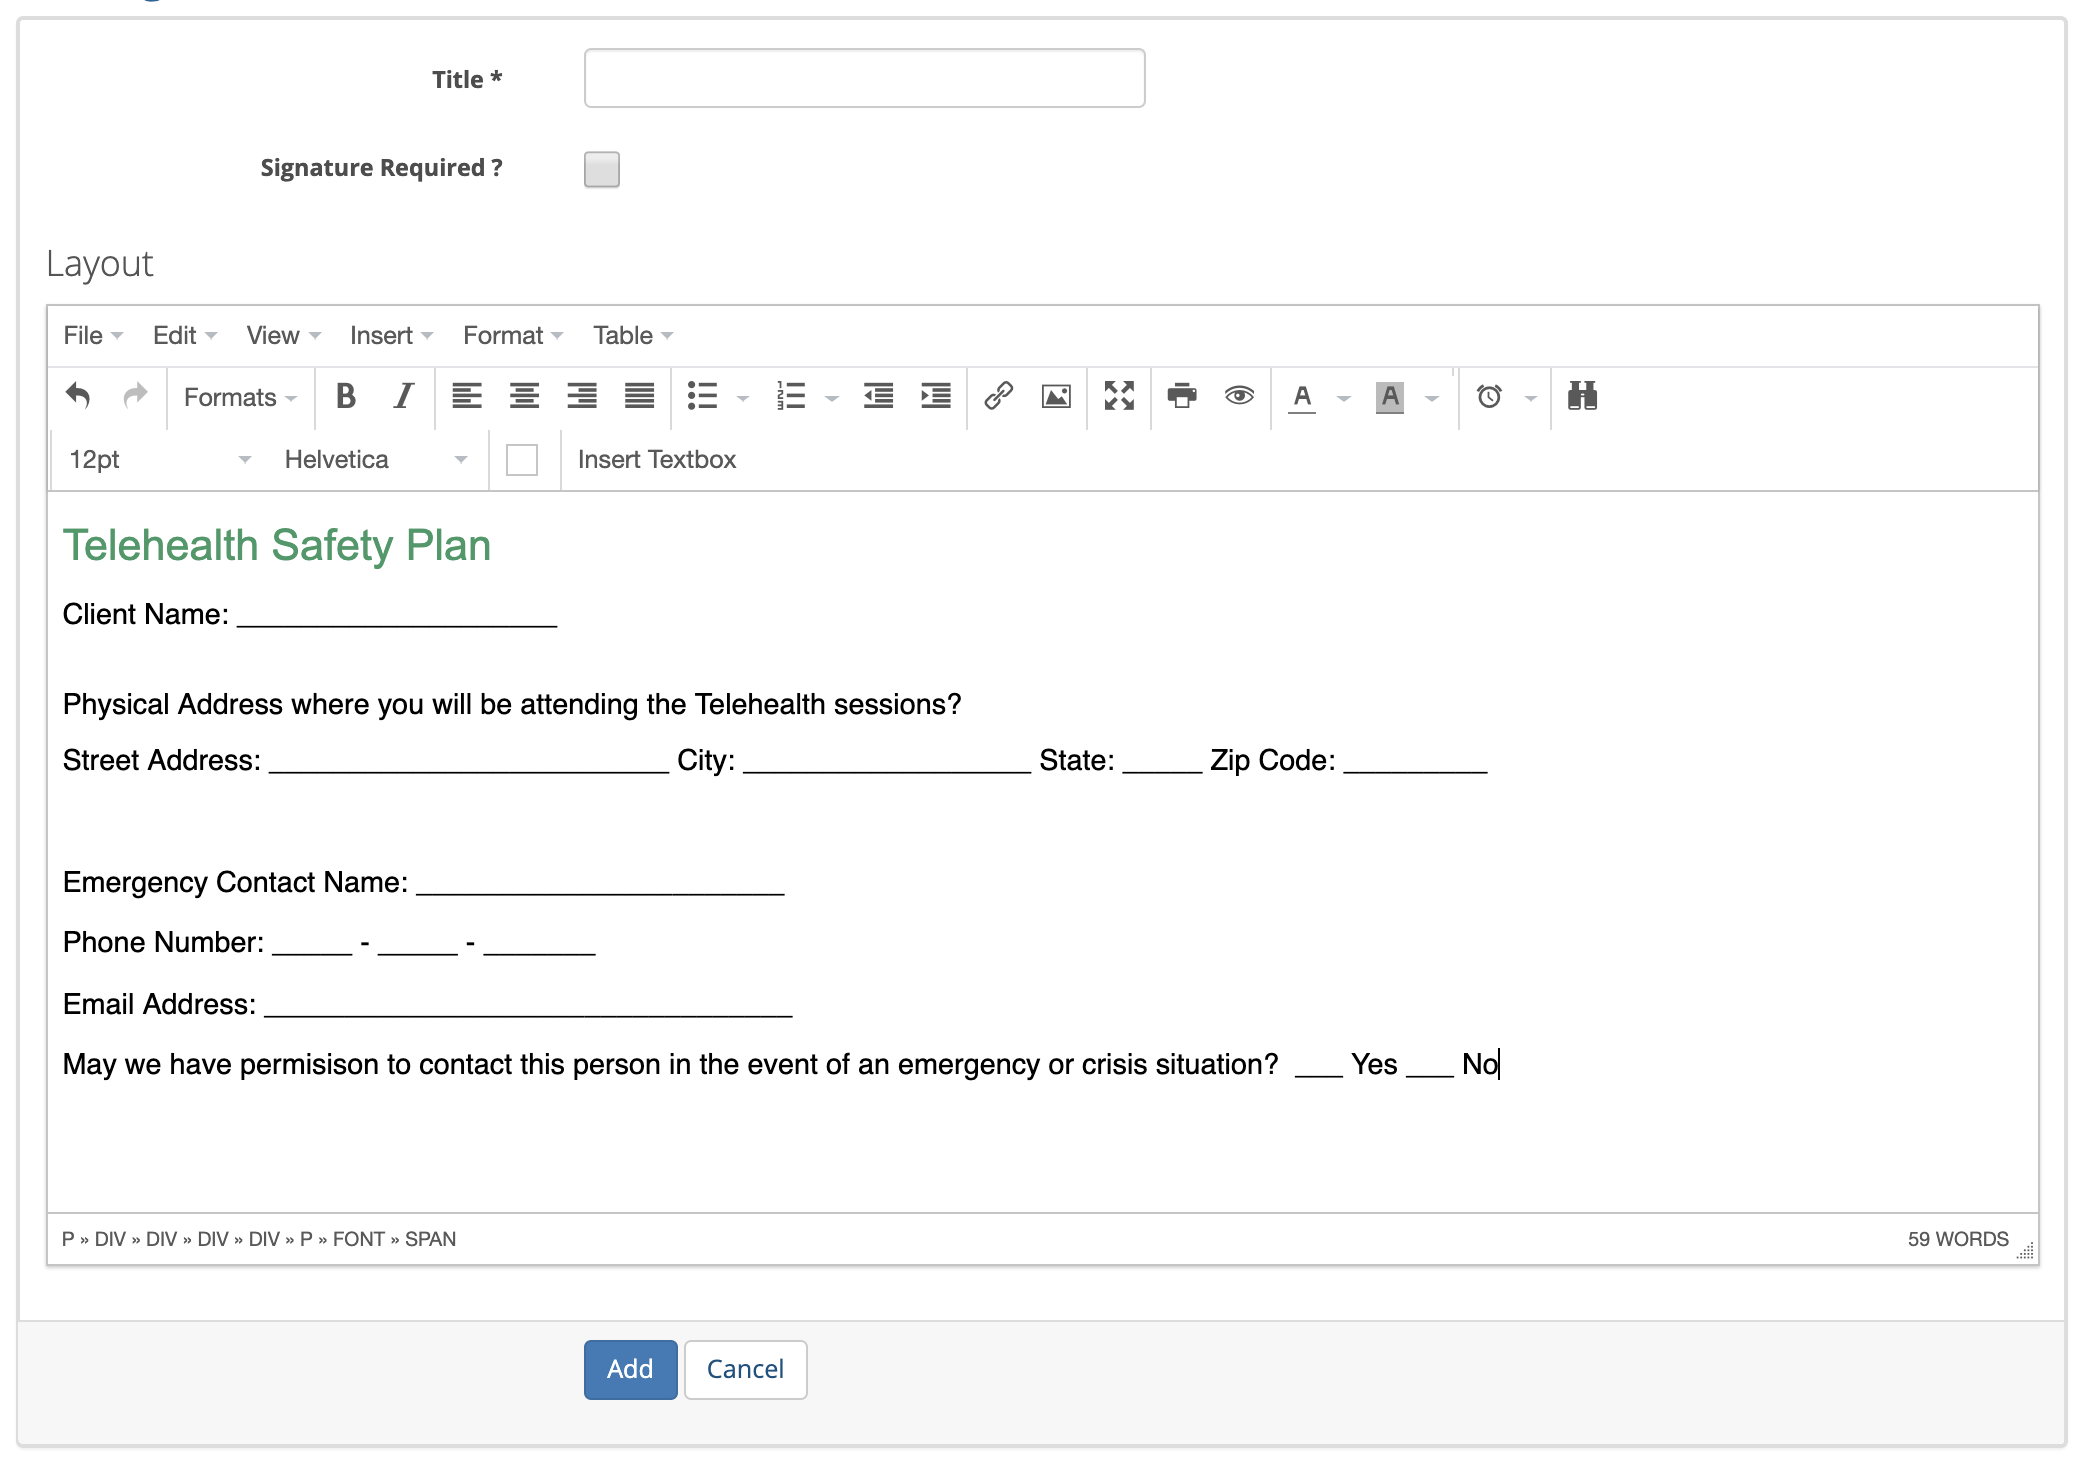
It contains lines that normally a client would write on if this was a paper document. To make these lines useful in an online electronic format we would replace the lines with input text boxes and checkboxes. See the converted example below:
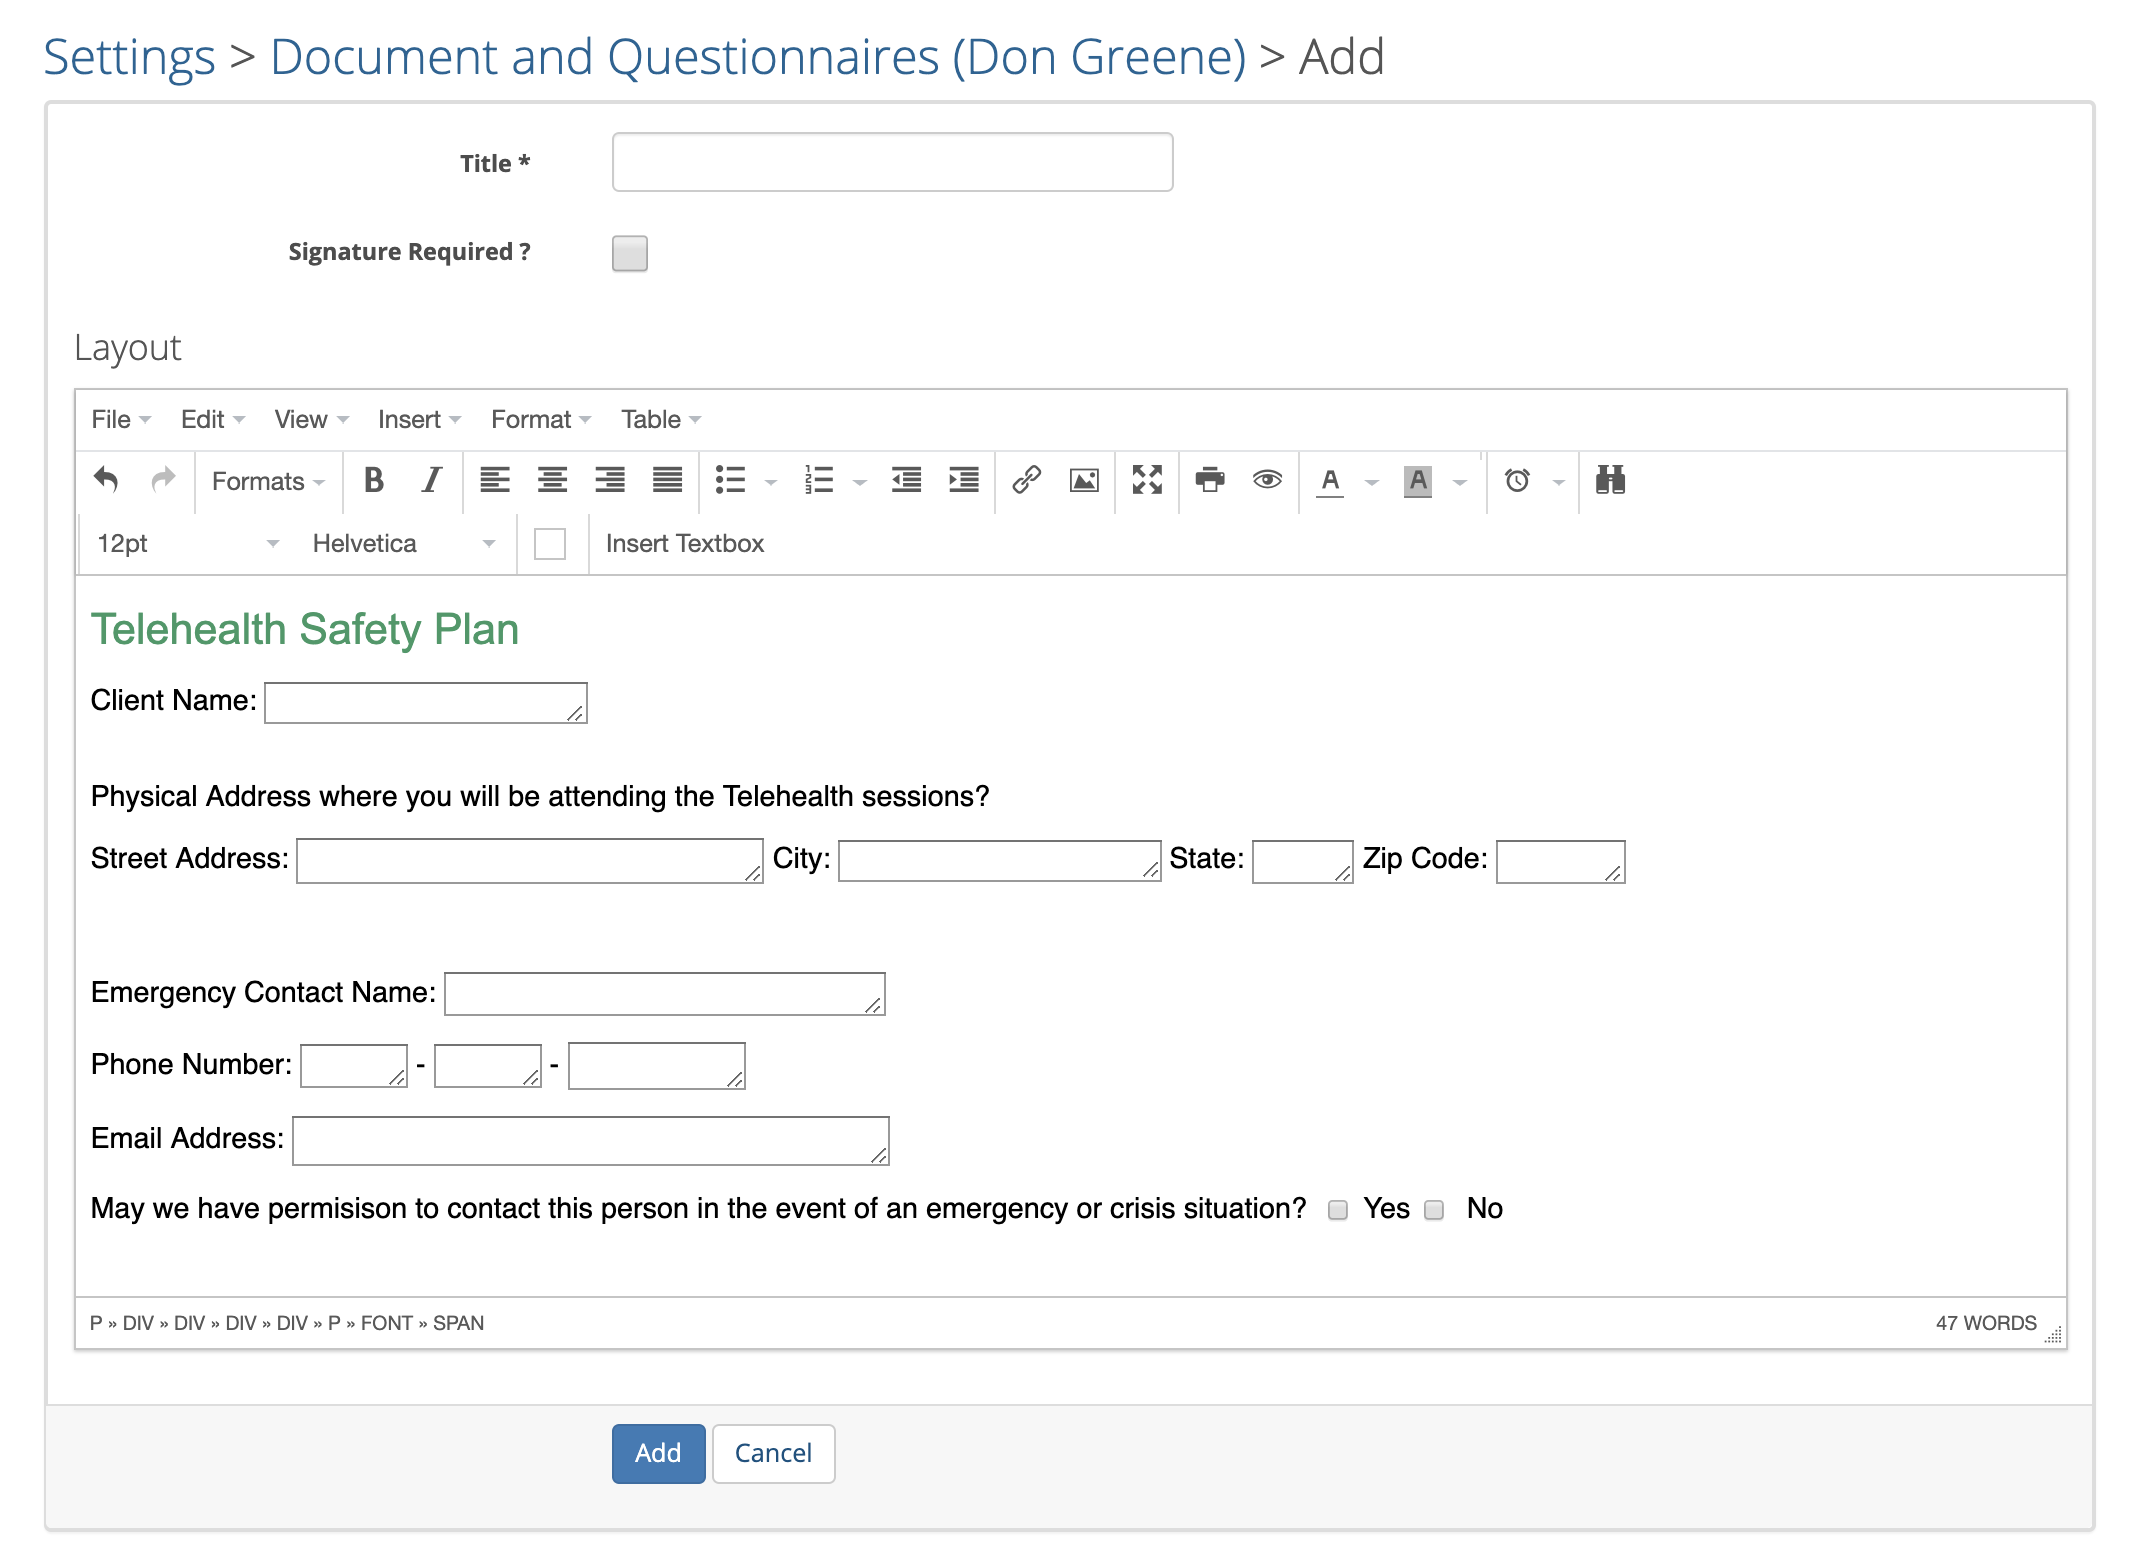
Inserting Text Boxes & Sizing Them
To replace the lines in your pasted document, highlight the line and then click on the Insert Text Box button. In this example we highlighted the Client Name field.
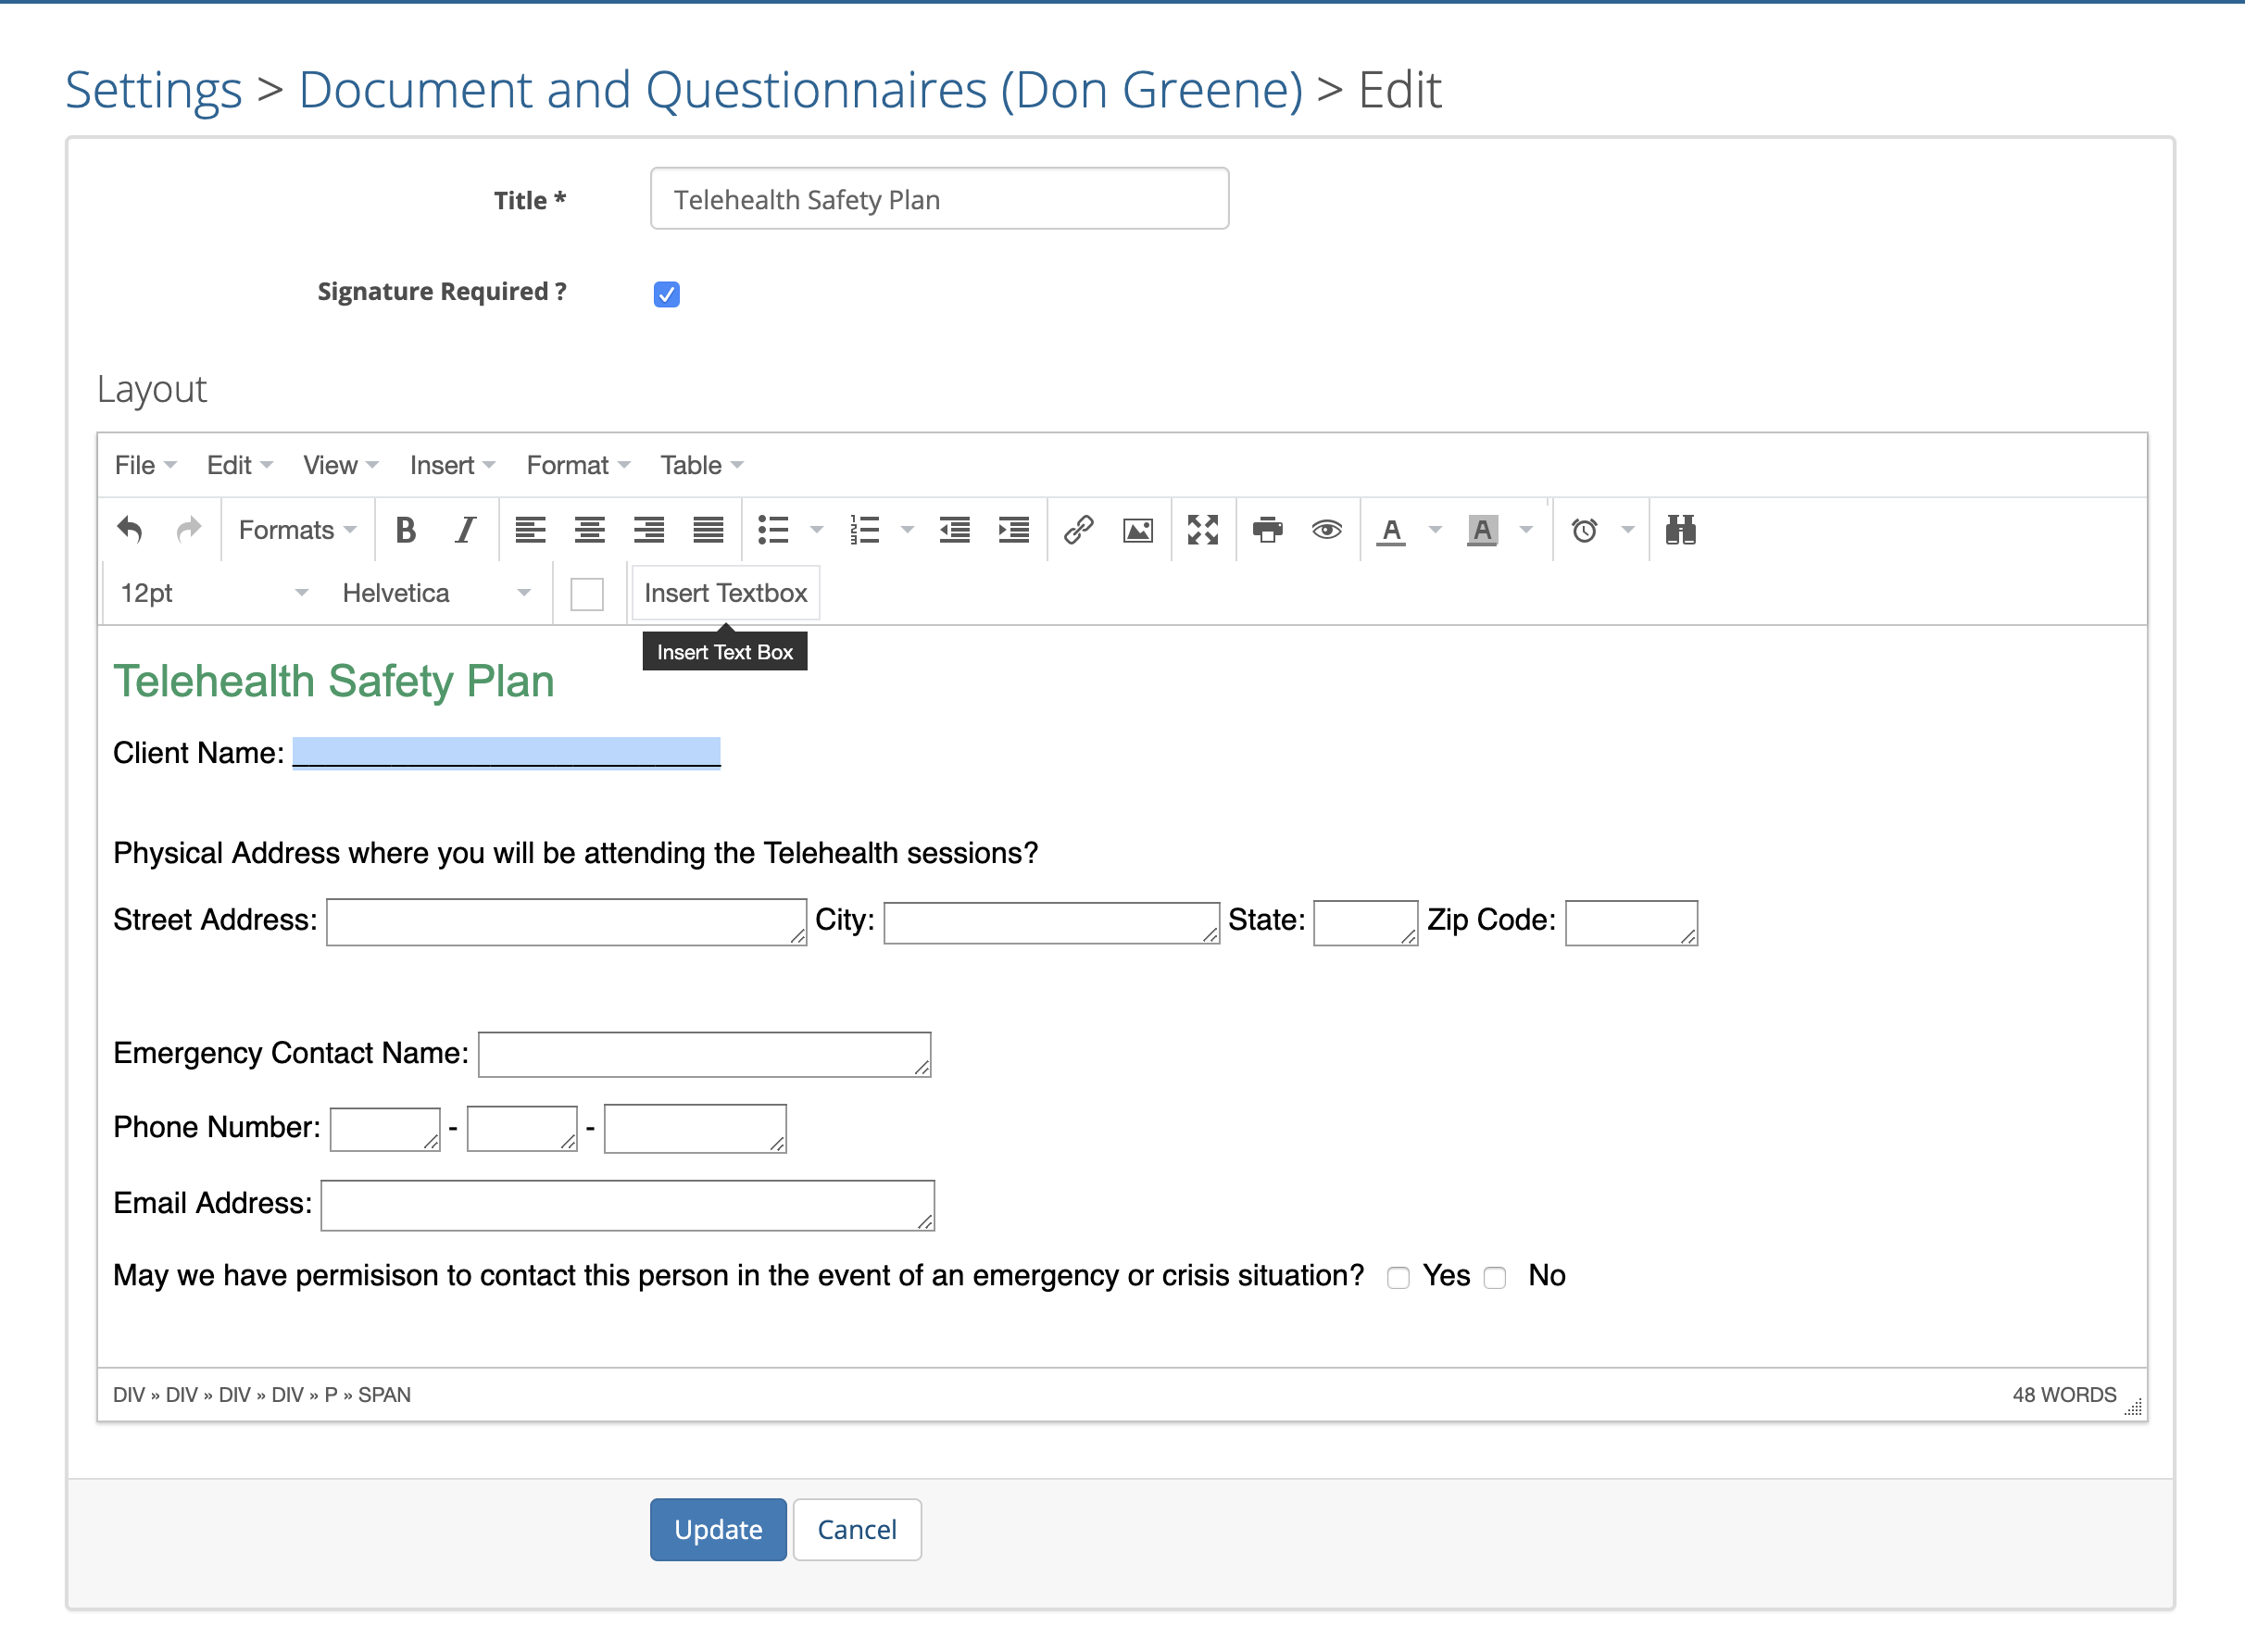
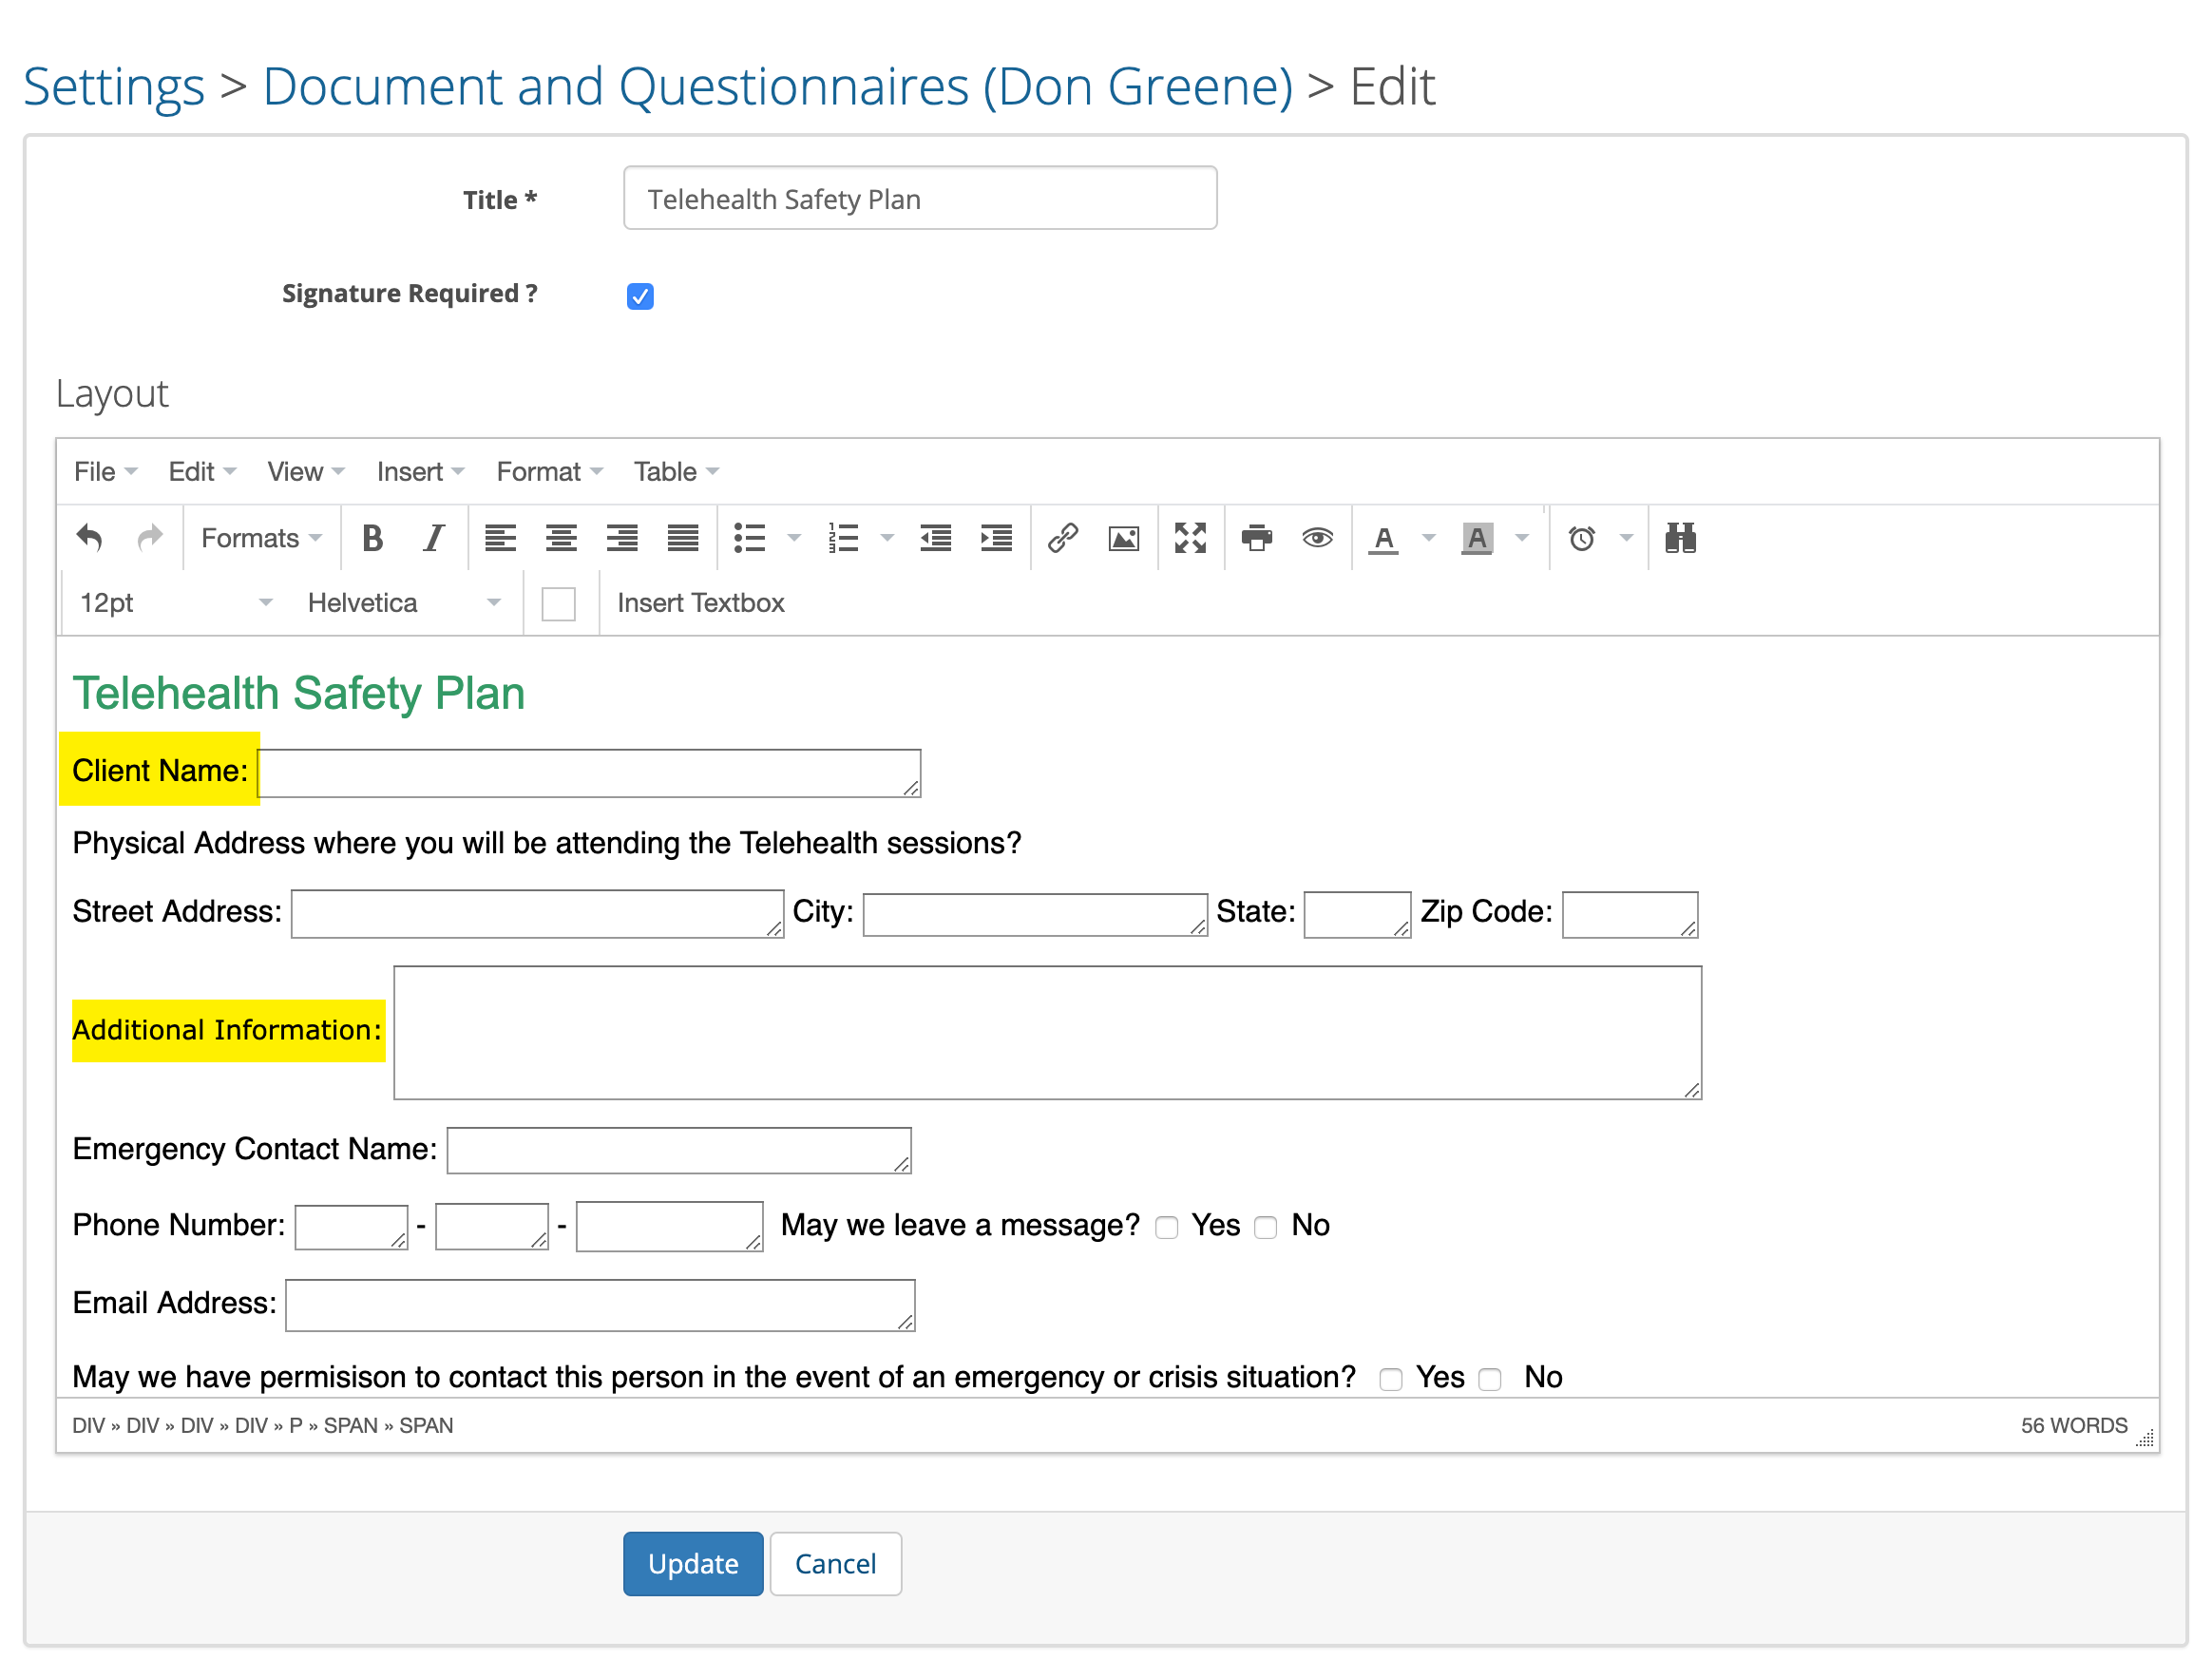
In the example below, we replaced the line with a text box. To make the box larger or smaller, click on the lower right hand corner of the box with your mouse and drag the corner of the box until it is the size you need.
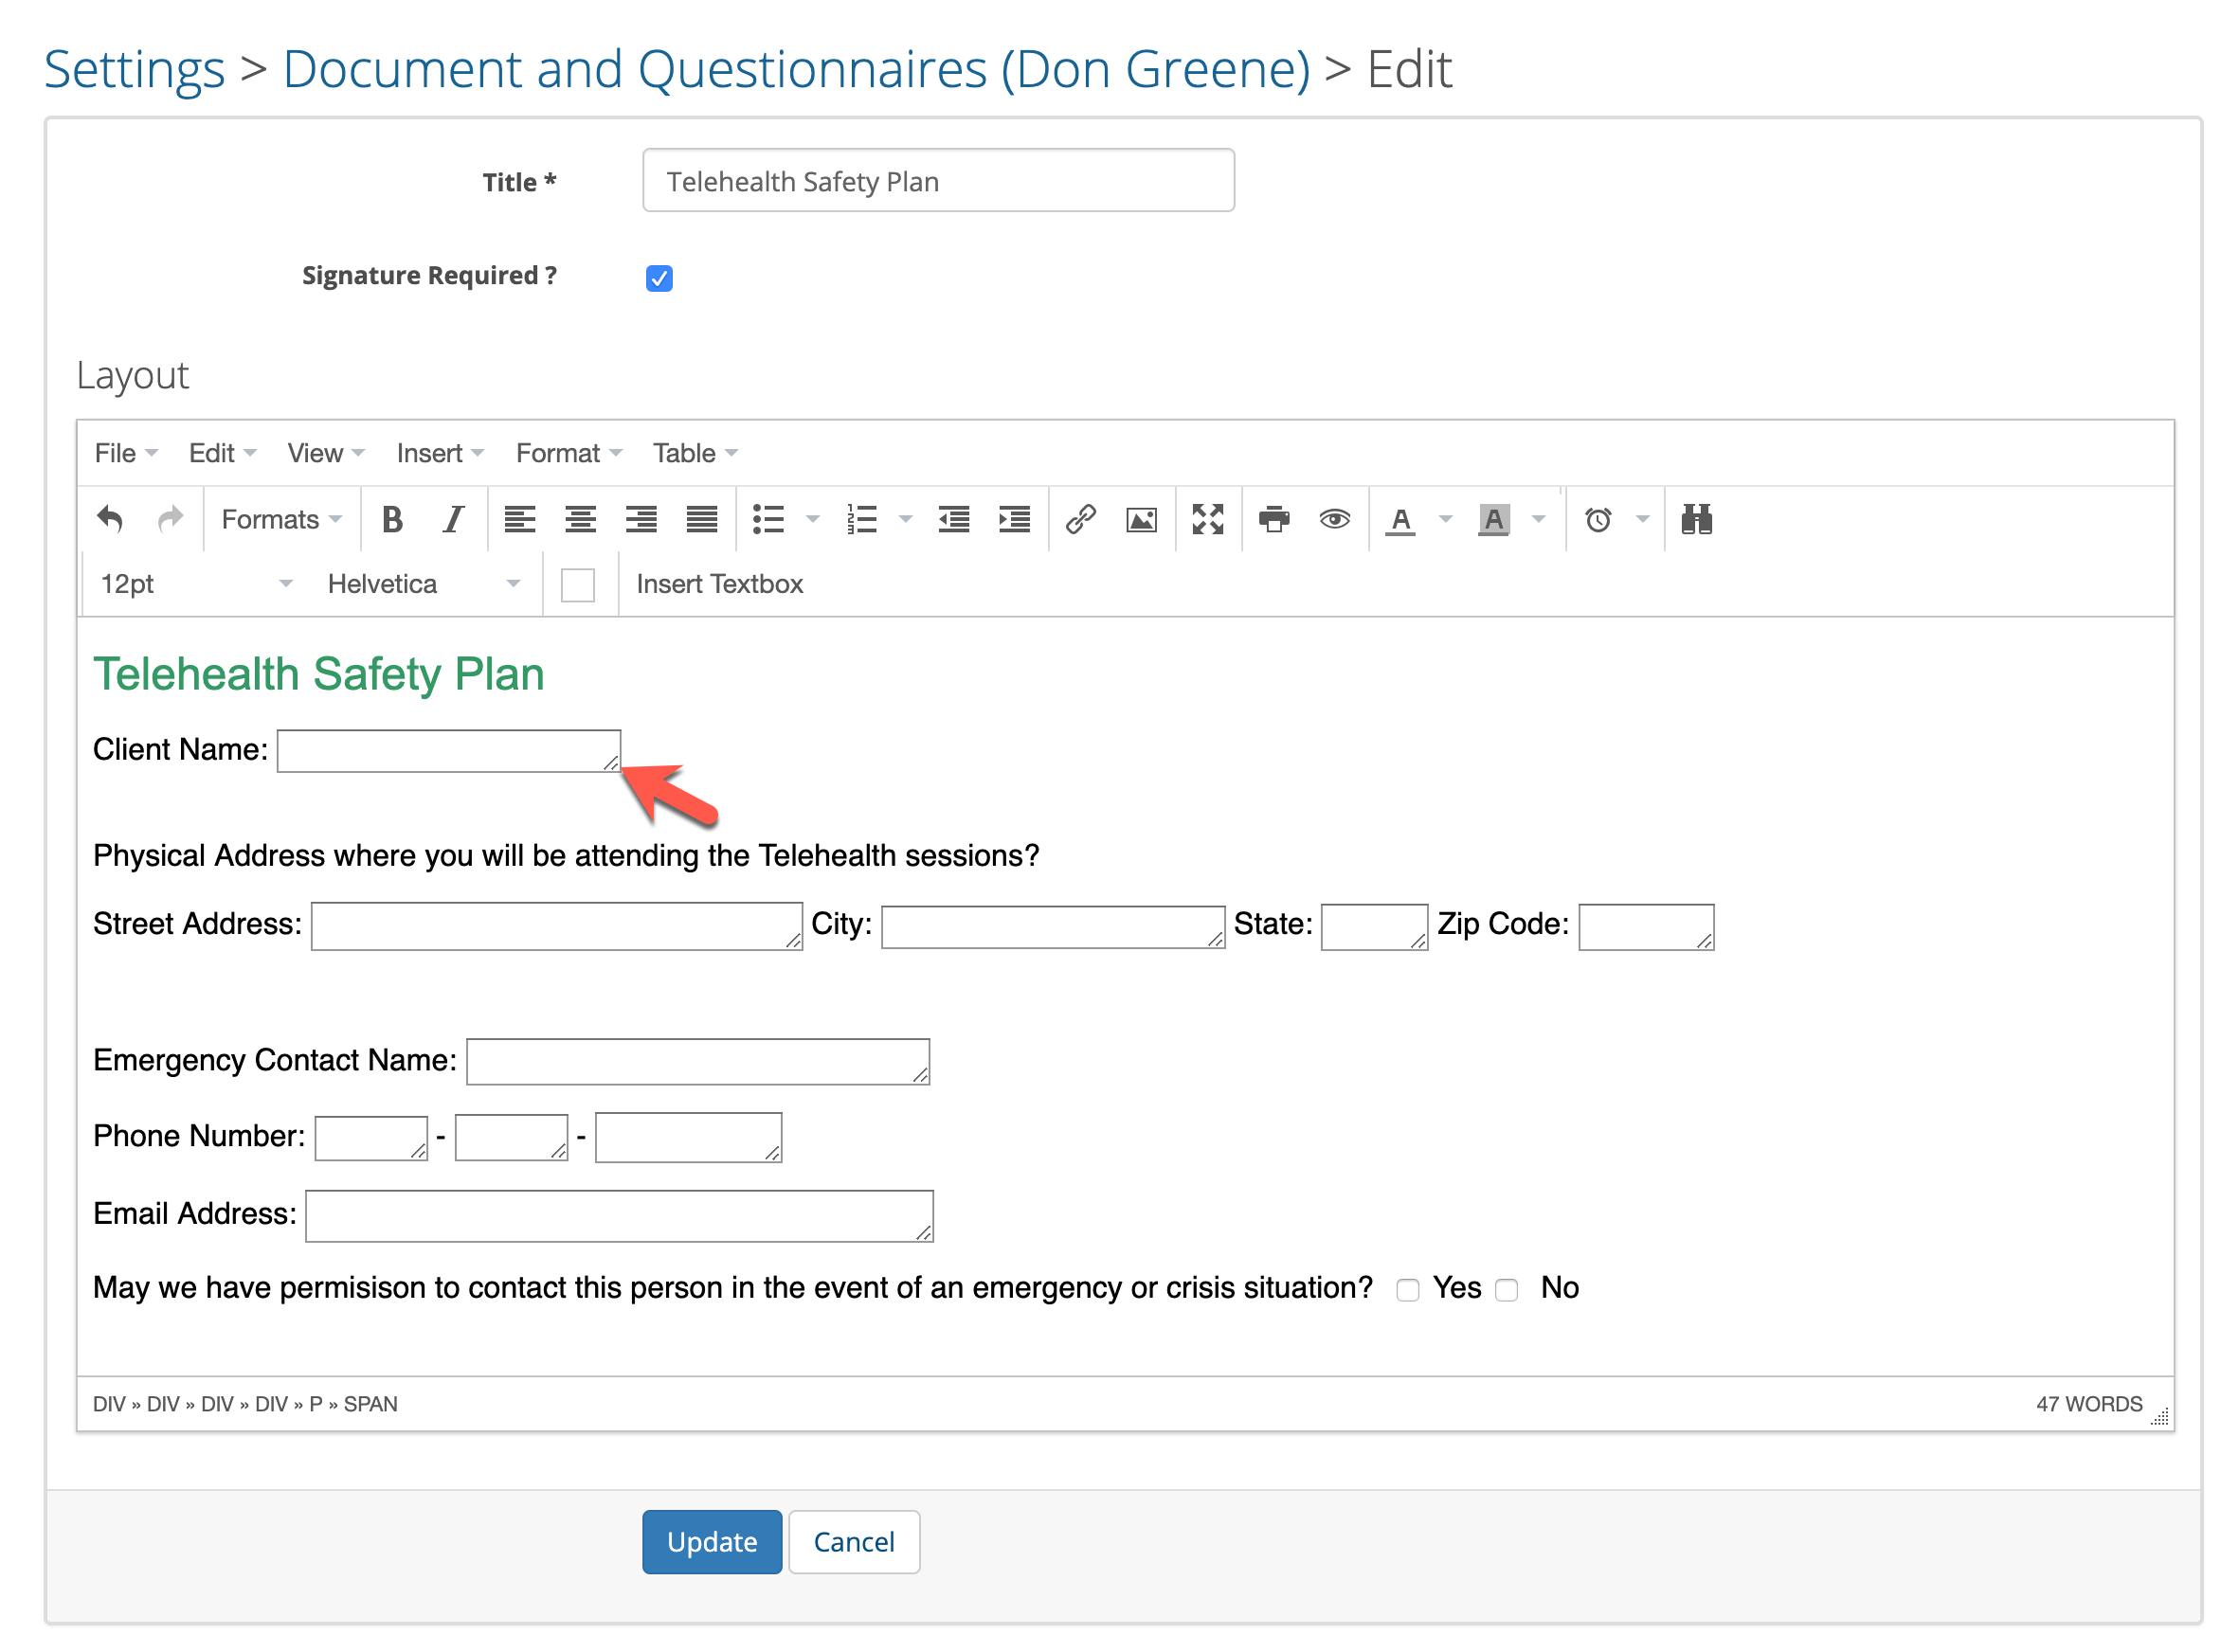
in the example below, the Client Name and Additional Information boxes have been stretched and sized the boxes to our needs.
Inserting Check Boxes
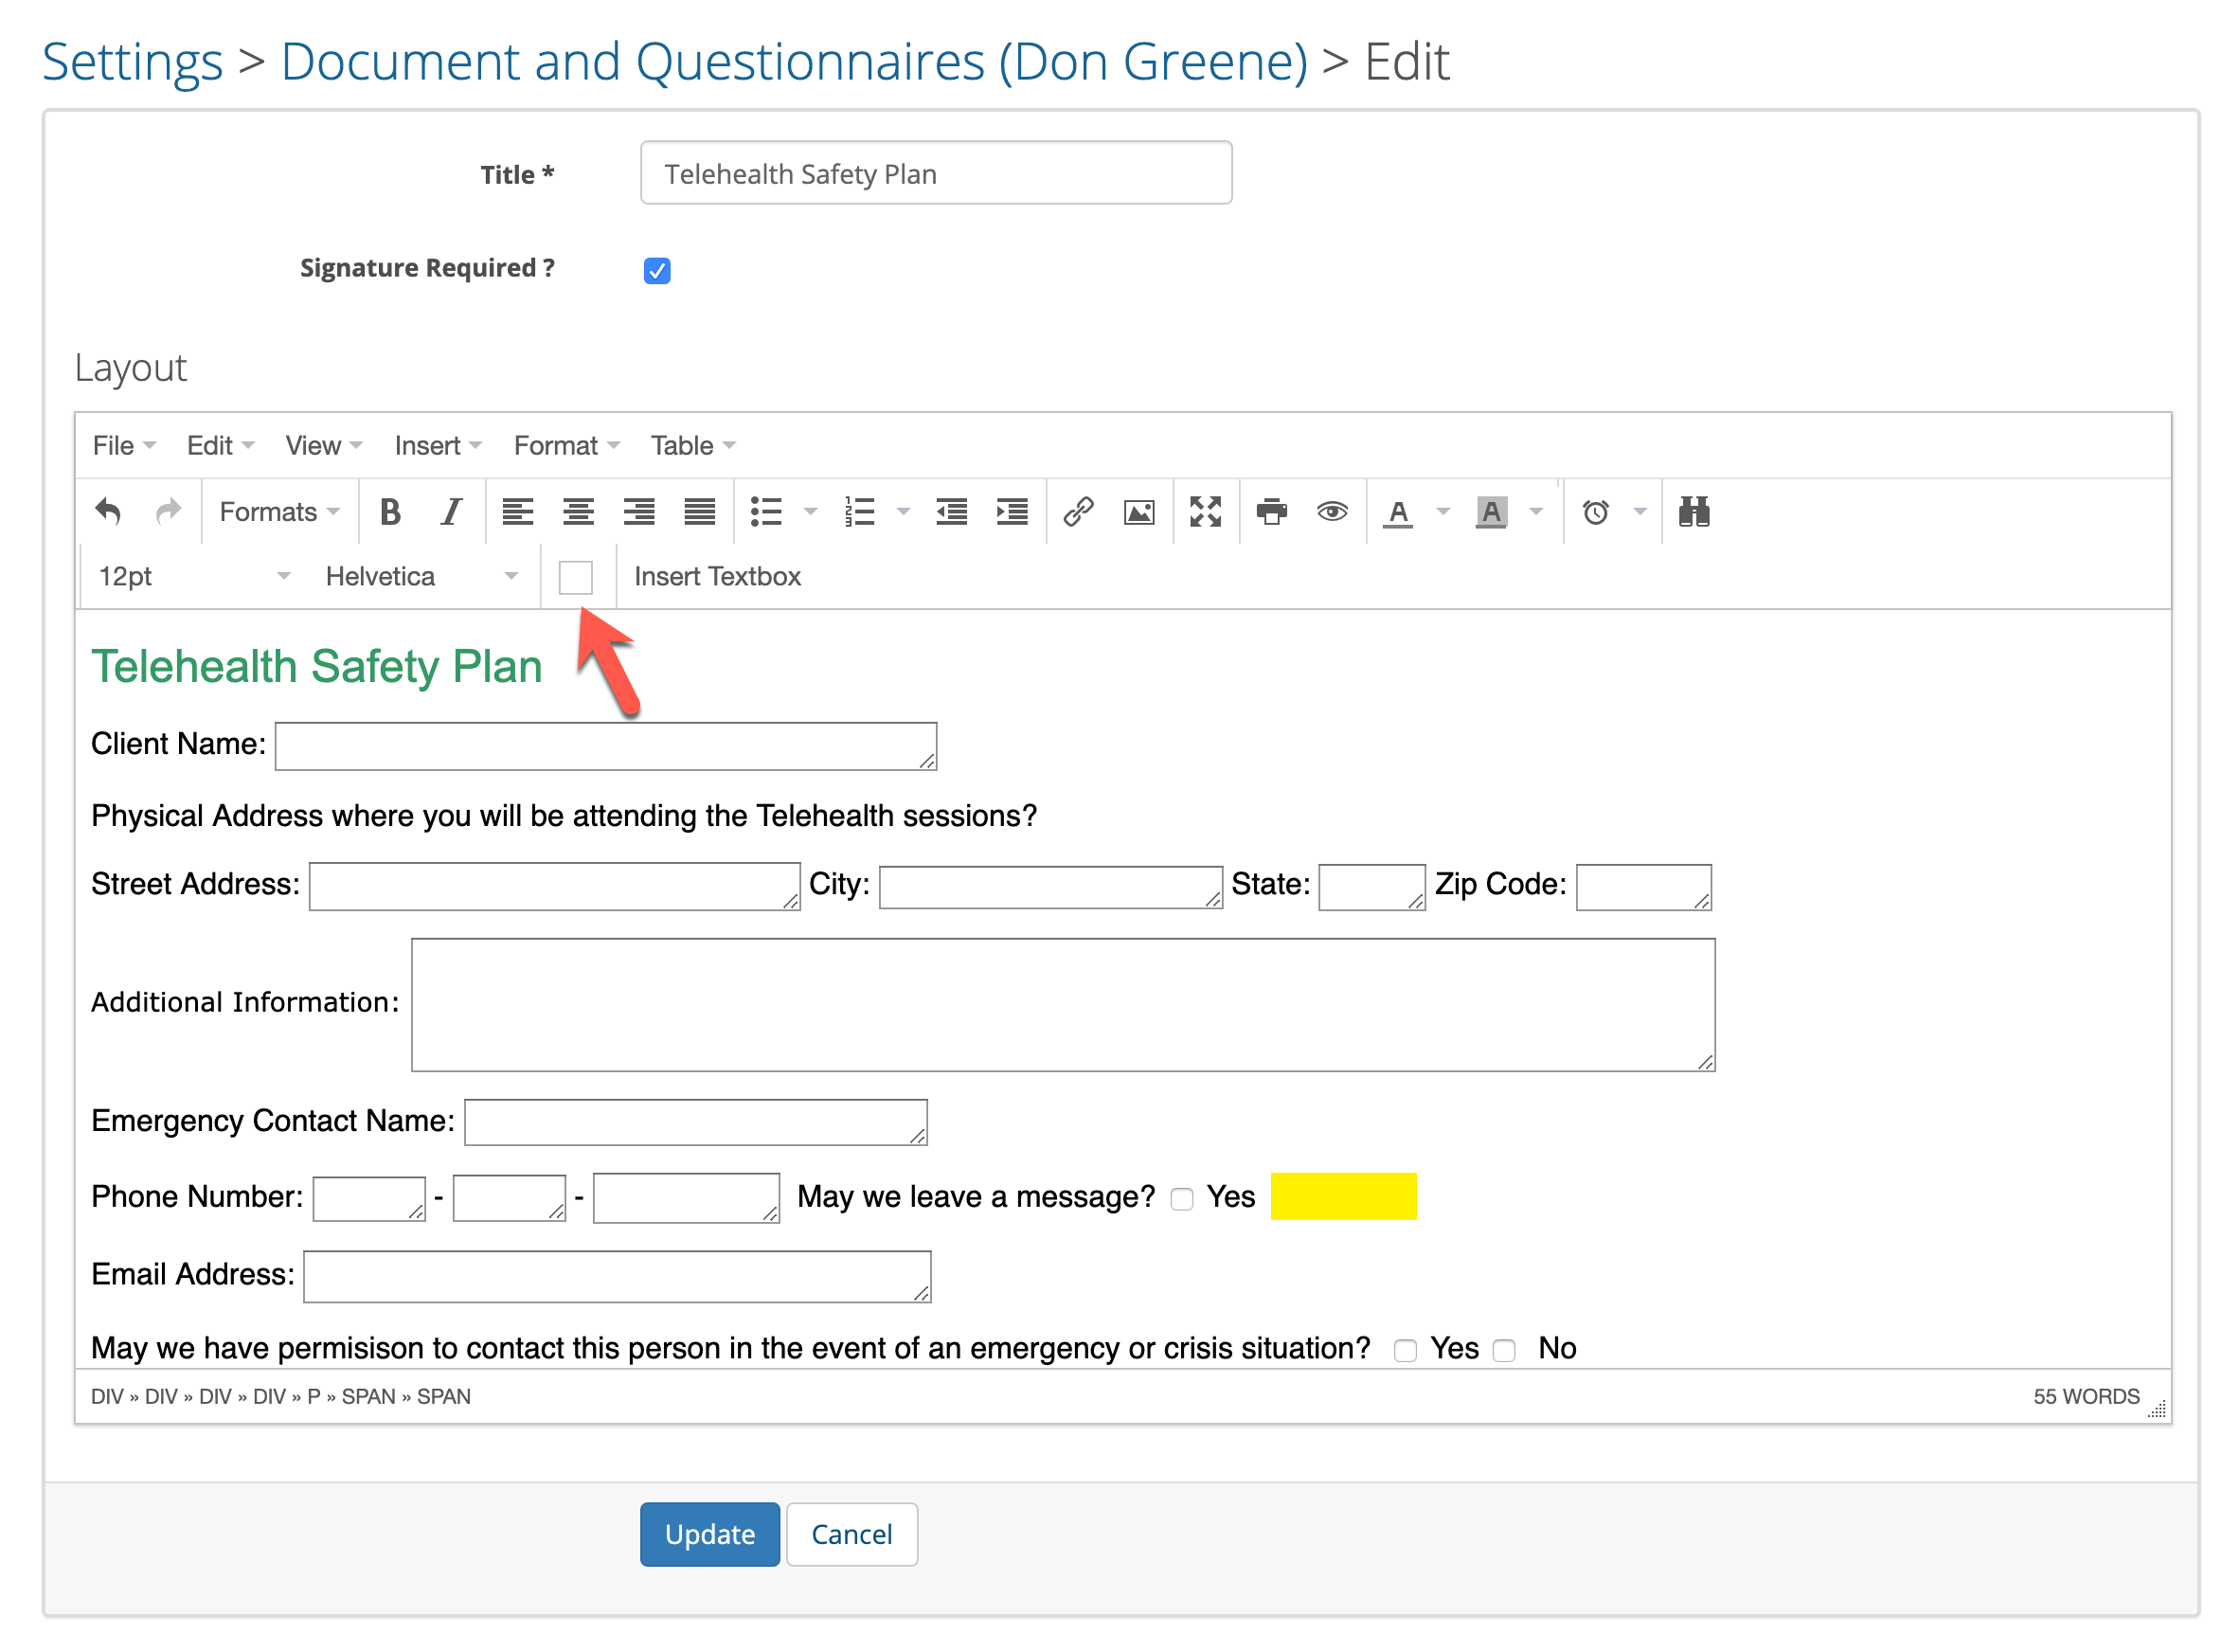
It is pretty easy to insert a Checkbox. Put you cursor at the location in the edit window where you need the check box to appear and then click on the Checkbox button on the tools bar.
It is pretty easy to insert a Checkbox. Put you cursor at the location in the edit window where you need the check box to appear and then click on the Checkbox button on the tools bar.
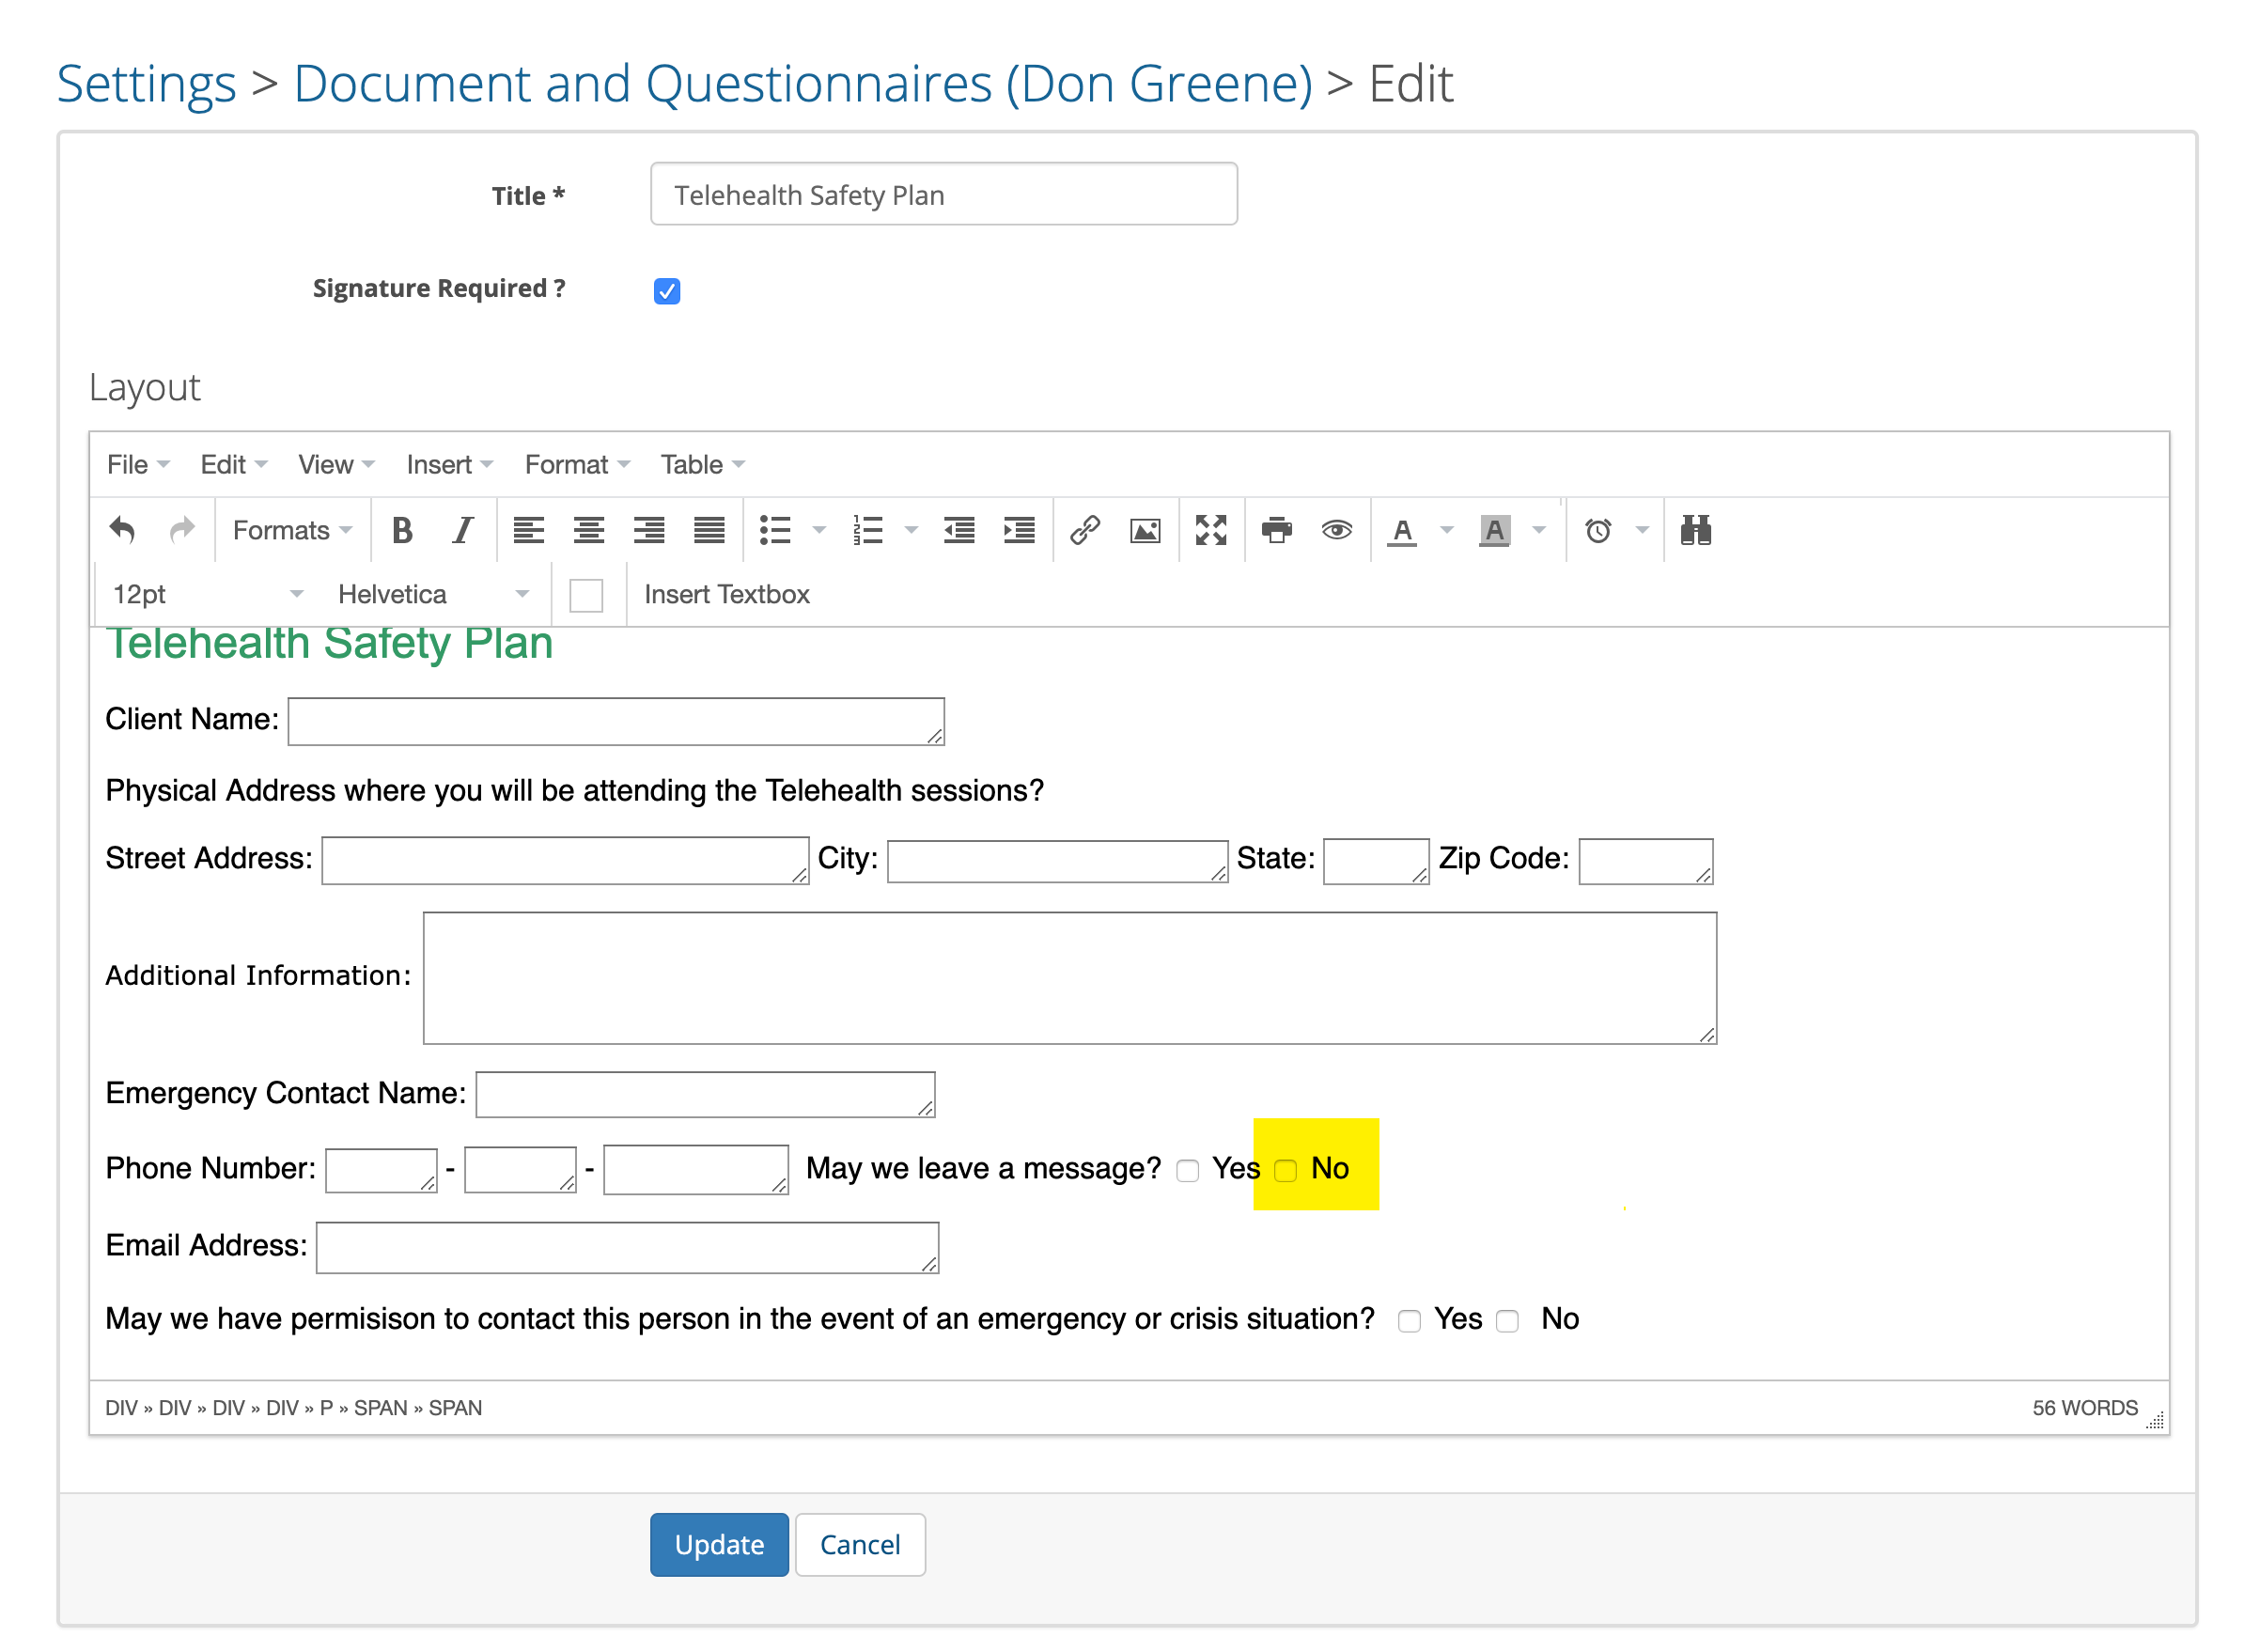
With the check box on the page, add the text label.
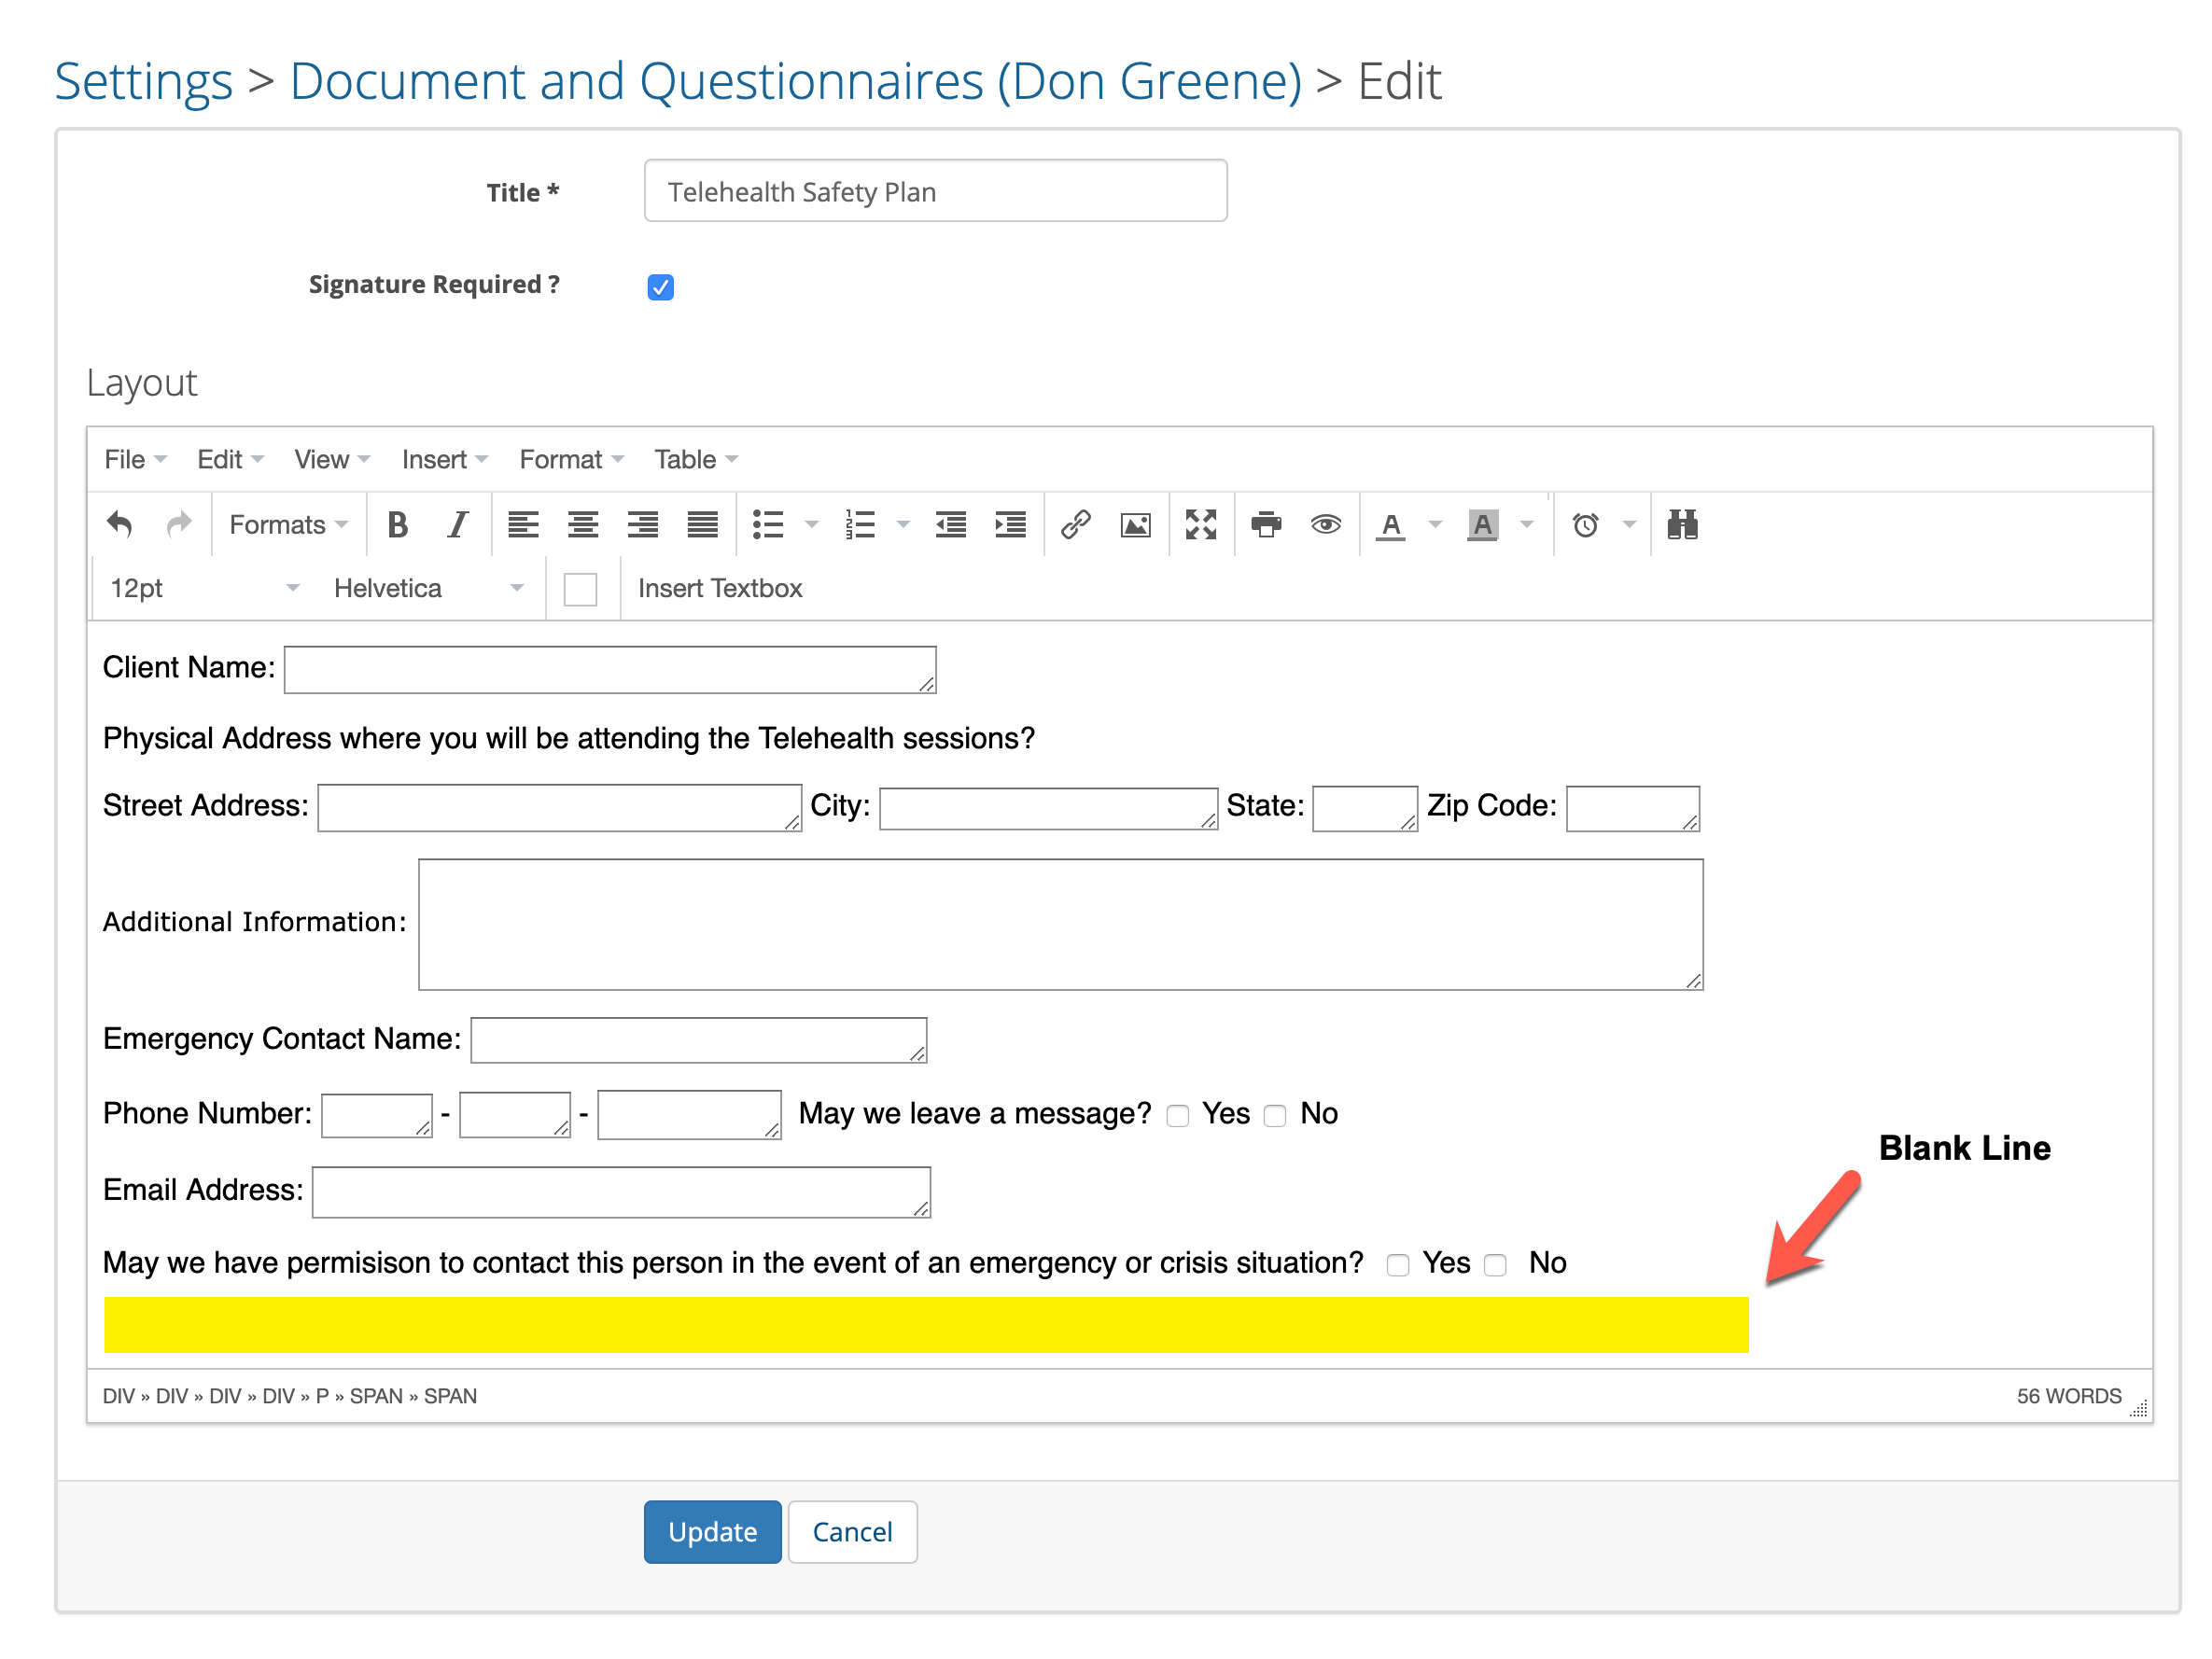
One last hint. At the bottom of your form, make sure there is one blank line on the form. This will ensure that your clients can scroll all the way to the bottom.
If you have an existing form and need help converting it to an online electronic format let us know. We and convert it for you for an extra hourly fee.