You can add a client’s appointment to your calendar in two ways:
- Click on an empty time slot on your calendar
- Click on the +Appointment in the Actions Menu
Click on the 2:00 PM slot on your calendar for example
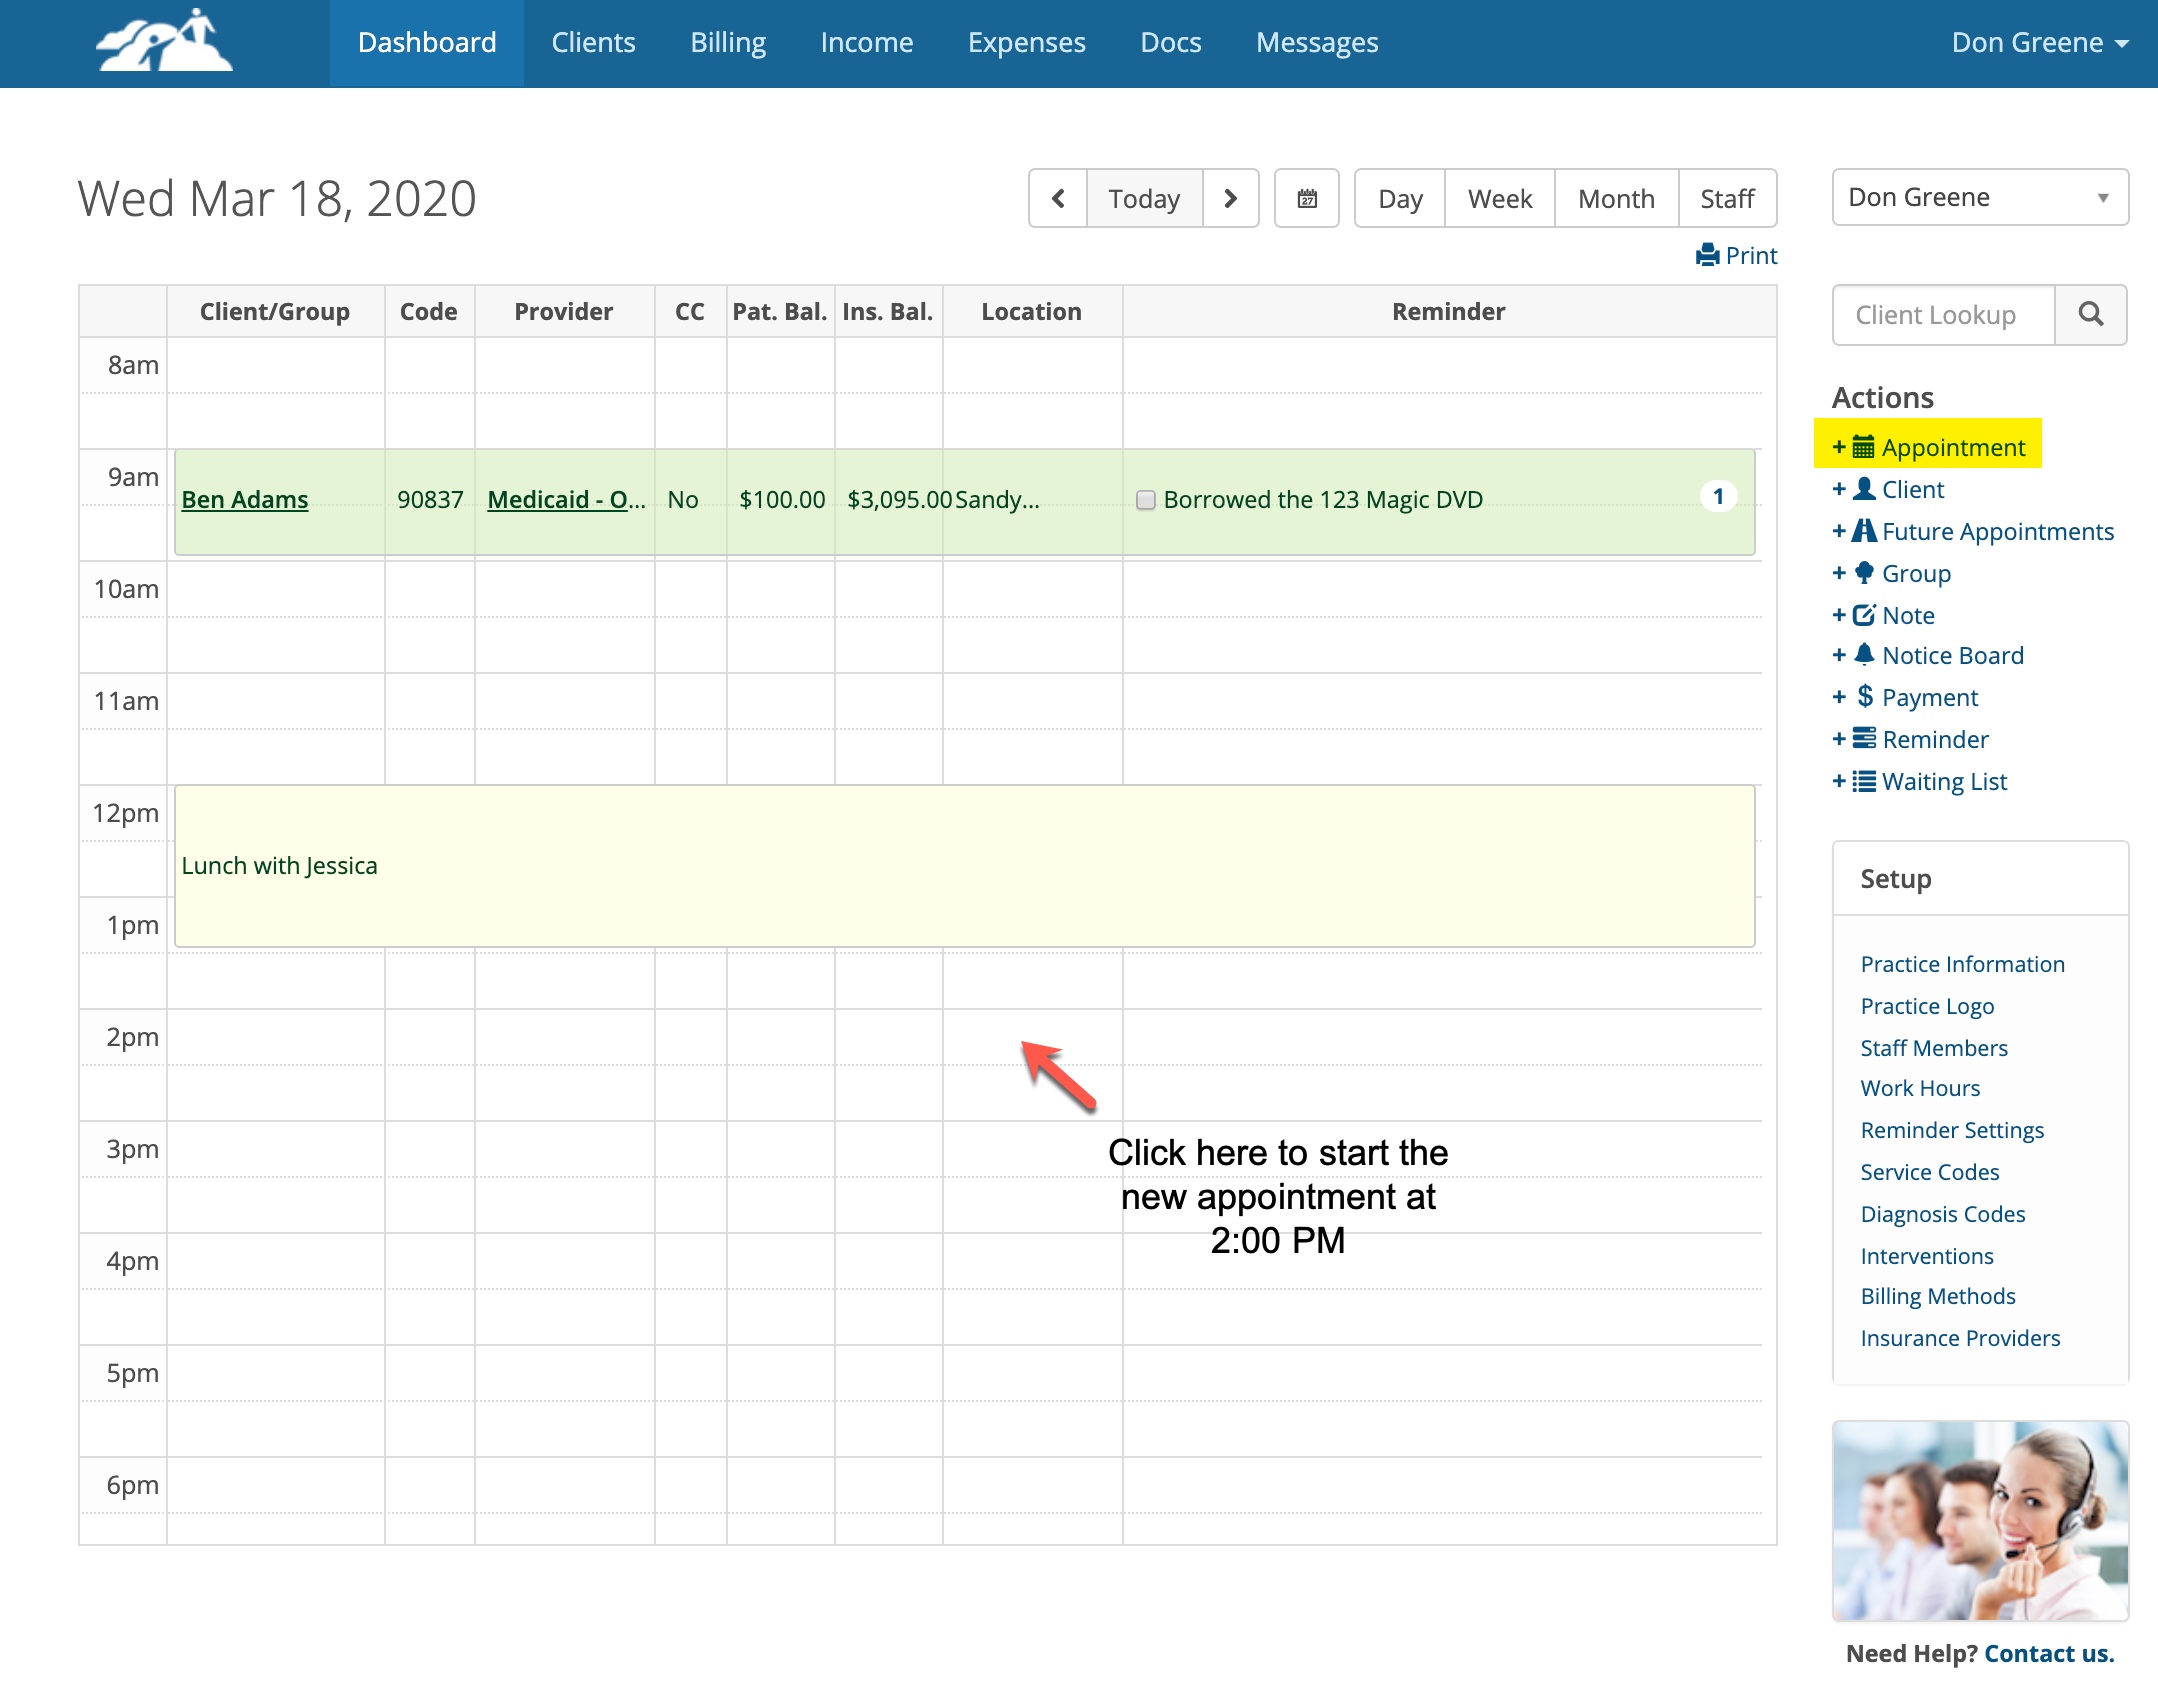
When you click on that empty time slot on the calendar the new appointment window will open. Select the appropriate options and save it.
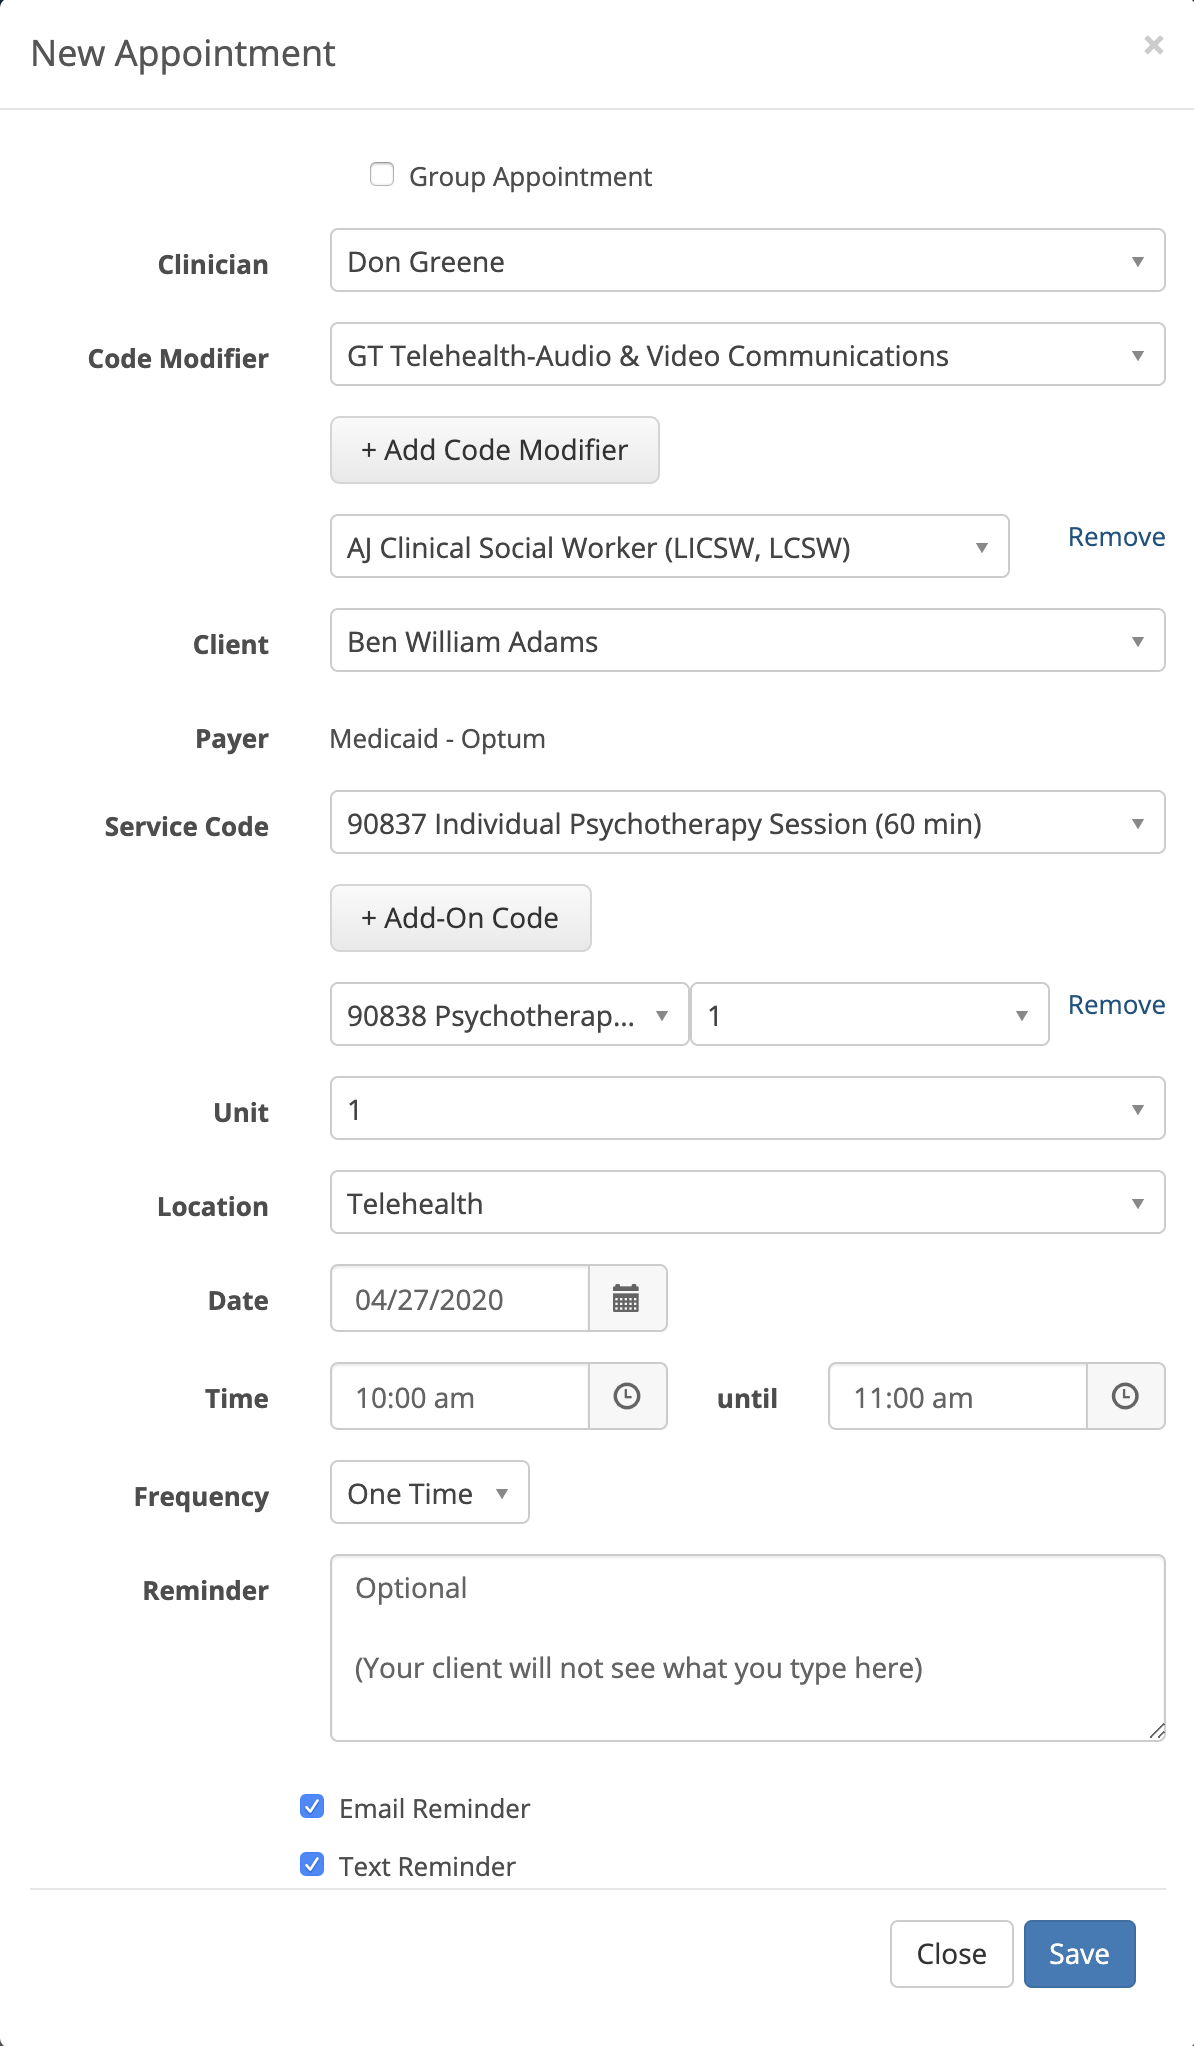
- Select the clinician (if there is more than one in the practice)
- Select the Code Modifier(s) if this feature is enabled. In the example above the appointment is scheduled as a GT Telehealth session with an added AJ modifier. If you don't have Procedure Code Modifiers enable in your master settings these drop downs will not appear.
- Select the client from the drop down.
- If the client has insurance the name of the insurance company will show underneath the client’s name. If the client pays out of pocket it will say Private Pay under the client’s name
- Select the Service Code you are performing. You can add multiple service codes for the appointment by clicking on the +Add-On Code button. In this example the primary service is a 90837 and a 90838 is a 30 minute add-on.
- The Unit dropdown defaults to 1. Most of the standard mental health services get billed as 1 Unit. Some insurance providers require you to specify a different value. For example, if I billed Medicaid for a 90791, I would need to specify 6 Units to get paid the correct dollar amount for the session, but for Aetna I only need to bill 1 Unit. Please check with your insurance provider and/or billing manager to understand how many units need to be specified when scheduling certain service codes
- Select the location where the session will occur if you have more than one. You could have a location where you physically see clients and a Telehealth location for audio & video interactive communications. In this example the appointment will be a Telehealth session.
- Select the correct day and time. If you clicked in an empty time slot on the calendar, the date, start time and ending time will be selected automatically for you
- Select the applicable frequency option. You are restricted to 18 months in advance for future recurring appointments
- Check to make sure the appointment reminders are check as appropriate if the client has been configured to receive text or email appointment reminders. Those boxes will be checked automatically if the global default is set in our Clinician Settings. Otherwise you can check the boxes manually so they receive the reminders
- Click Save when done and the appointment will be added to your Dashboard Calendar
- When the appointment is saved, the person's name who created the appointment will be shown in the appointment window. This could be any staff member who has rights do create appointments or the client themselves if created via the client portal self scheduling feature.
If you get a message that this time or date is not available, check you Work Hours settings to see if they are set improperly. You can adjust them and try creating the appointment again. The system will also warn you if you try to book a new appointment for a time and day or a service location where an appointment already exists. You can choose to override the message if you wish.