You can create one chart for couples and partners, manage their notes, documents, appointment reminders, messages and access to the client portal.
Here are some things to keep in mind when using this feature:
1. It is assumed that both people will attend their sessions together. All session notes for the couple or partners will be saved in the one chart. (If the people will be seen separately and you wish to keep their records completely separate, do not use this feature, create two charts, one for each person)
2. Each person can have their own Client Portal access to fill out documents and questionnaires and store them in the chart. The documents and questionnaires each person creates are confidential and can't be seen by the other person.
3. Each person can use the Messaging feature to interact with the Clinician in a private manner.
4. You can send text and email appointment reminders to one or both people for their appointments.
5. On your main clients page, the main person in the chart will be listed and the partner will also be listed. In the second column on the clients chart there will be a "Yes" next to the partner indicating they are a partner and there is information on them.
6. Adding partners does not count as an active client. Only the main person in the chart does.
Creating a Couple or Partner Chart
Click on + Client on the Dashboard or on your Clients page.
Add the first person on the Client Information page like you normally would.
If you wish to send appointment reminders to this person add their mobile phone number and email address.
Click the Save button. The documents and questionnaires window will now appear. Check the boxes next to the items you wish to send to this person to fill out. The first person will then receive an invitation to the client portal to create a username and password and fill out the documents and questionnaires you just sent.
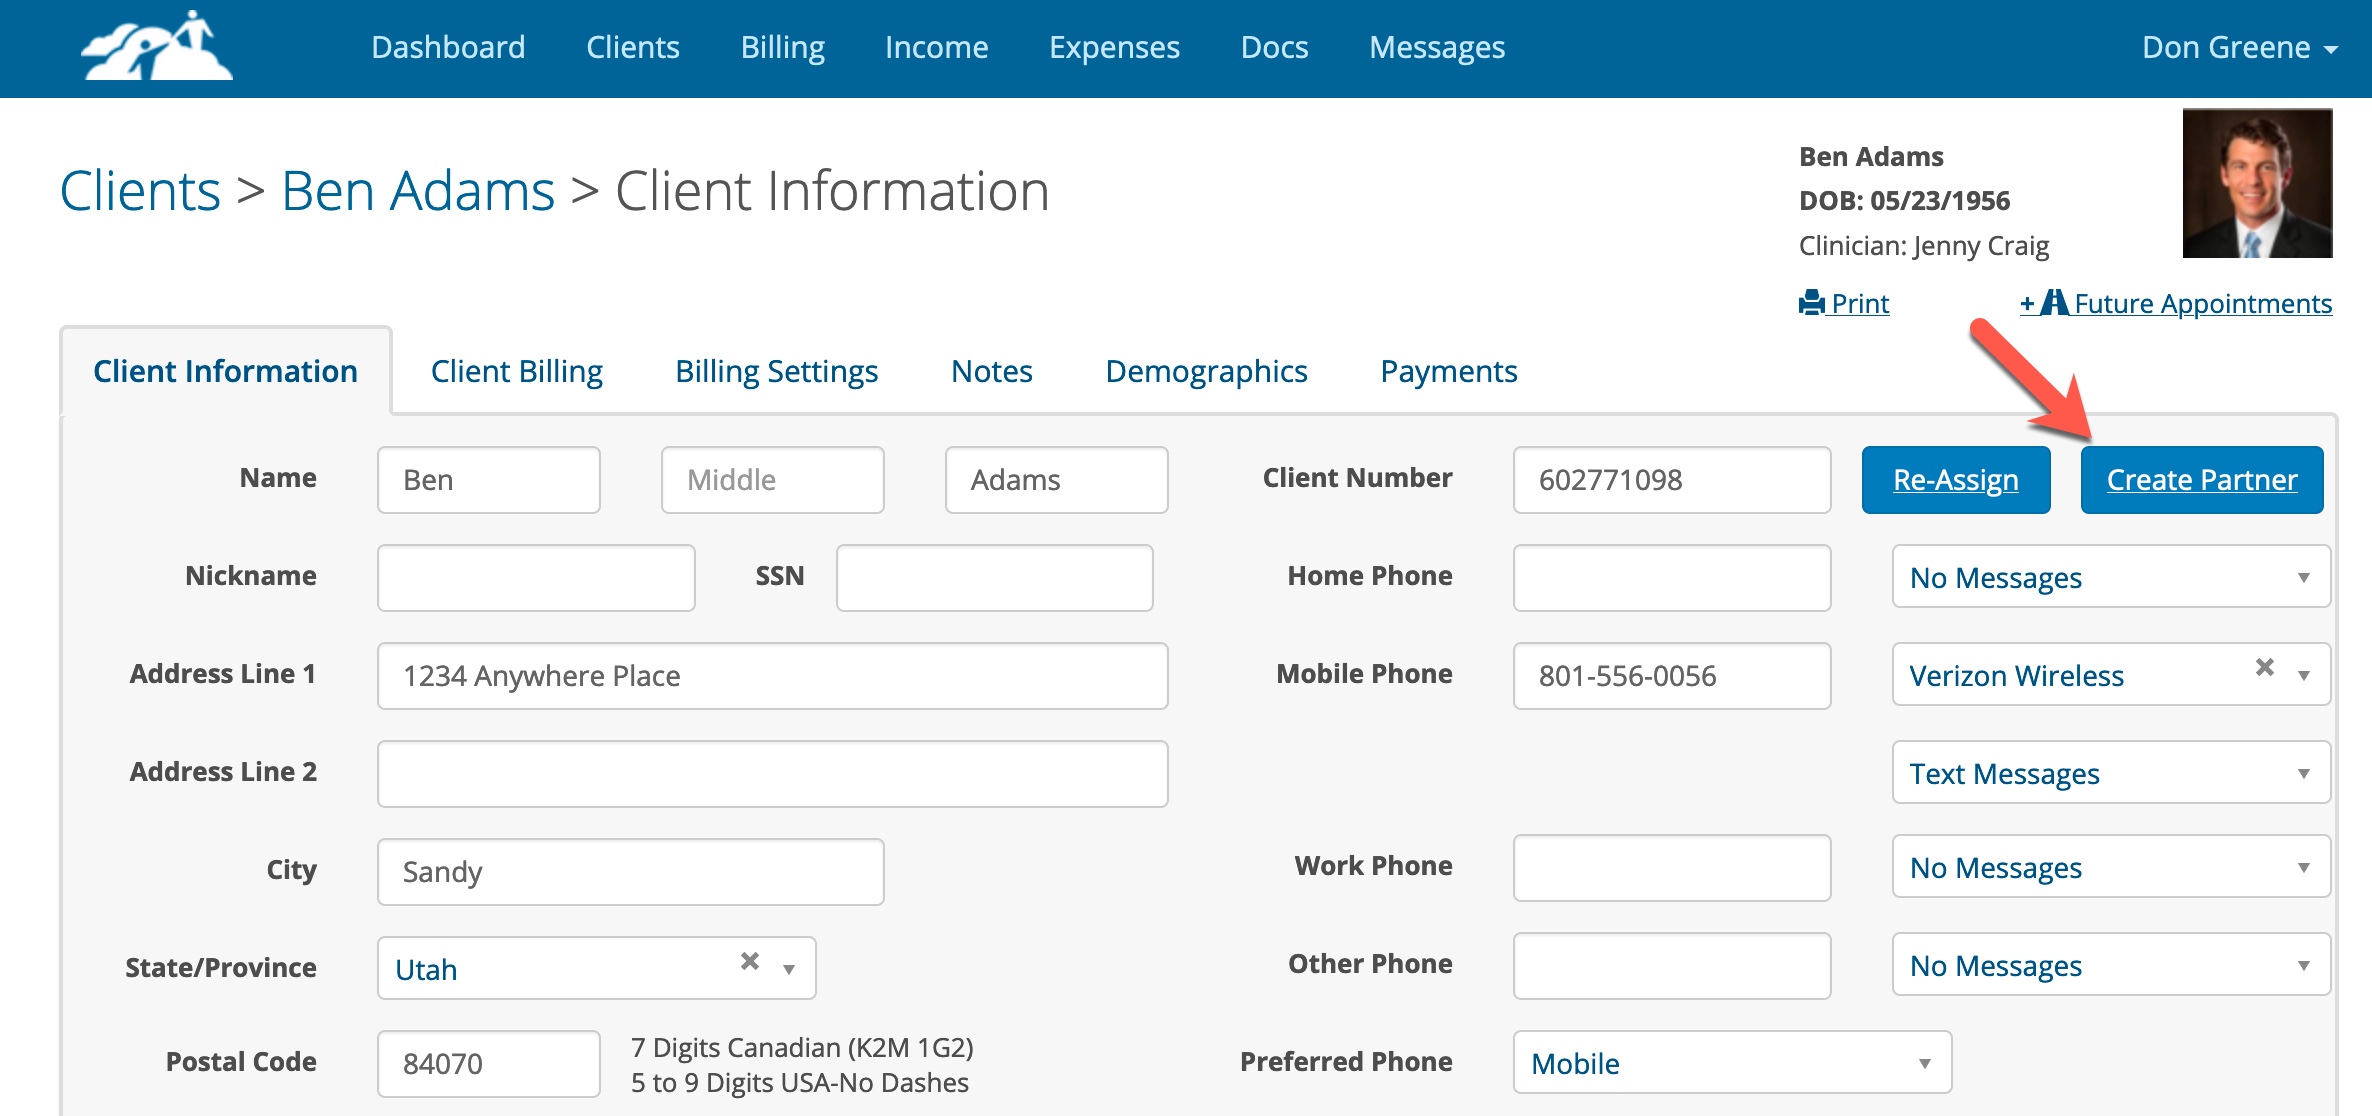
Add the second person by clicking on the Create Partner button shown below.
On the next page fill out the partners information. The recommended areas are highlighted below:
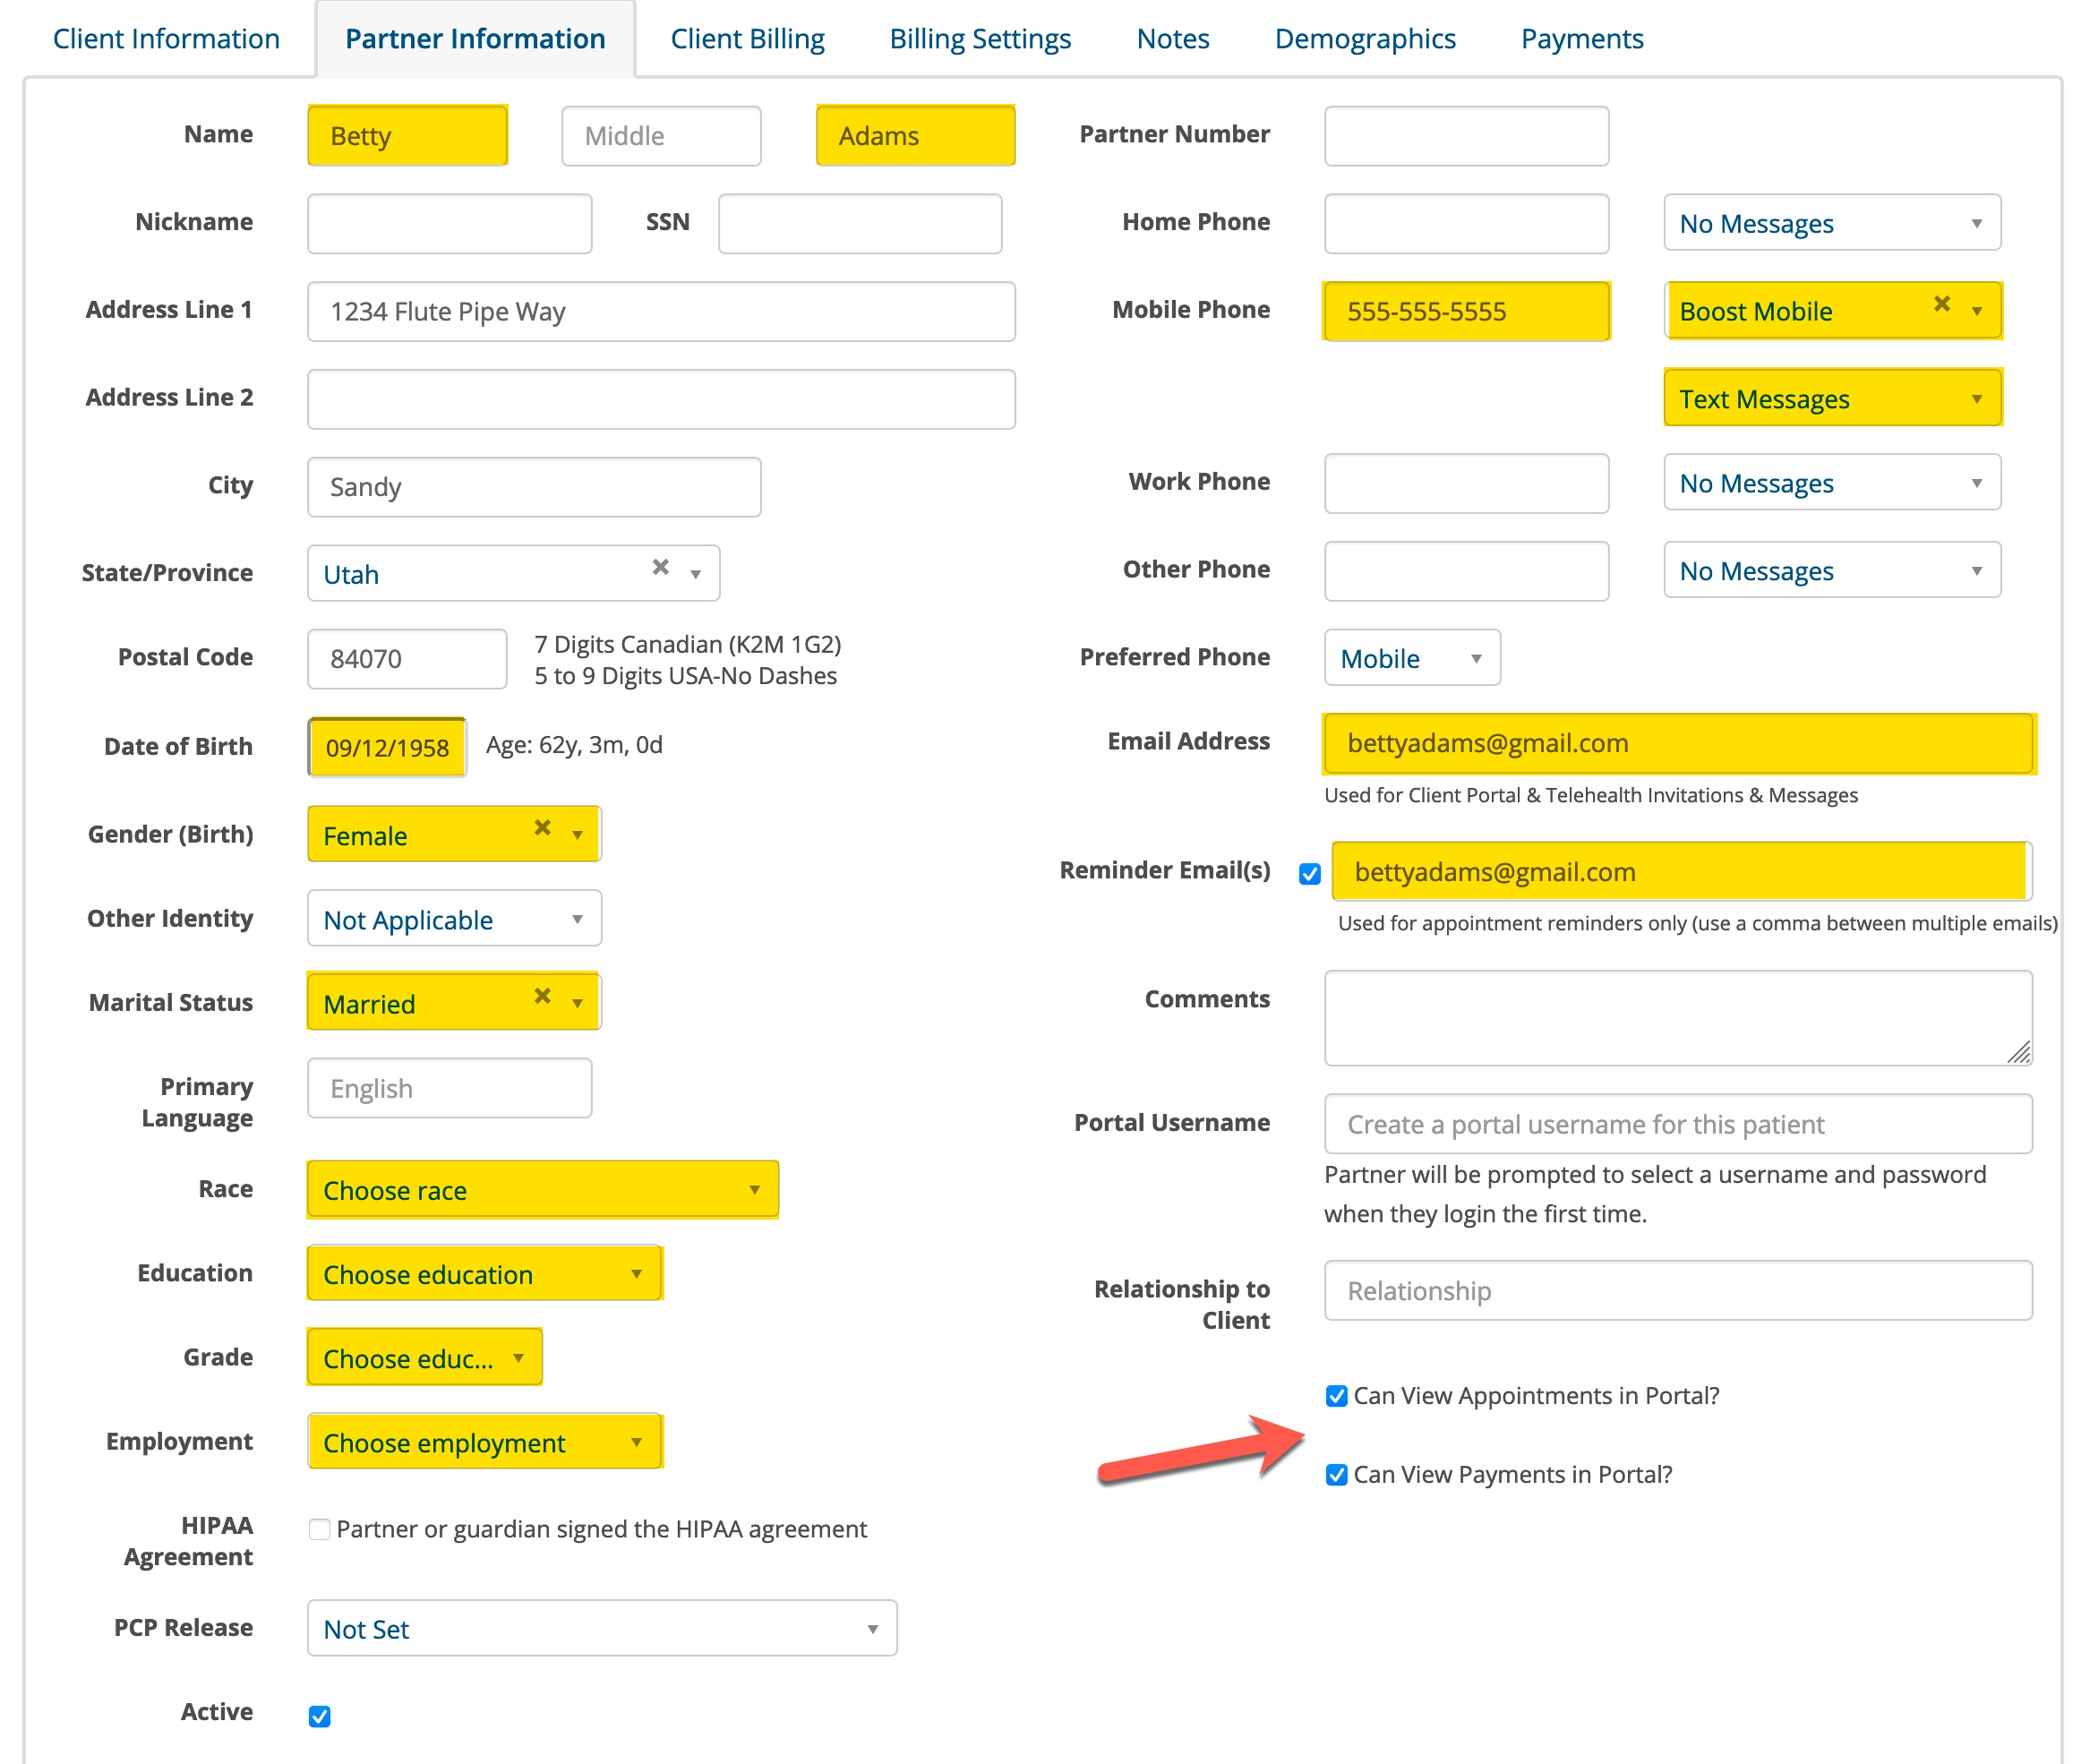
If you wish to send appointment reminders to this person be sure to add their mobile phone number and reminder email address.
You can give the partner access to view the appointments and payments that get entered into the system for the couple or partners. The partner has this access by default (see red arrow above). If for some reason the partner should not have access to this information uncheck the boxes.
Click the Add Partner button when done.
The following window will appear so you can send the Second Person their own set of documents and questionnaires to fill out. Check the boxes next to the applicable items and click the Send Invitation button.
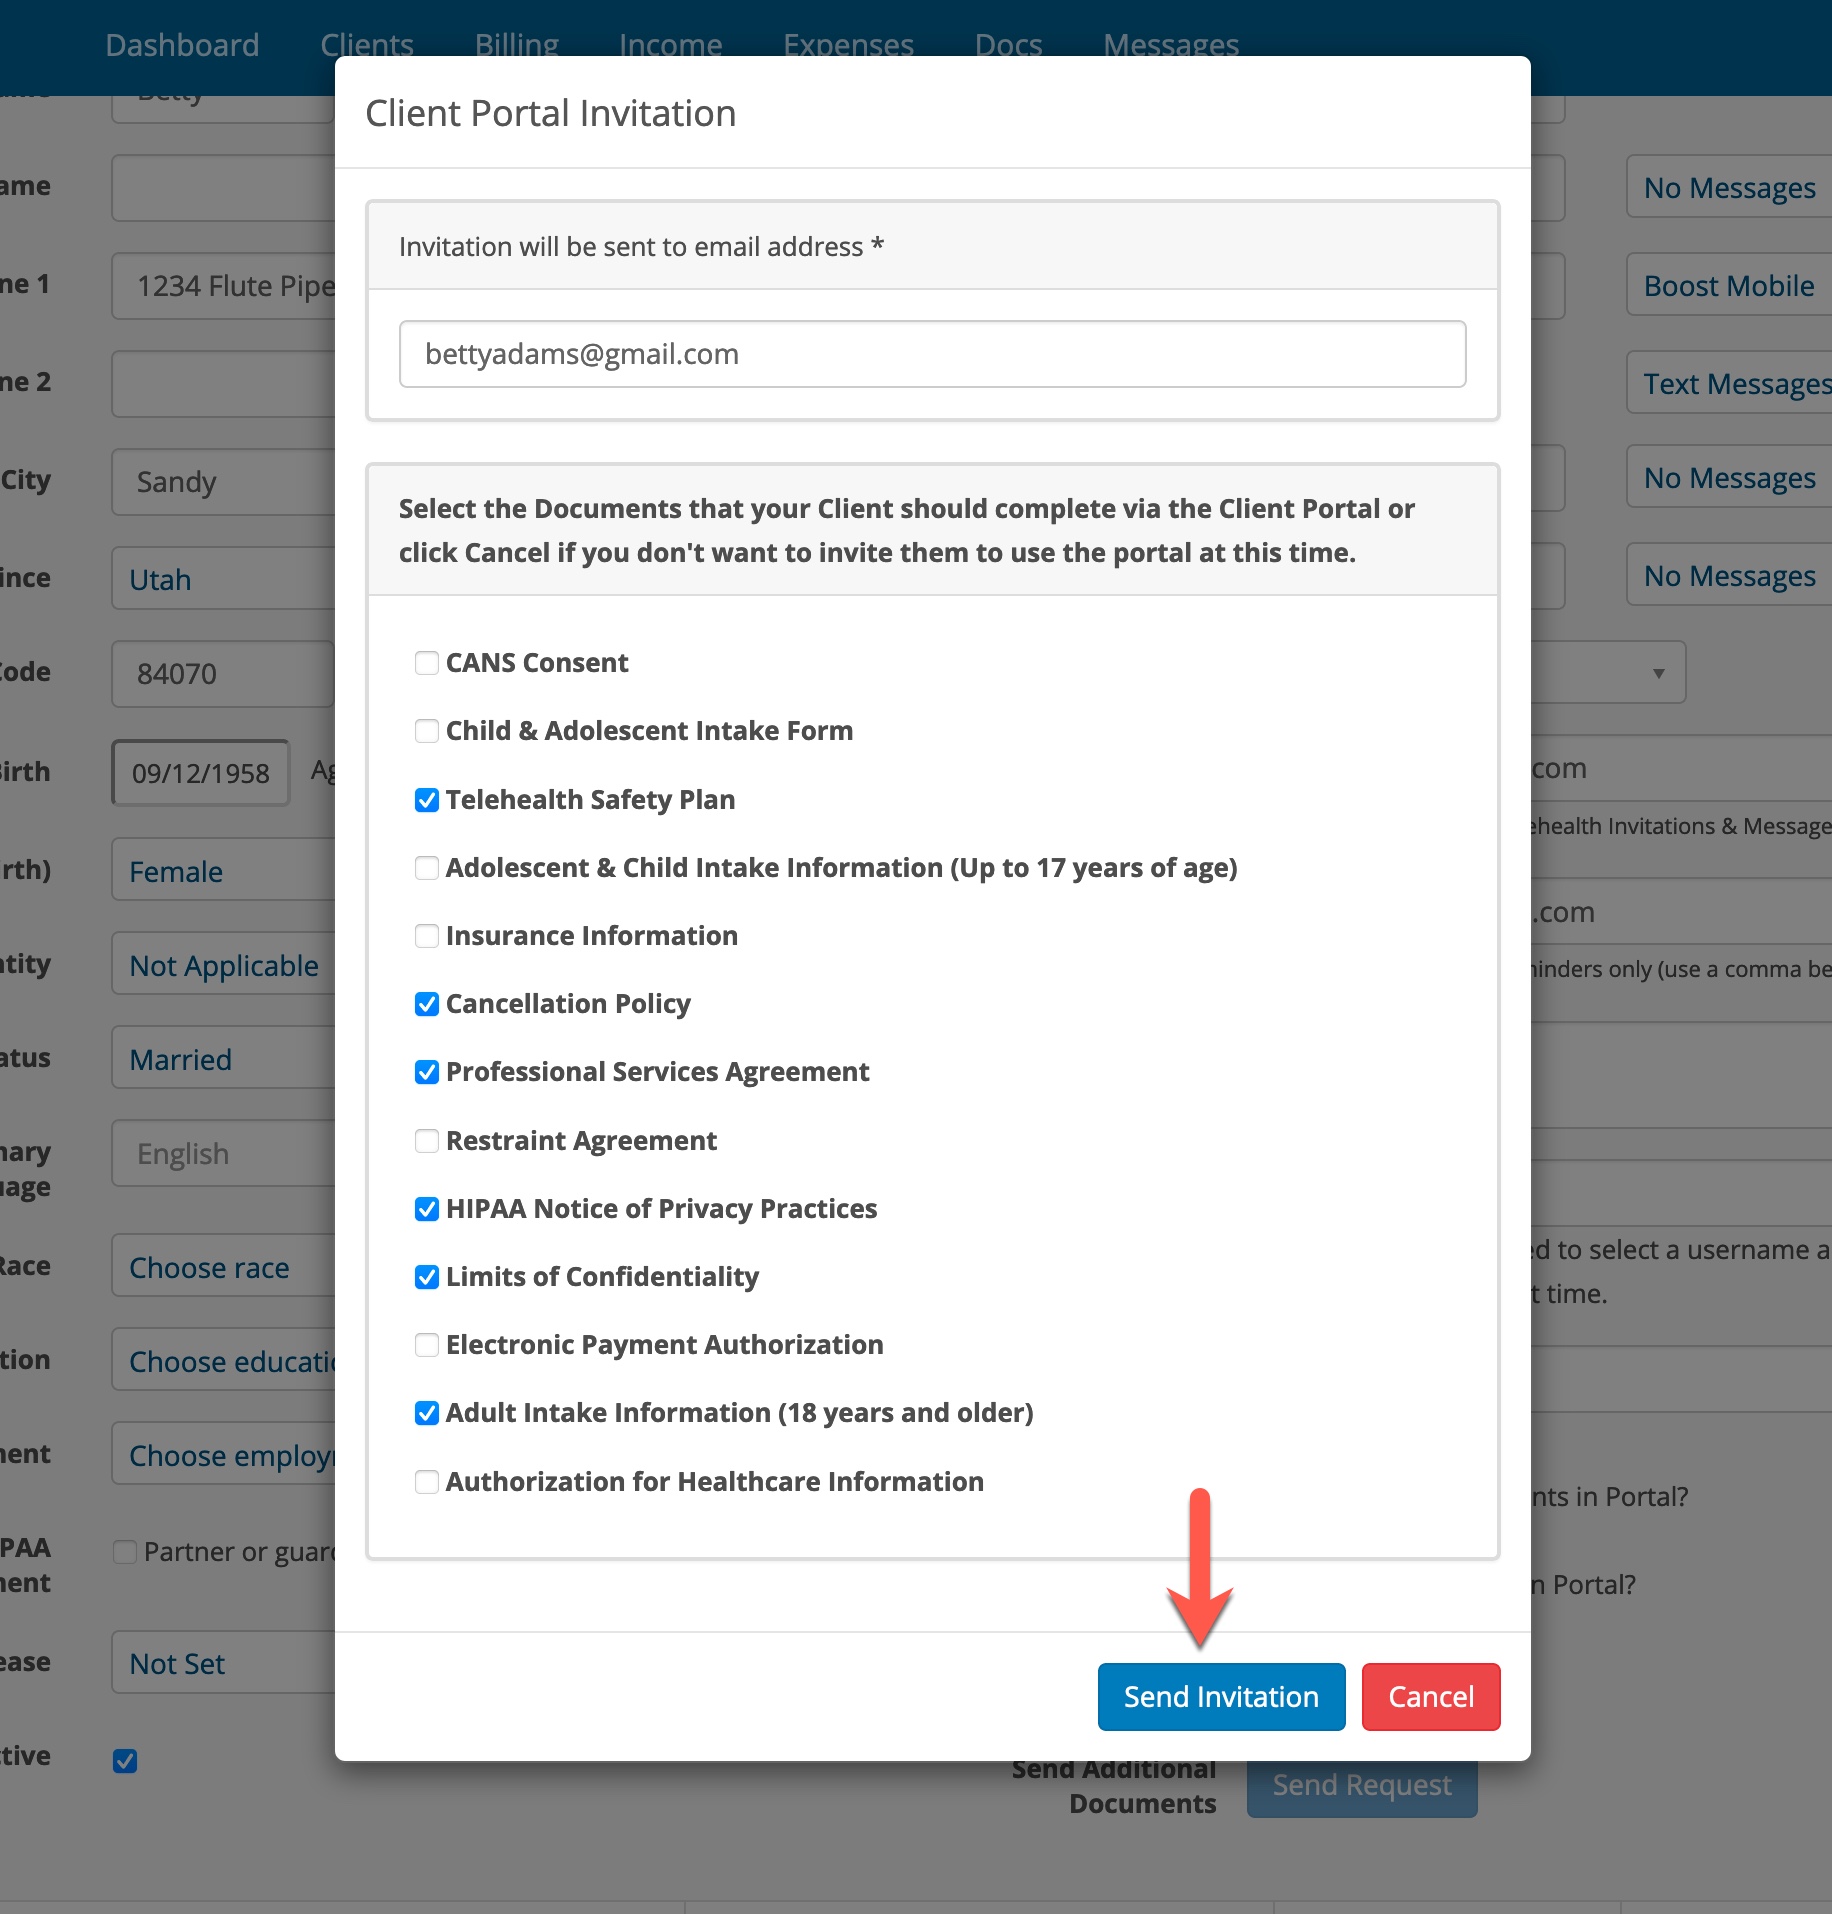
The second person will now receive an invitation to the client portal to create their own username and password and complete the items you sent them.
Completed Documents & Questionnaires Location
When the couple or partners complete their own set of documents they get save automatically at the bottom of the Notes page in their chart.
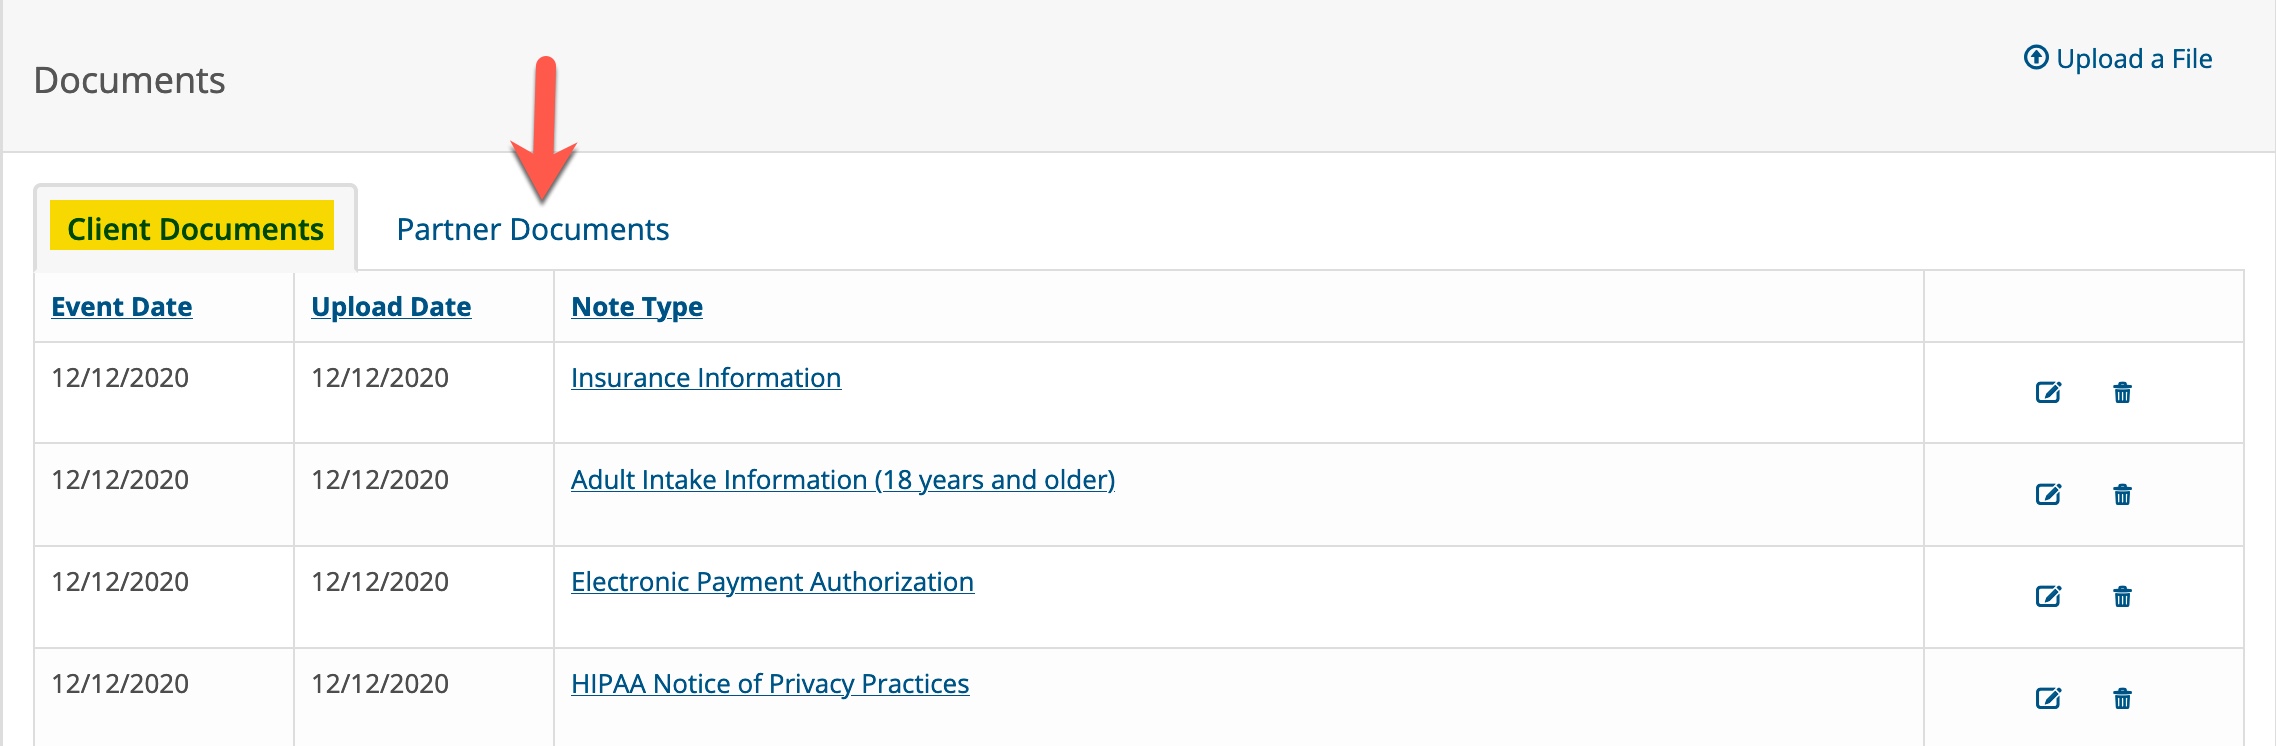
The First Person's documents are under the Client Documents tab and the Second Person's documents are under the Partner Documents tab (see above).
Scheduling
Create an appointment as you normally would. Select the first person's name from the Client drop down. It will automatically include the second person.
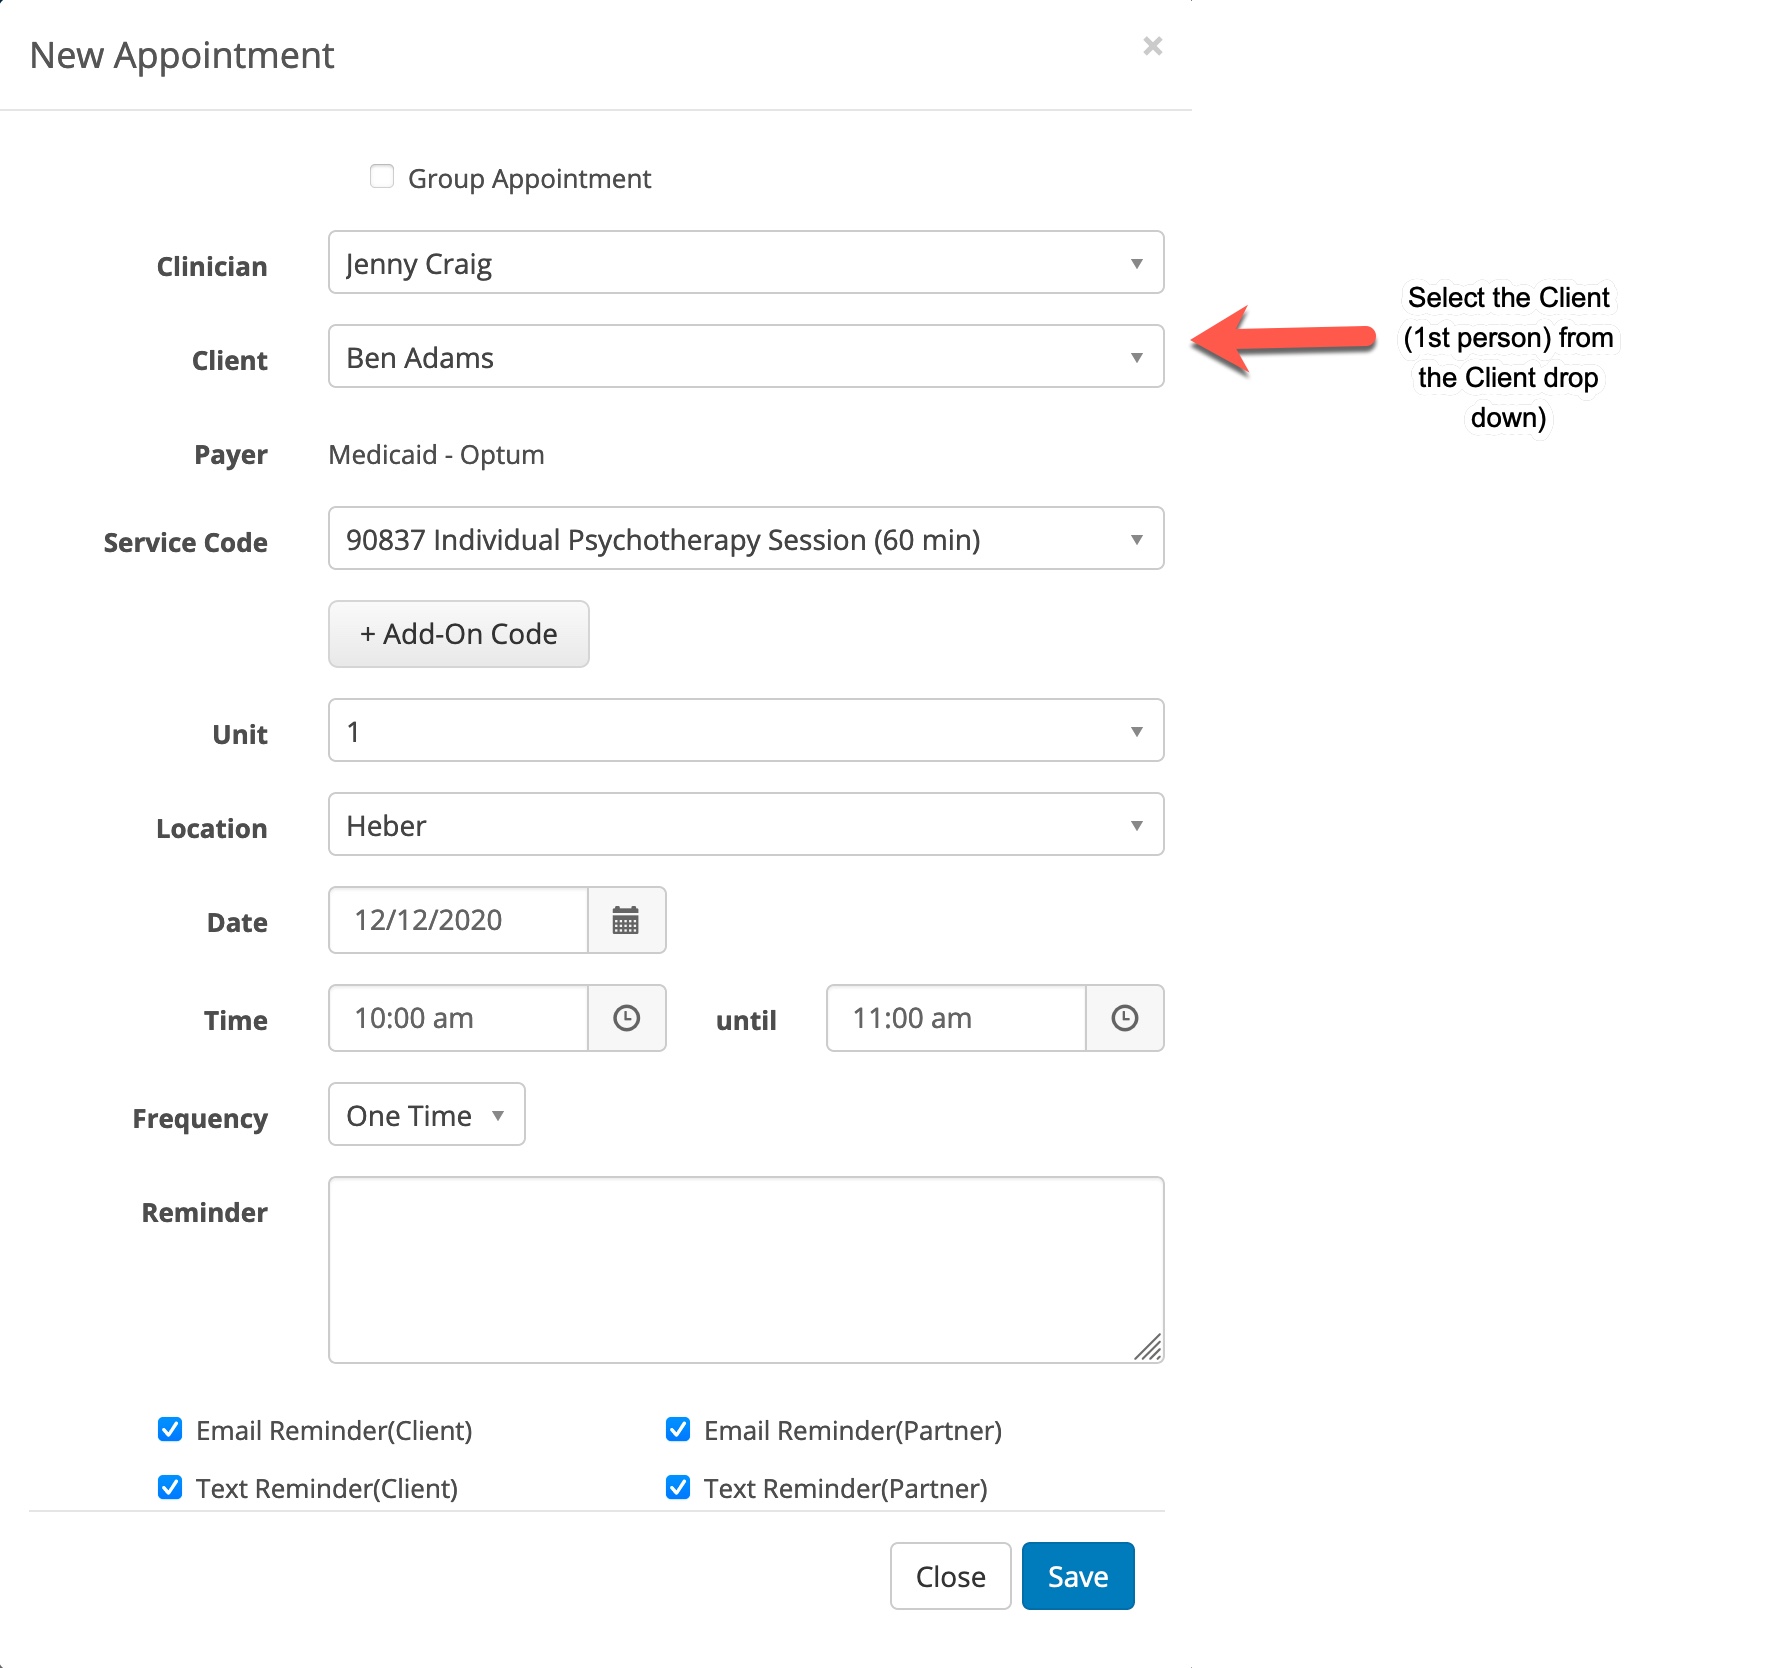
If both parties have their text and email appointment reminders configured, all of the boxes will be pre-checked as shown above. (if the practice has this feature setup).
We recommend that you create a test client with a partner added and play around with the scheduling, reminders, client portal and messaging feature so you get first hand experience. Many of your additional questions will be answered if you do this.