You can import patient information into TherapyMate if you can download your patient list from another EHR system in a CSV spreadsheet file format. You might need to contact your old EHR provider to find out how to do this. Importing data from another system can be a bit tricky. The format of the fields needs to match exactly or the data won't import. For example, the birth dates may be formatted as 01/12/51 in your old EHR, but TherapyMate is expecting 01/12/1951. Before you import the date you'll need to fix things like this. Once you have a CSV file containing your patient’s information, use the following steps to import them into TherapyMate or contact us if you would like us to do this for you.
- Go to your Clinician Settings page by clicking on your name in the upper righthand corner. Choose “Settings” from the dropdown.
- Click on the “Patient Imports” link about halfway down the settings page.
- Click on + New Import
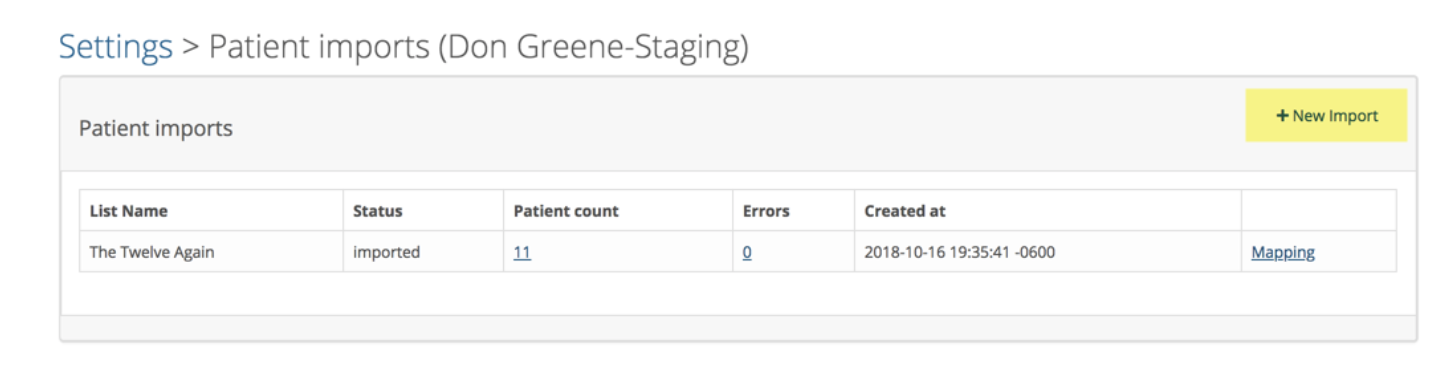
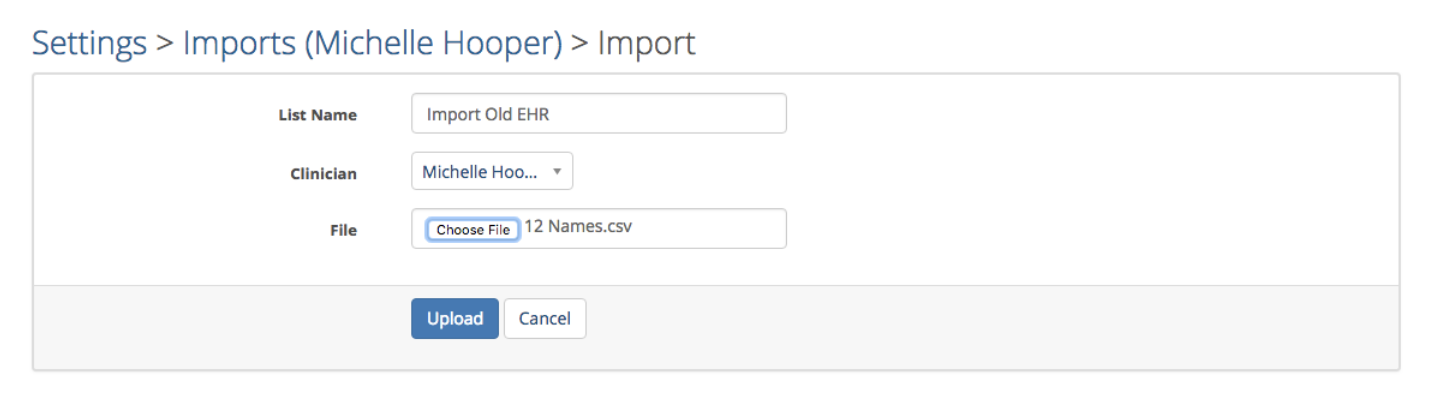
- Give your import a name (i.e. Import Old EHR)
Please Note: If you operate a multi-clinician practice, you will need to add other clinicians to your staff settings before you can import patient records that need to be assigned to a specific clinician. Please create a separate version of your CSV file for each clinician and import them one at a time making sure you select the correct clinician. Don’t proceed until you have done this.
- Select the clinician who will be assigned to the patients that you are importing.
- Click the “Choose File” button and locate your CSV file on your computer. Remember, you can only use CSV formatted files. If you have questions about your file, please contact TherapyMate support at the bottom of this article.
- Click the blue “Upload” button. This will take to the following Mapping page before you can import and save your import.
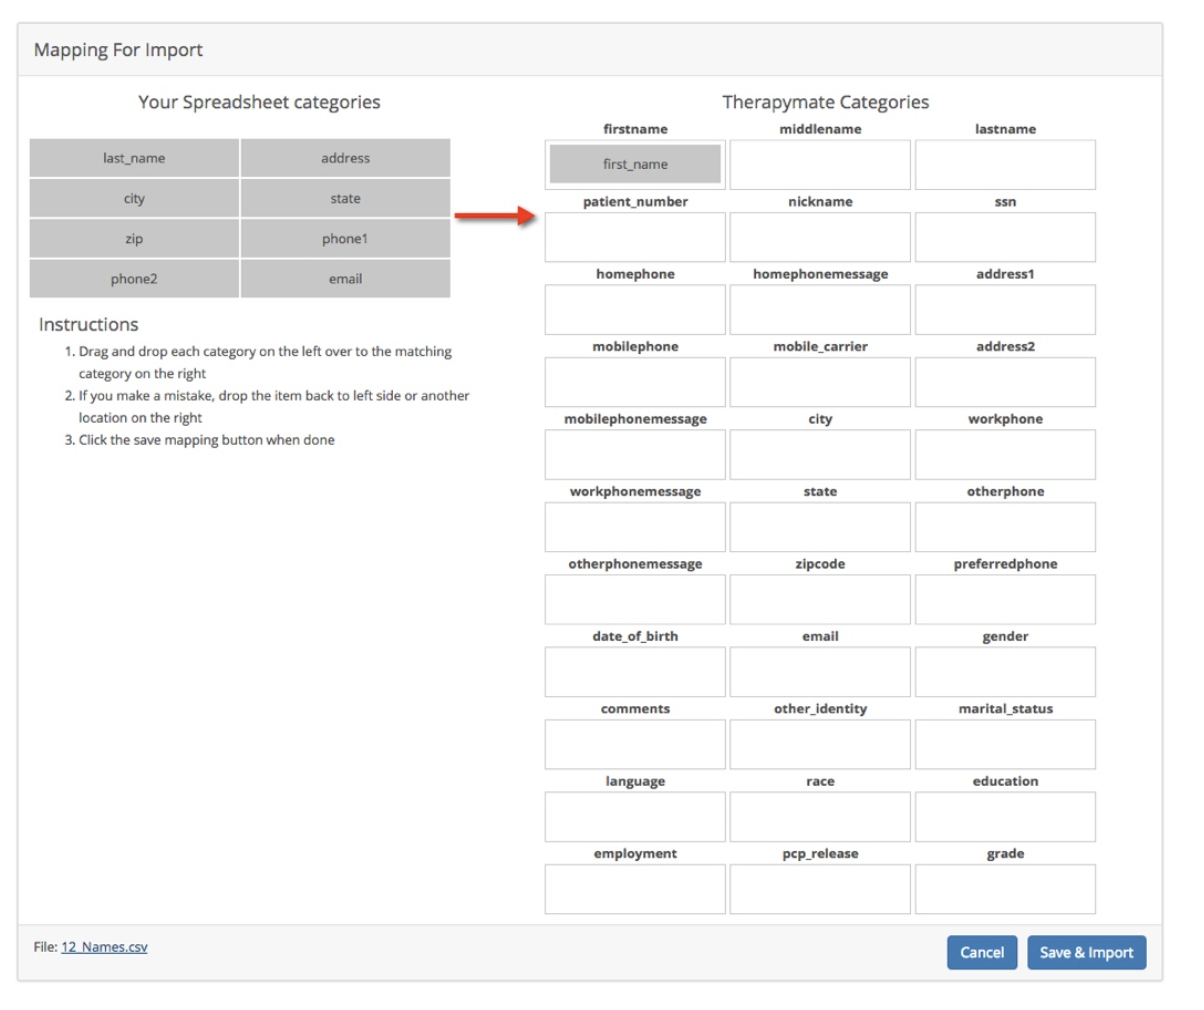
- Map the categories from your CSV file on the left to the TherapyMate fields on the right. Drag and drop each category on the left over to the matching category on the right. If you make a mistake, drop the item back to the left side or move it to another category on the right.
- In the example on the next page we have moved all of the categories from the left over to the right into matching categories.
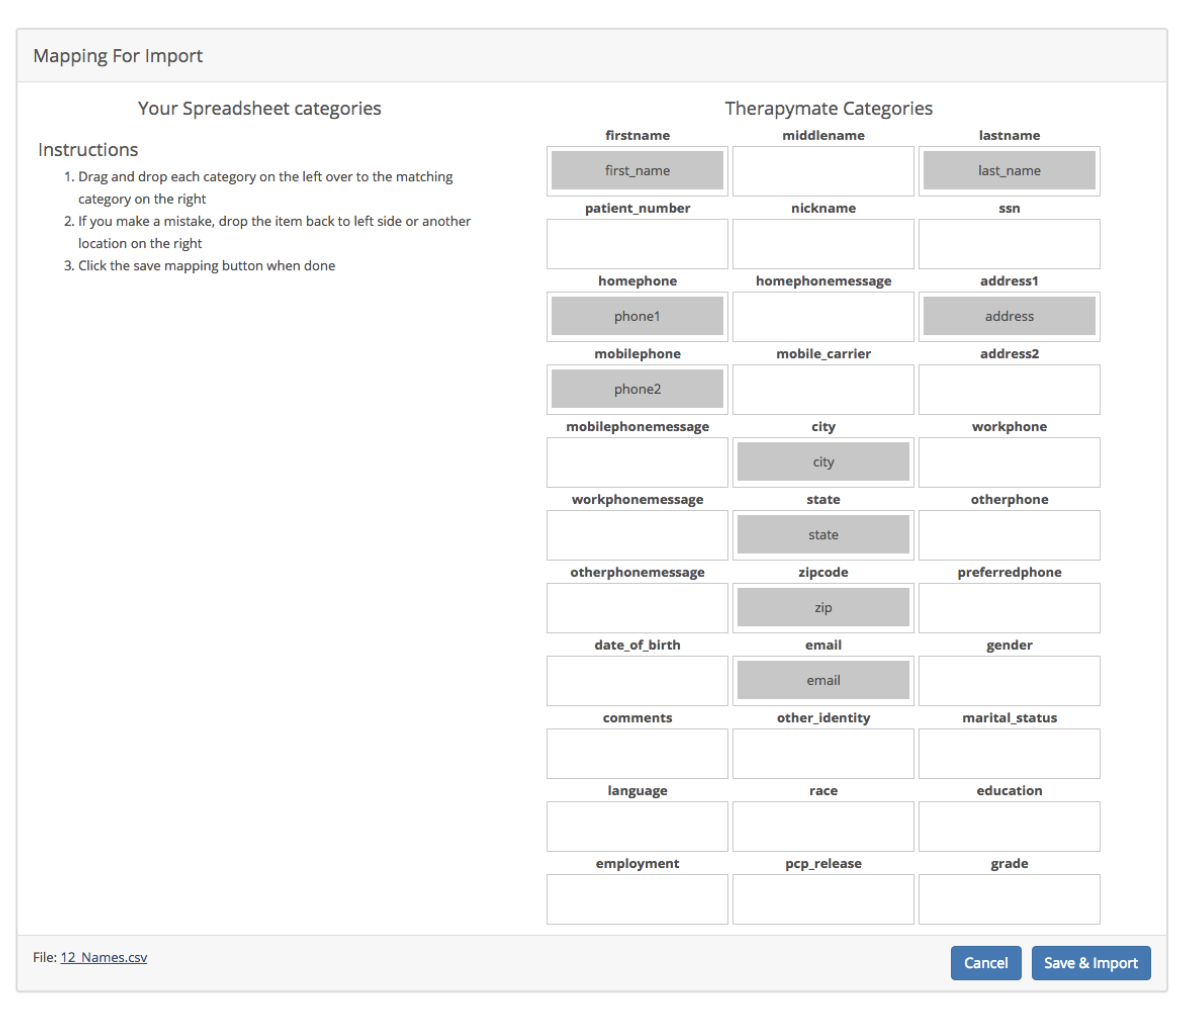
- Click the “Save & Import” button when your mapping is done.
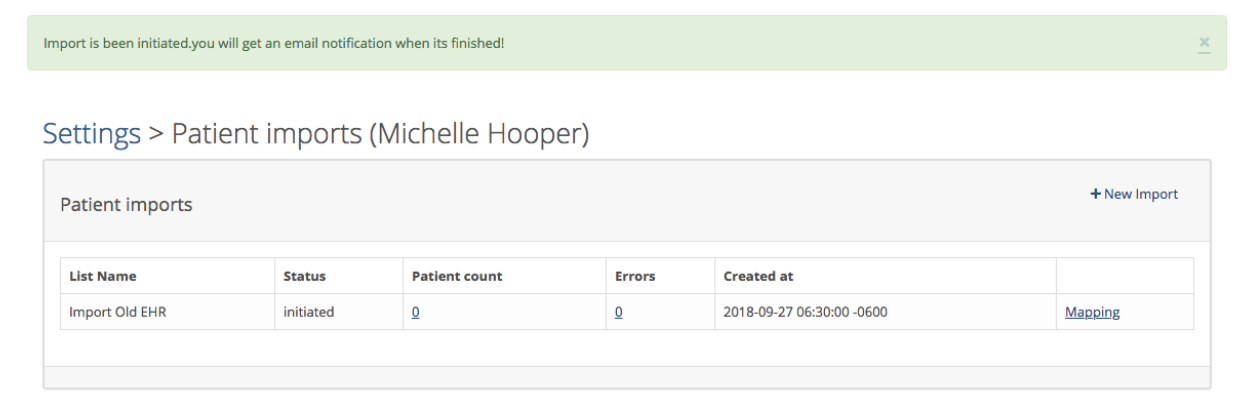
- Your file import has now been initiated.
Please Note: Allow about 10 minutes for the process to complete. You will receive an email confirmation when the import is finished.
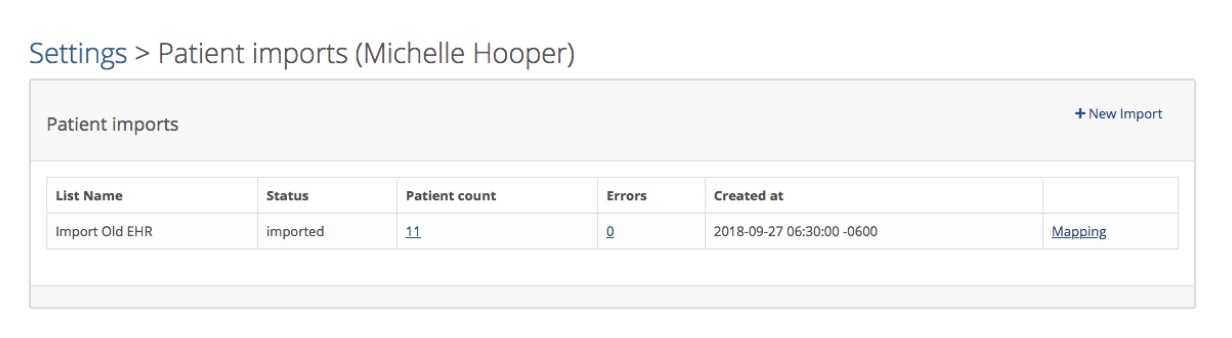
- When the import has finished, the Status column will change from ‘initiated” to Imported.
- You will see a total count of the number of patients imported and any errors the might have occurred. To view the errors, click on the number if it is greater than zero.
- Here is the same page after the import has been completed.
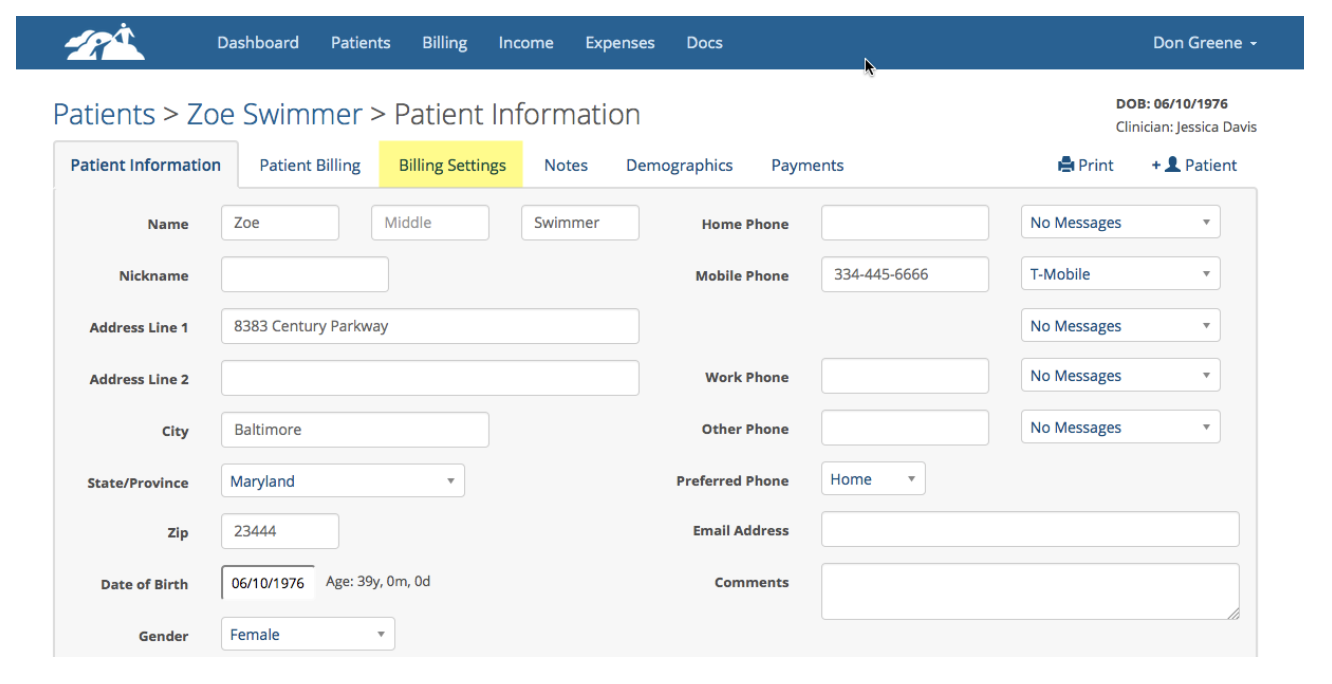
- Click on “Patients” on the main menu bar from the Dashboard. You will see all of the patients that were added. You can check each patient’s information if you wish and make any additions or corrections as necessary.
- It is important to immediately configure each Patient’s Billing Settings before you schedule the Patient for their first appointment. This tells TherapyMate how to create the invoices accurately and charge each patient or their insurance provider the correct amounts. The billing settings page is the third tab in a patient’s chart as shown below:
- There are two areas on the Patient’s Billing Settings page to consider:
Insurance Patients- A client's insurance information can't be imported using this process. The System Administrator for the Practice must will add the insurance providers in the Insurance Companies and Other Providers settings area before you can configure a patient’s billing settings for insurance.
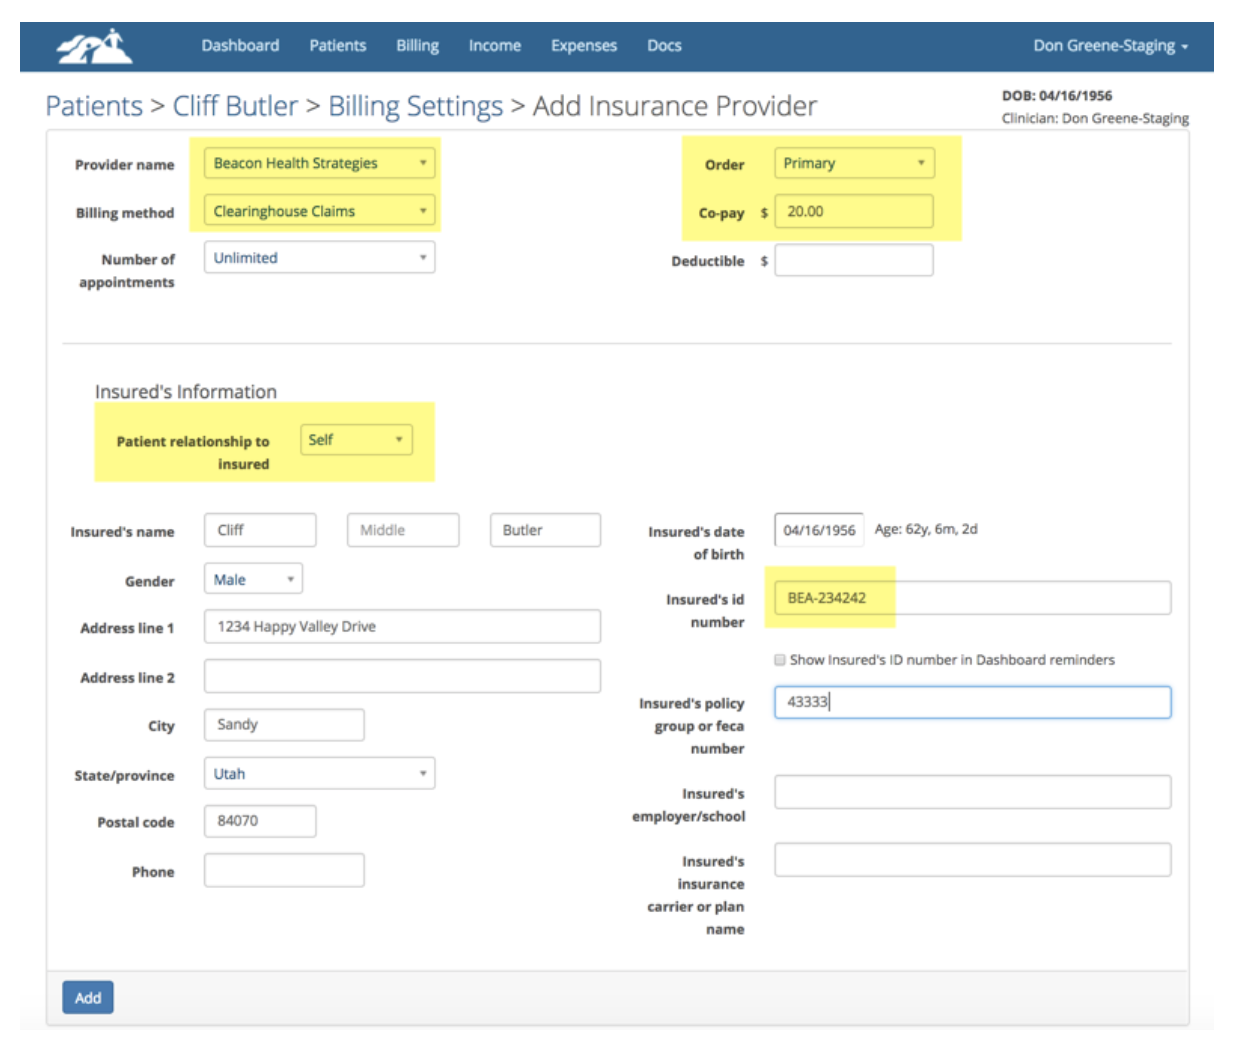
To assign an insurance provider to the client, click on the +Add button on the patient’s Billing Settings page.
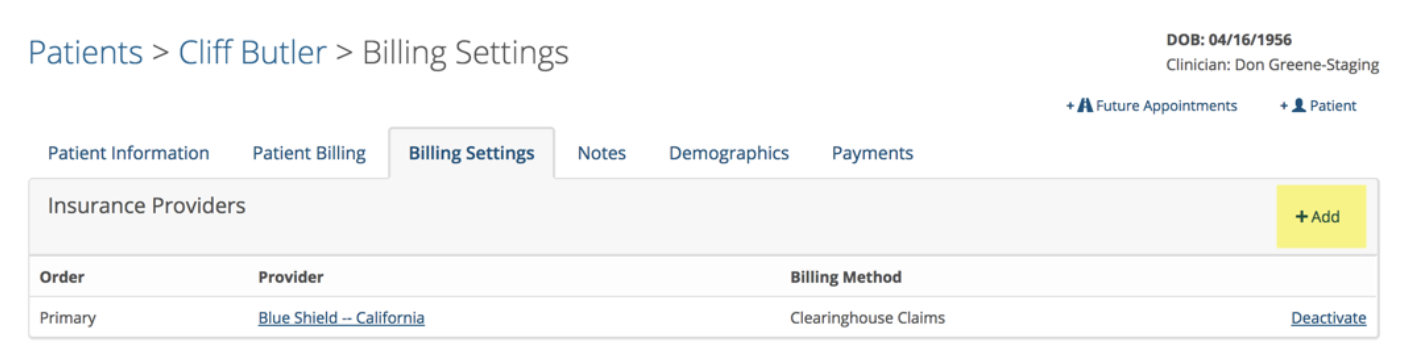
Fill out the appropriate fields. The highlighted fields below should be considered the minimums depending on the situation.
Private Pay Patients-If the Patient is paying out of pocket for your services you can designate the dollar rate that you will charge for each visit. Sometimes this is referred to as the Sliding Scale rate.
Please Note: A patient will have an insurance provider, or they will be private pay, not both. Please don’t configure both the Insurance Provider and Private Pay areas for the same patient.
If you enter a dollar amount in the Default private pay amount box, this will be the fee that the patient gets charged whenever you schedule them. If you wish to add a particular service code to the Service Specific Private Pay Amount, this will override the default amount whenever that one service code is scheduled.
For more information refer to the Knowledge Base document called “Adding & Creating a New Patient” for more details about configuring a patient’s billing settings.
To access the Knowledge Base, click on your name in the upper righthand corner and choose Knowledge Base from the drop down. The document is located in the Patients section.