To add a new client to your Practice, click on +Client in the Actions Menu on the Dashboard.
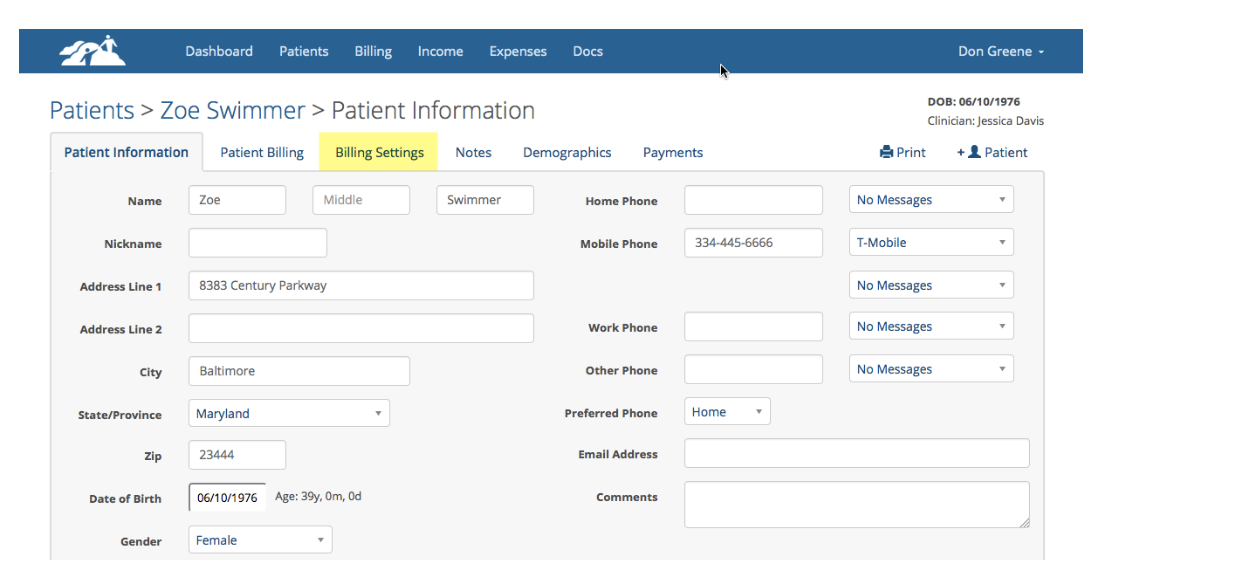
The first page to fill out is the Client's Information page. The highlighted fields are recommended, but you can omit or add to this as necessary. If you want to send text or email appointment reminders make sure you add the email address and/or mobile phone number, carrier and change the No Messages drop down to Text Messages. There is a Knowledge Base document that goes into more detail about appointment reminders.
Click Add to save this page.
Next, we recommend that you immediately configure the Patient’s Billing Settings before you schedule the Patient for their first appointment. This tells TherapyMate how to create the invoices accurately and charge the client and/or their insurance provider the correct amounts.
Next, we recommend that you immediately configure the Patient’s Billing Settings before you schedule the Patient for their first appointment. This tells TherapyMate how to create the invoices accurately and charge the client and/or their insurance provider the correct amounts.
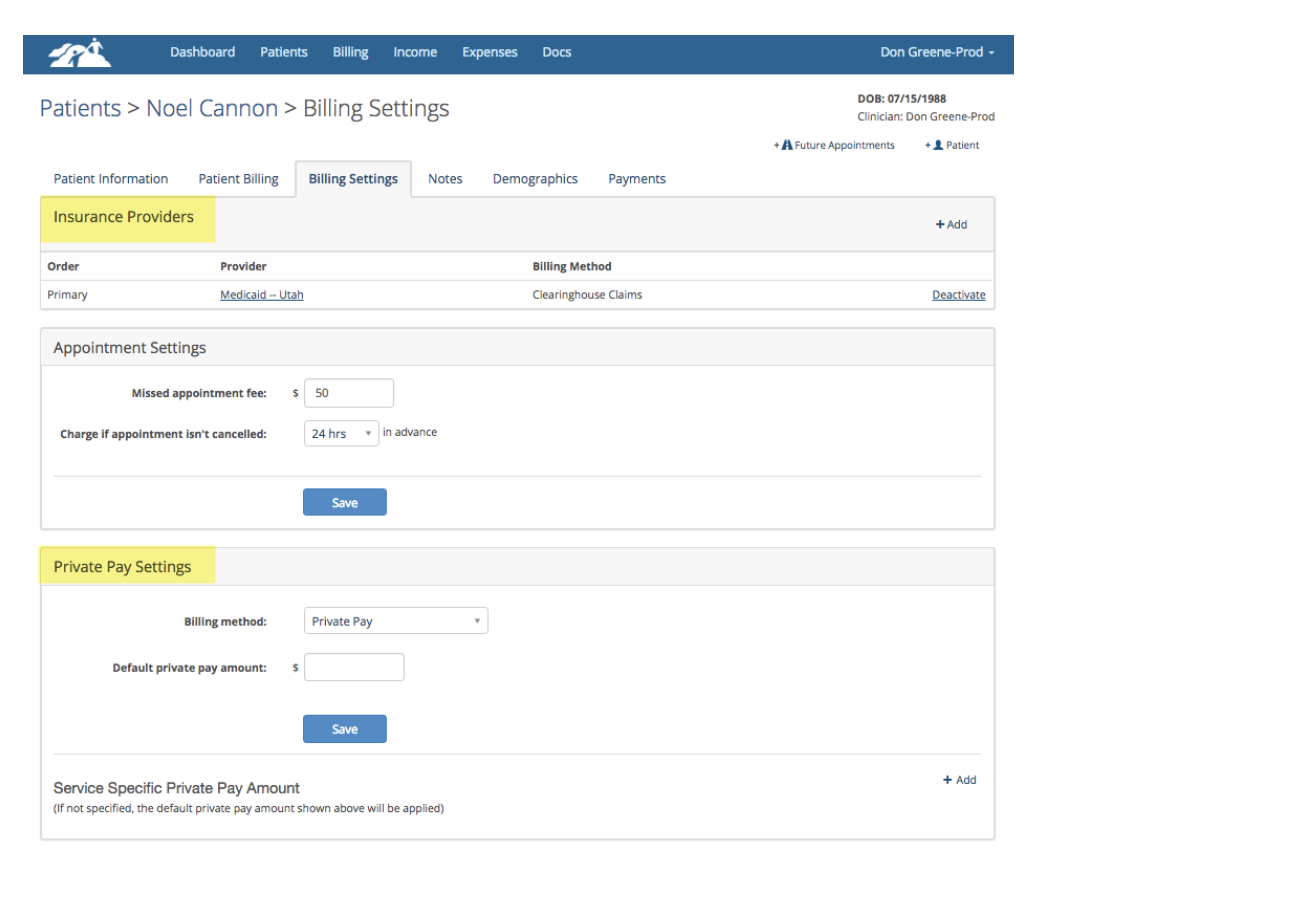
There are two areas on the Patient’s Billing Settings page to consider:
1. Insurance Providers- To assign an insurance provider to the client, click on +Add. Be sure to add the insurance providers you are paneled with first in your Clinician Settings under Insurance Providers and Other Payers. You will be able to specify the patient’s copayment requirement when you set this up.
2. Private Pay Settings-If the Patient is paying out of pocket for your services you can designate the dollar rate that you will charge for each visit. Sometimes this is referred to as the Sliding Scale rate.
Please Note: A patient will have insurance or they will be private pay, not both. Please don’t configure both areas for the same patient.
Adding an Insurance Provider
Click on the + Add button as shown below:
On the following page you can pick the client's insurance provider, set the billing method, enter their copay amount, select the patient's relationship to the insured and enter their insurance policy and group ID numbers.
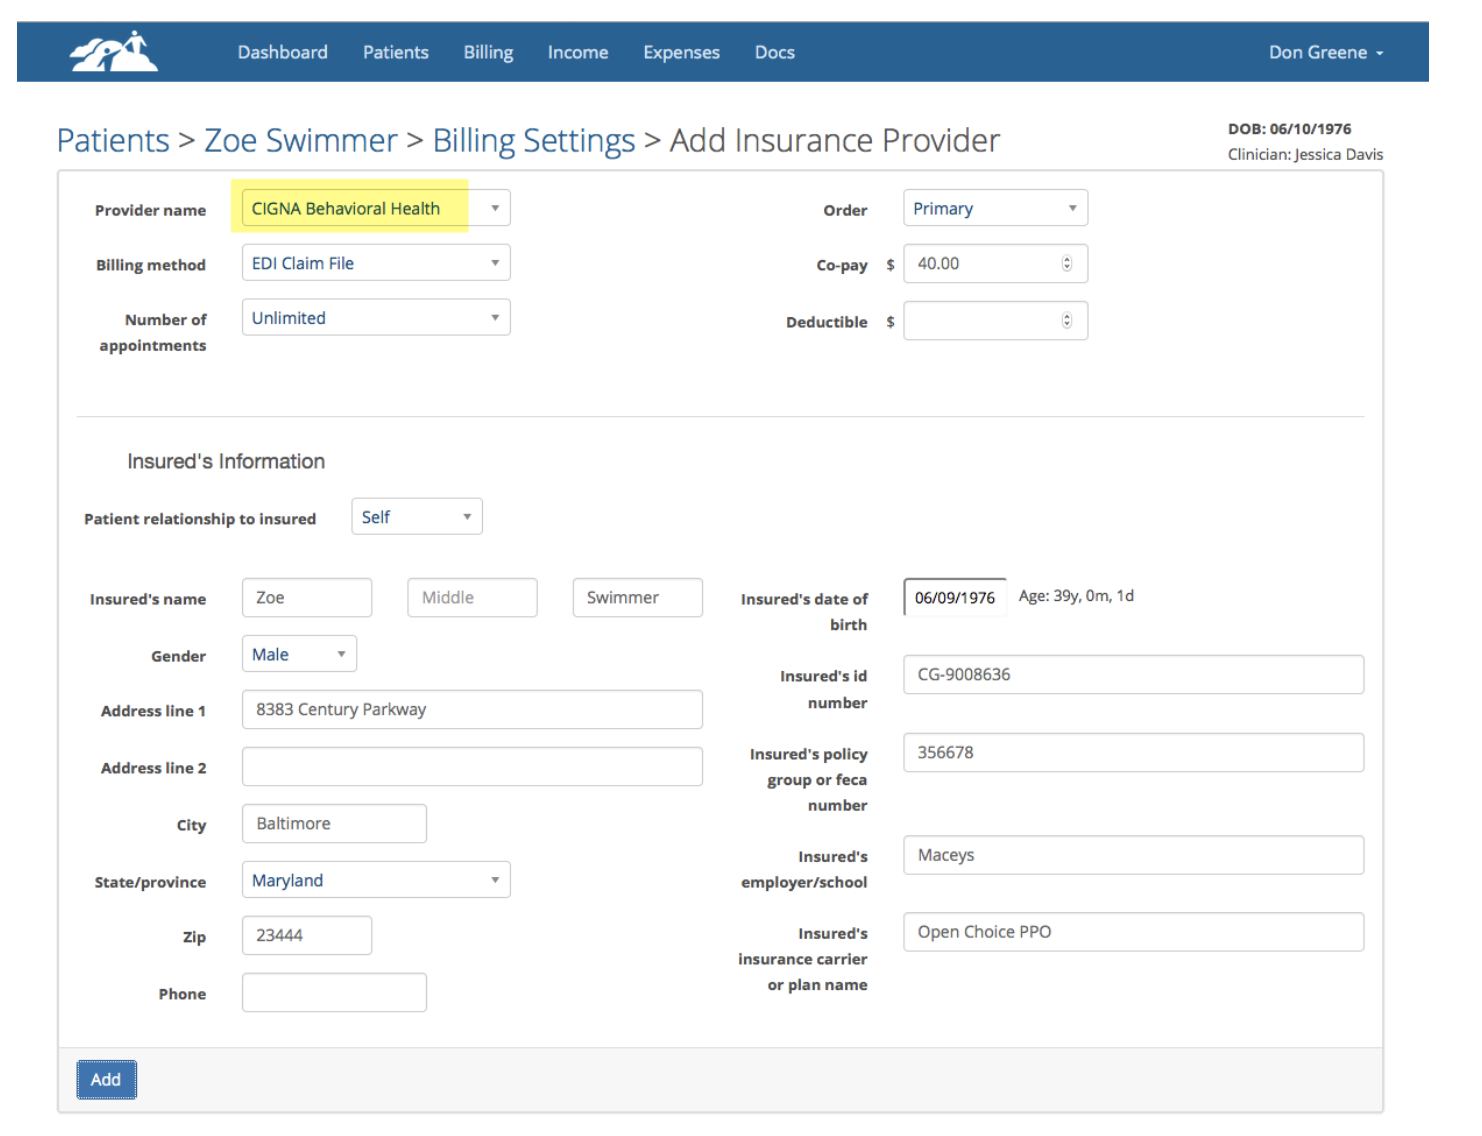
Start by selecting the insurance provider from the drop down. If the insurance provider you wish to use isn’t in the drop down, you will need to add that provider in on your Clinician Settings are under the Insurance Providers and Other Payers section. Select the Billing Method and fill in the Co-pay box if the client has one.
The Patient Relationship to the Insured is important if you wish to bill using CMS-1500s or Clearinghouse Billing. Select the appropriate option from the “Patient Relationship to Insured” drop down. A selection is required.
If the patient is a spouse or child of the insured, you will need the insured information, including their birth date and other information from their insurance card.
Click the Add button when done.
Repeat the same process for a secondary provider if applicable.
Click the Add button when done.
Repeat the same process for a secondary provider if applicable.
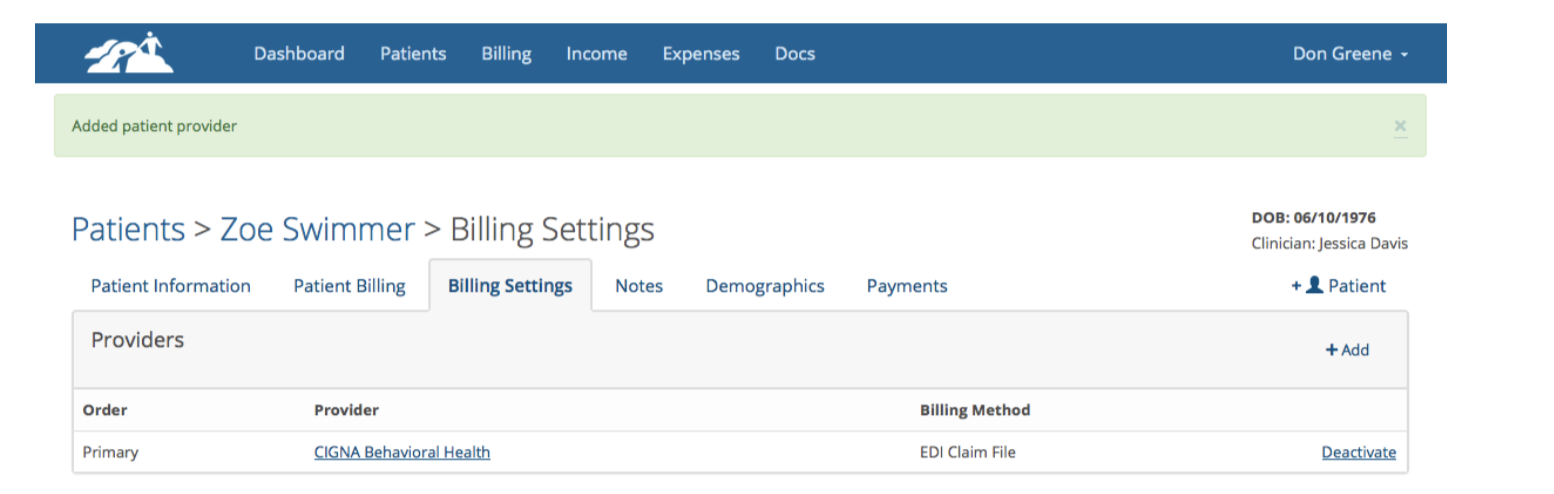
When you’ve successfully added the provider you will see a green bar saying “Added Patient Provider”. You will also see the name of provider as shown in this example:
Private Pay Settings
You have two options for a patient who will pay out of pocket for your services and doesn’t have insurance coverage.
- You can set a default private pay amount (sometimes called a sliding scale rate) for all services provided.
- You can specify a Service Specific Private Pay Amount for each type of service you schedule as shown below. When you schedule these service codes, the system will automatically apply the correct amount to a patient’s invoices when you schedule an appointment on your dashboard. If you schedule a service code that is not defined in the Service Specific Private Pay Amount, it will default to the Default Private Pay Amount if you set one.
Missed Appointment Fee
You can specify an amount you’ll charge if the patient misses their appointment or cancels without advanced notice. This is optional.
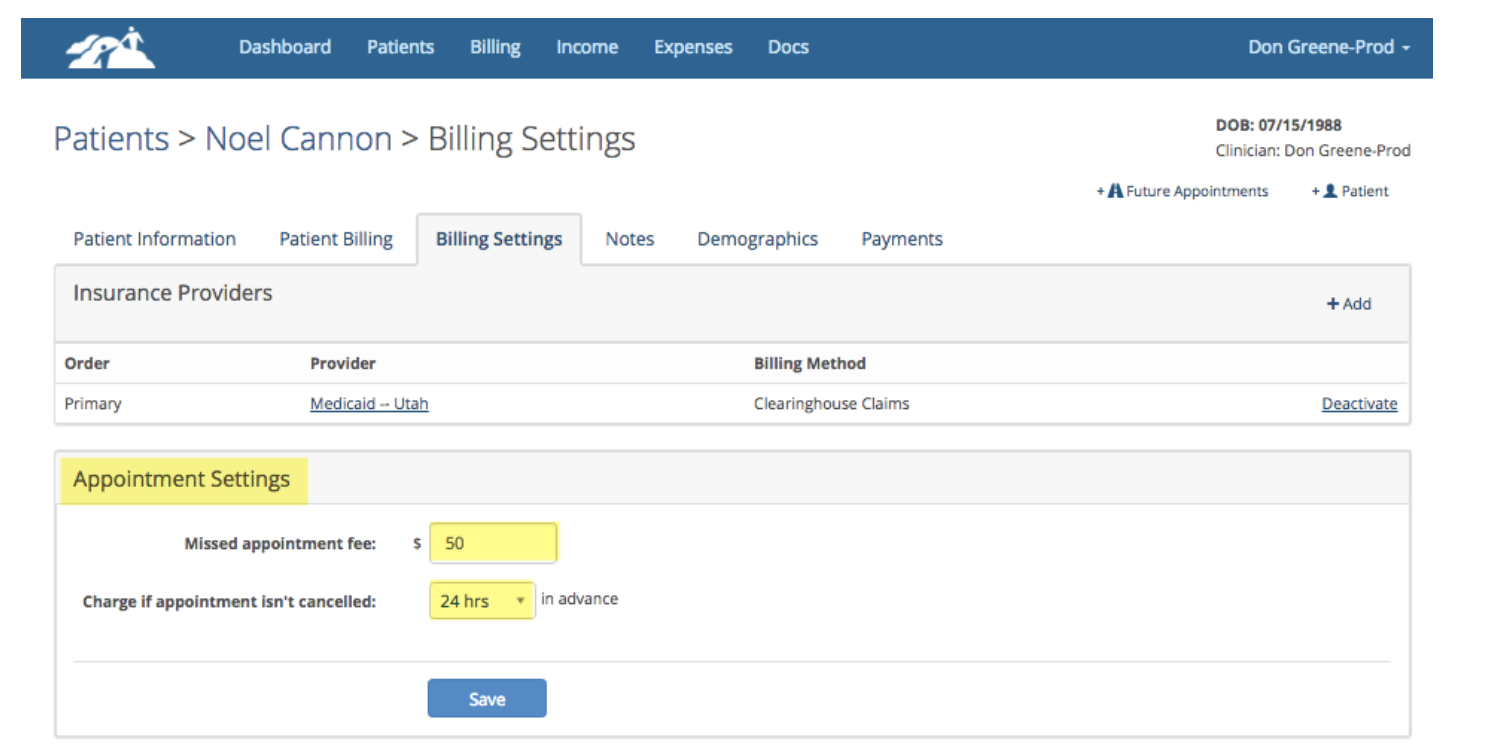
To specify the dollar amount you wish to charge for a missed appointment in the box and select the number of hours in advance you require.
Click Save when done.
Now that you have the patient information page and billing settings filled out, you can schedule the client for an appointment.
Now that you have the patient information page and billing settings filled out, you can schedule the client for an appointment.