The training document will describe important prerequisites, configuration requirements and dependencies that you need to be aware of before you can create and submit insurance claims using CMS-1500s or Clearinghouse Claims. Please incorporate the following into your Practice when you have a patient who is using their insurance to pay for your services.
Configure the Client's Information Page
Please ensure that the following items have been filled out:
- First Name
- Last Name
- Address, City, State, Postal Code
- Date of Birth
- Sex/Gender
Configure the Client's Billing Setting Page
The Insurance Provider(s) needs to be added to the patient’s Billing Settings. Be sure to do this BEFORE you schedule the client. Otherwise you'll create extra work for yourself.
a. On the client's billing settings page click +Add and make sure the appropriate insurance provider has been added to the top of this page. Here is an example:
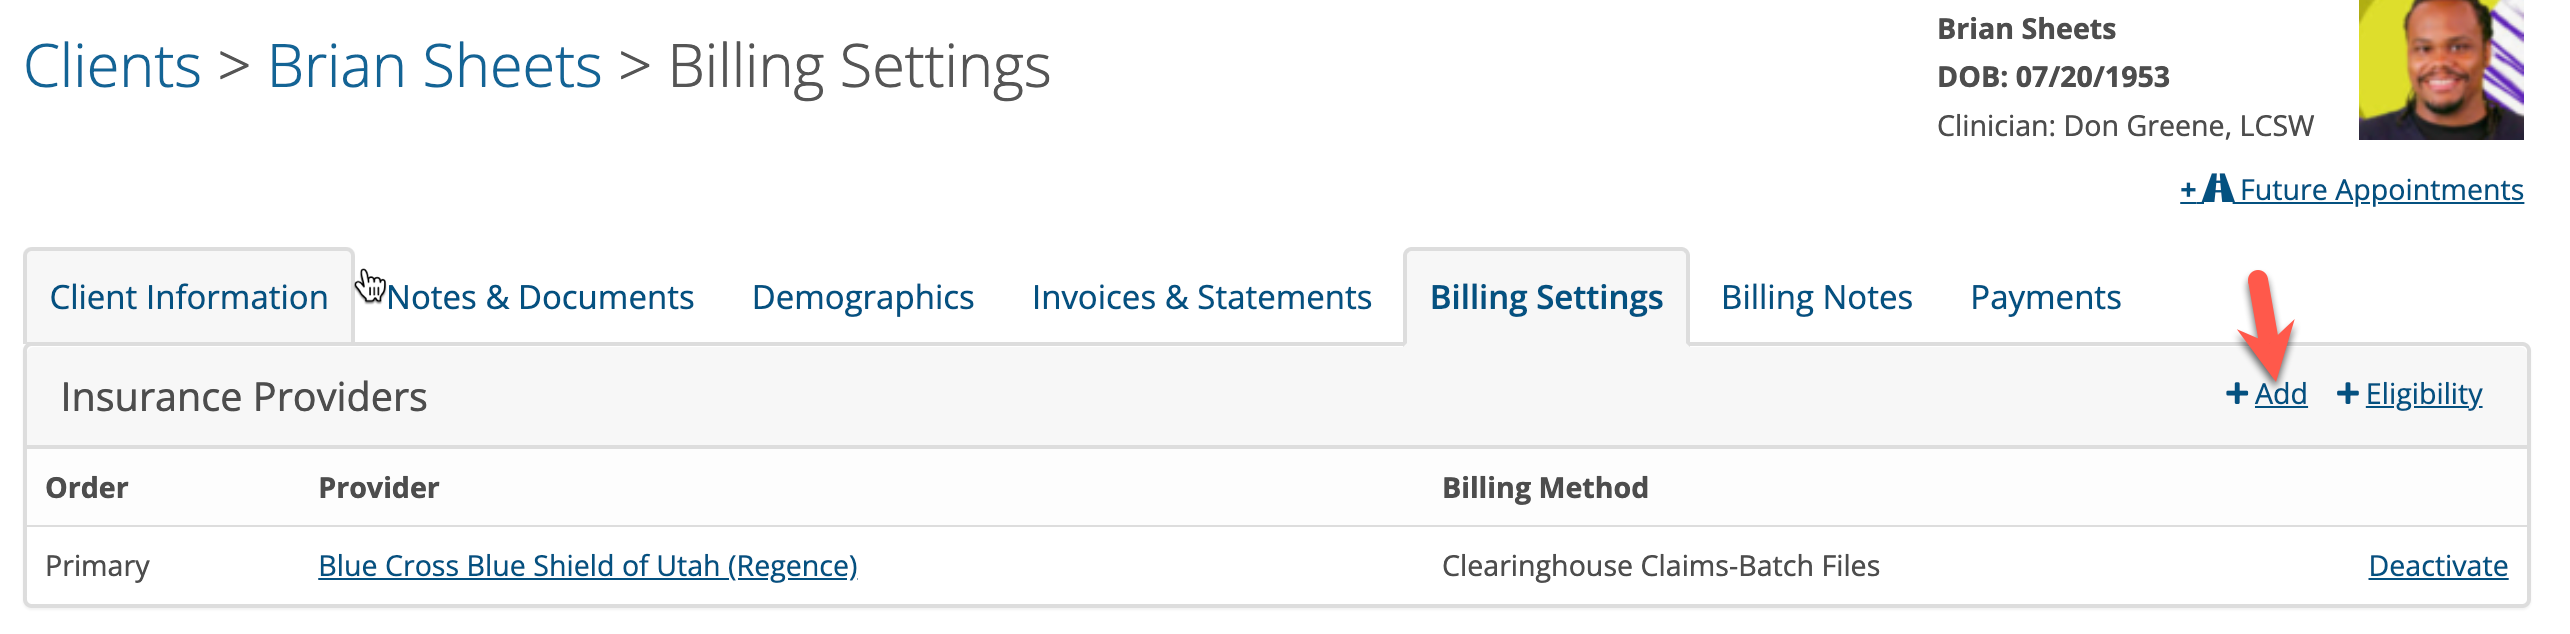
Here is the Insurance Provider settings page:
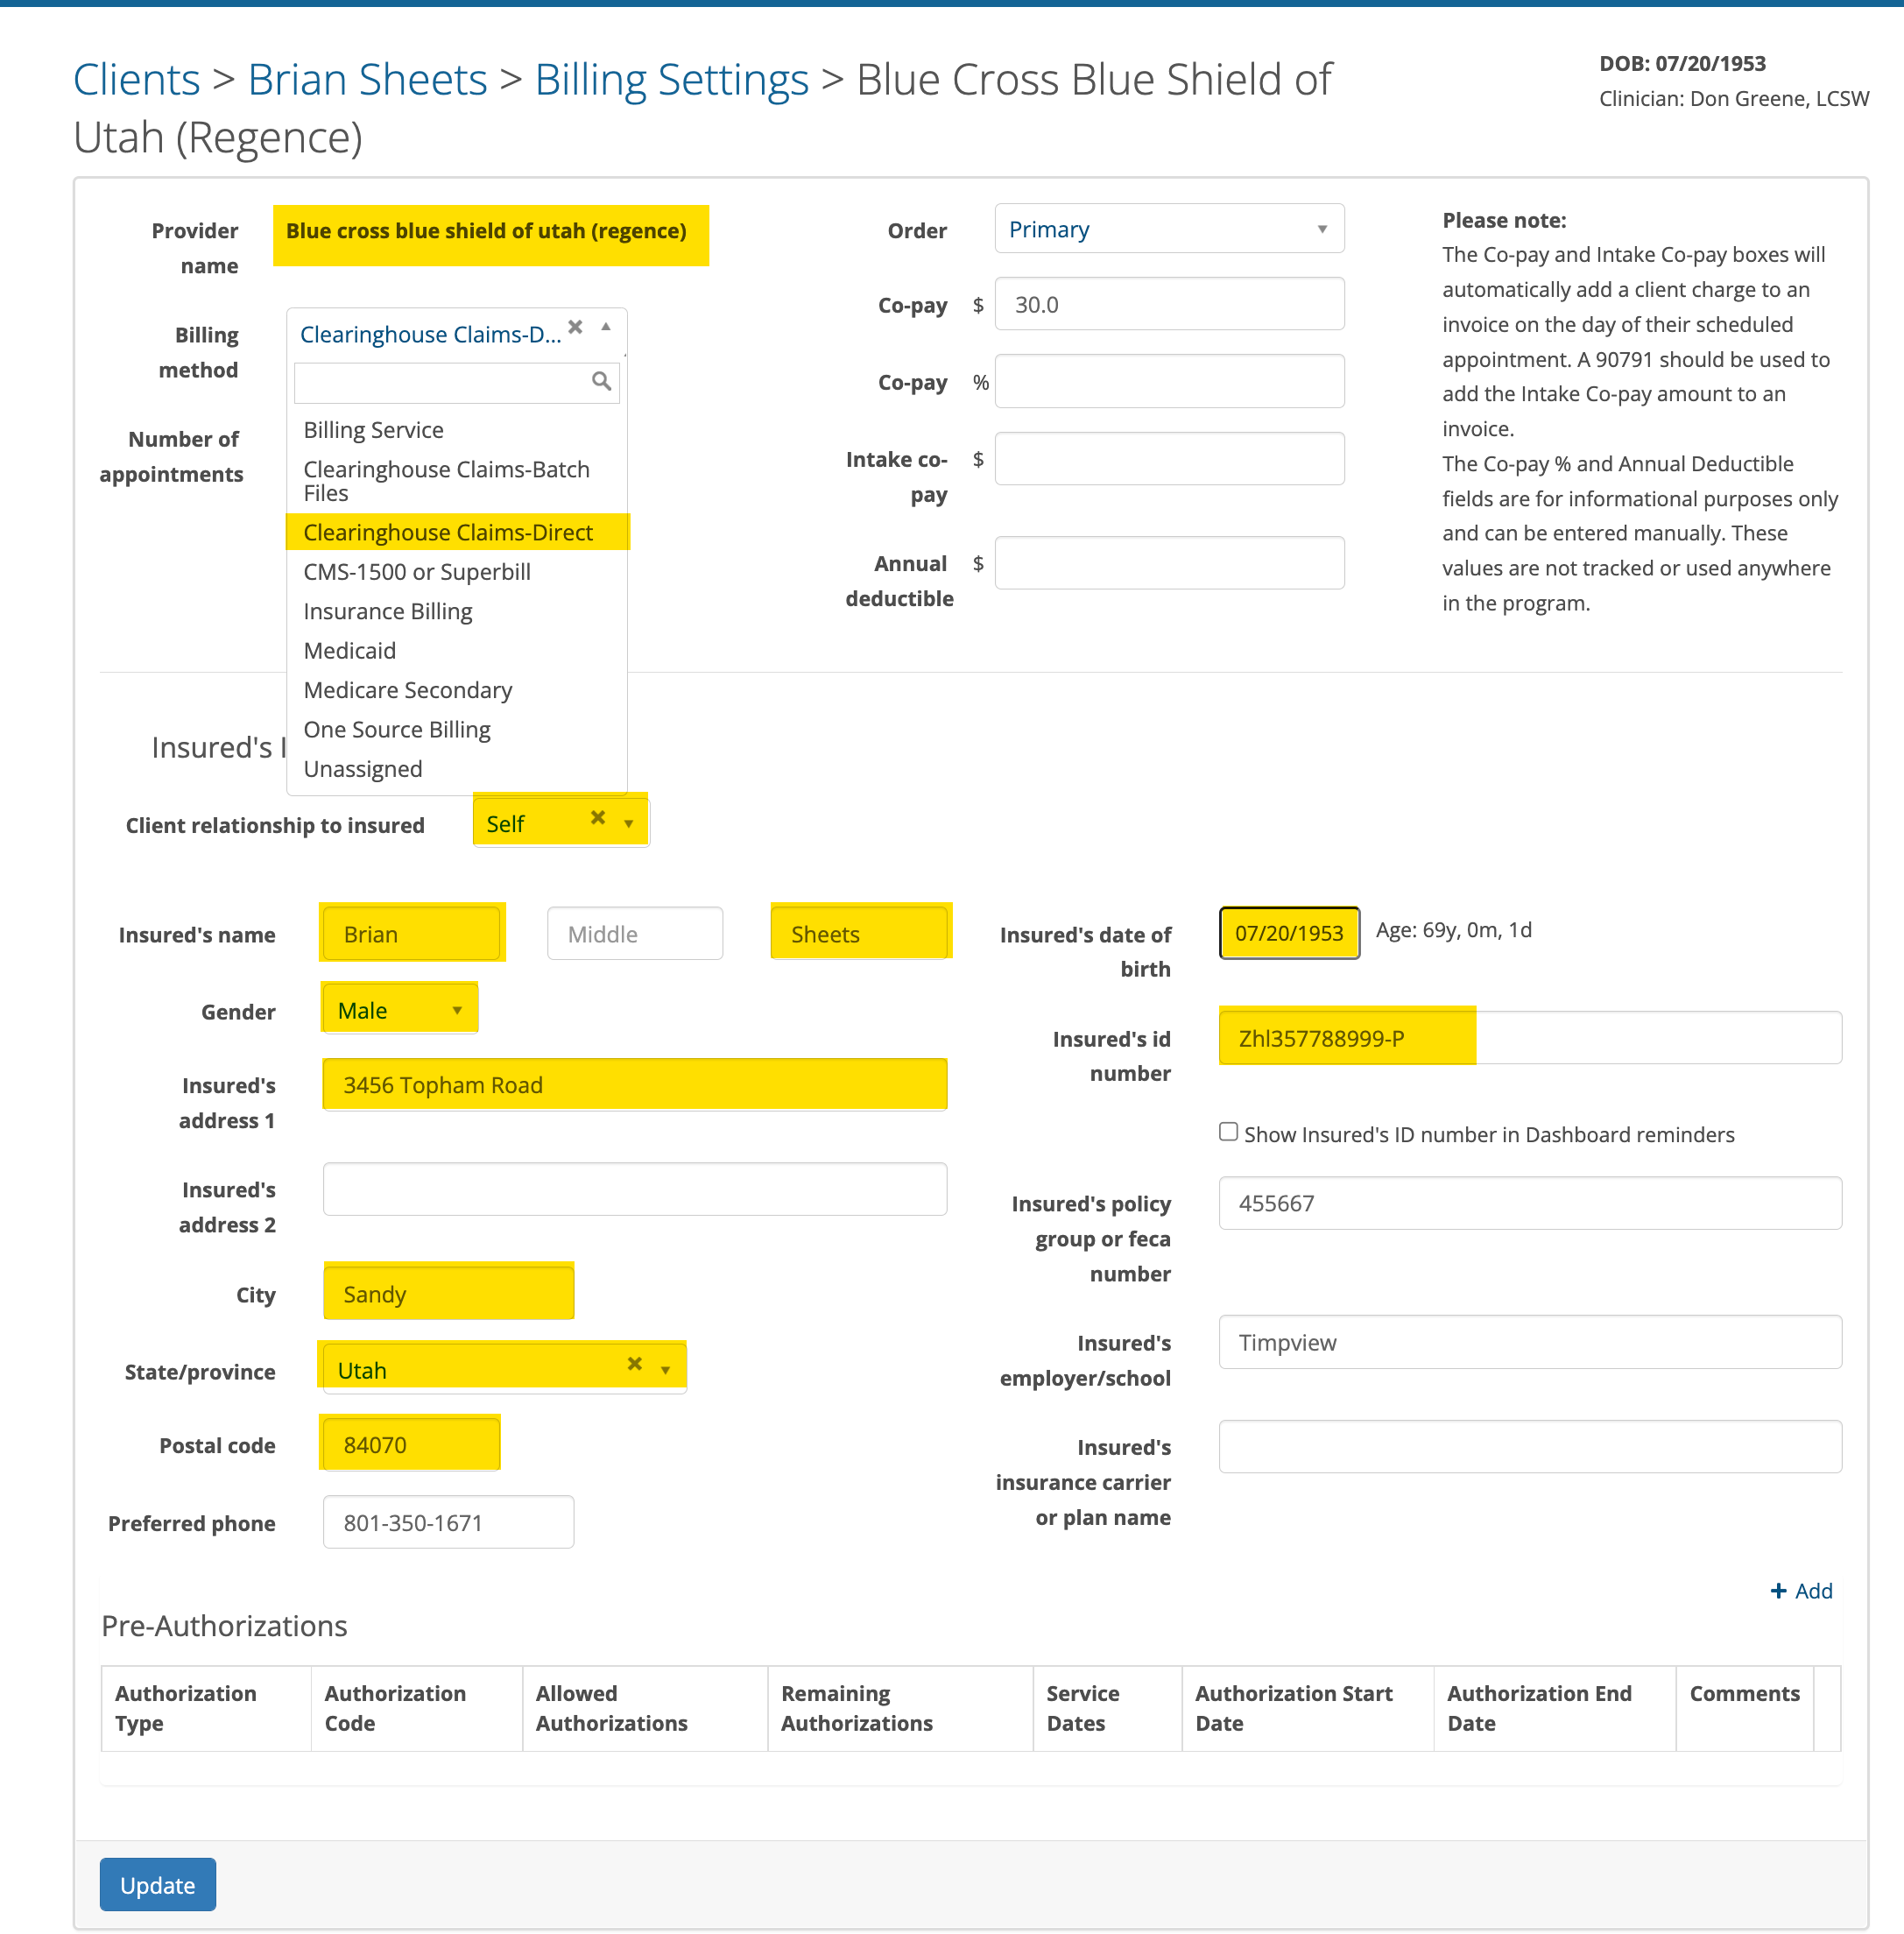
The yellow highlighted fields shown above are required:
- Select the name of the insurance provider from the drop down
- Select the appropriate Billing Method. For Claim.MD choose Clearinghouse Claims-Direct
- Entering the number of appointments is optional. This is for reference purposes only.
- Set the order drop down to Primary or Secondary as appropriate
- If you have two insurance providers and you are using Claim.MD, set both Billing Methods to Clearinghouse Claims-Direct. When the billing method is set in this manner, the secondary will automatically get billed after the primary has processed the claim.
- If Medicare is the primary and the client has a Medicare Supplement policy as secondary, don't set the secondary to Clearinghouse Claims-Direct. Medicare is they are already aware of the secondary and will automatically forward the claim after they process it.
The co-pay, intake copay and annual deductible are optional. If a co-pay dollar figure is entered it will be added automatically to a client's invoice on the day of their appointment as a patient charge.
Select the relationship to insured and add the insured's policy ID number. If the insurance requires a group number enter that as well.
If you choose the relationship of Self, the gender, DOB and address information will be added automatically for you if it is present on the client's profile page. Otherwise you'll need to get this information from the client and enter it manually.
Configuring Pre-Authorizations (EAPs)
If a client has EAP type benefits you must add them to the pre-authorizations settings area prior to scheduling the client. A client can only have one active authorization at once. If you are adding a second authorization be sure to set the remaining box to zero on the first authorization before adding the second.
Click on the + Add button to add the pre-authorization information.

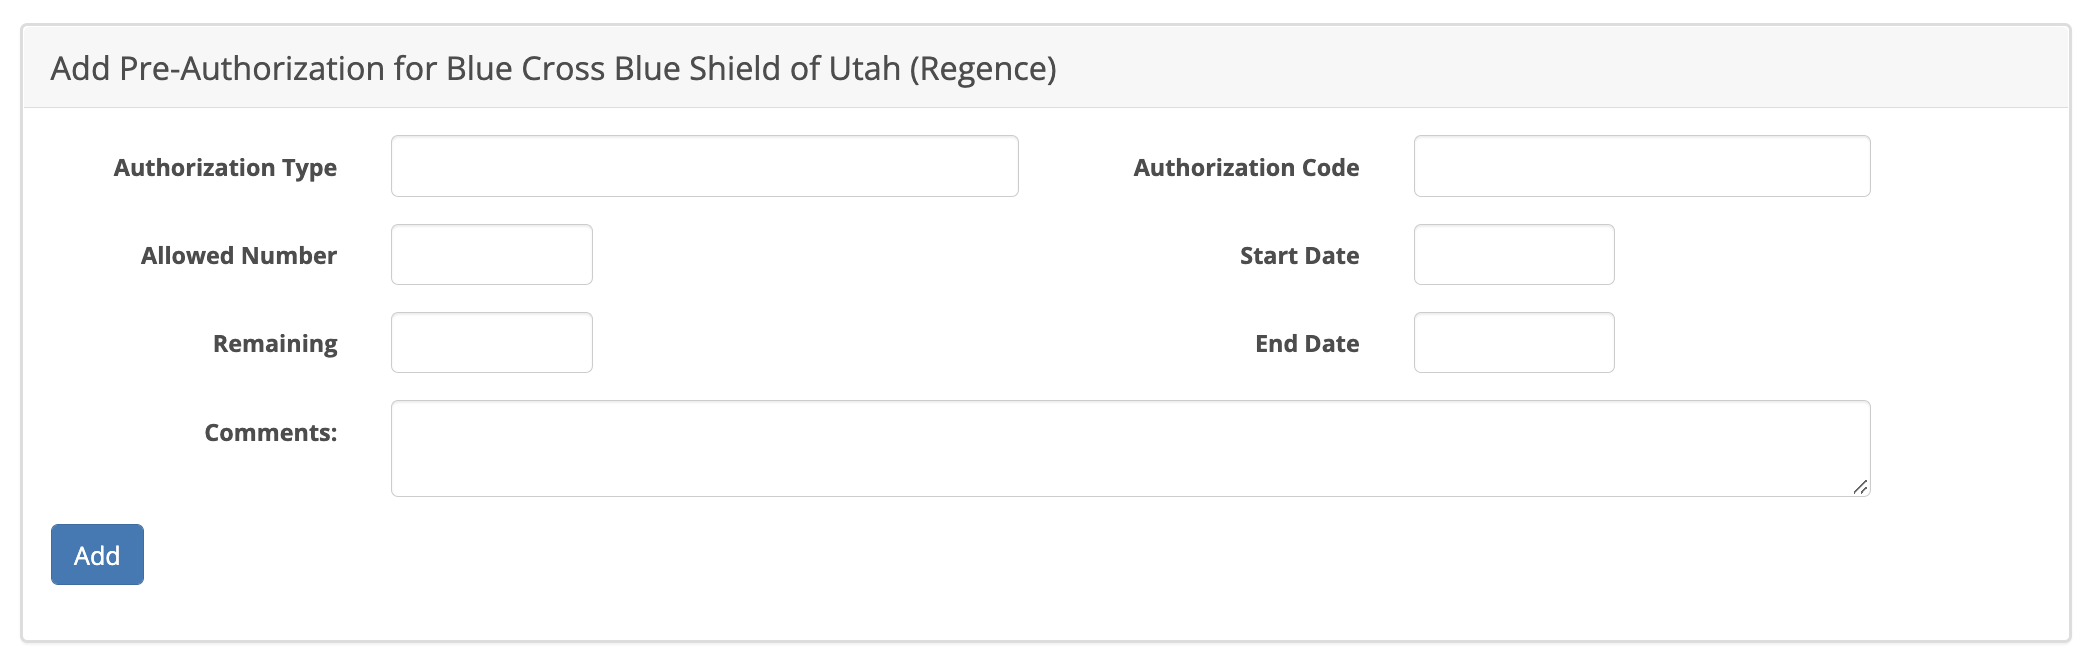
- Add a short authorization type description (i.e. EAP)
- Enter the Authorization Code. Use numbers and letters only, no special characters.
- Enter the allow number and remaining number. They should be the same
- Enter the Start and End Dates
- Comments are optional
- Click the ADD button when done.
When a client's billing settings have been configured properly they can be scheduled for their appointments.
The reason it is so important to get this done prior to scheduling is because the entire billing work flow depends on you doing this before hand. Otherwise you won't be able to bill or bill accurately for your services.
In addition to these settings, a client must have a diagnosis set for each date of service. This is done when an Intake or Progress Note is created for each session. Without a diagnosis set the claim can't be submitted.