This training article will show you how to upload your claim files into Office Ally.
- Login to Office Ally at www.officeally.com
- Click on Upload Claims on the left hand menu bar.
- Choose Upload Professional (CMS-500/837P) File as shown below:

3. Click on the Choose File button and look for the claim file in your downloads folder or wherever you saved it to your computer.
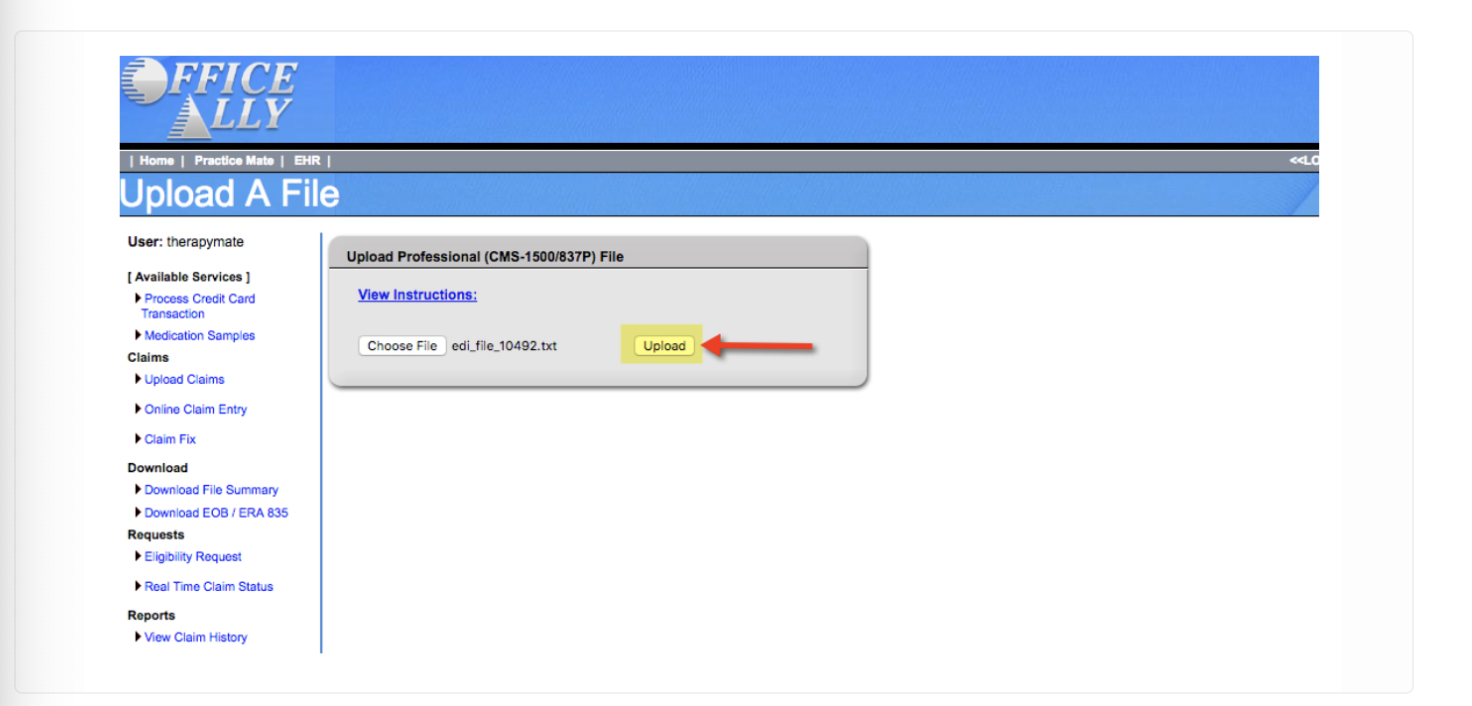
When the file is attached, click on the Upload button to complete the submission process.
Office Ally will send you a series of emails. The first one will say that it was successfully uploaded.
In a couple hours later you will get another one saying that is was initially accepted or rejected. If it is accepted, it will be sent to the insurance provider(s) for processing.
The insurance providers will eventually respond as to whether or not the claims were accepted or rejected by them. If the claims are rejected, you can use Office Ally's Claim Fix area to correct the claim and re-submit it.
Office Ally will send you a series of emails. The first one will say that it was successfully uploaded.
In a couple hours later you will get another one saying that is was initially accepted or rejected. If it is accepted, it will be sent to the insurance provider(s) for processing.
The insurance providers will eventually respond as to whether or not the claims were accepted or rejected by them. If the claims are rejected, you can use Office Ally's Claim Fix area to correct the claim and re-submit it.