This document will show you how to create and submit electronic claims that can be uploaded to the Clearinghouse.
Clinician Practice Information Page Settings
Before you can create and submit a Clearinghouse Claim File, you must make sure you have the Clearinghouse ID and Interchange Qualifier fields set on your Clinician Practice Information settings page. Click on your name in the upper righthand corner of the Dashboard and choose Settings from the drop down.
At the bottom of the Settings page you’ll see a link to Clinician Practice Information.
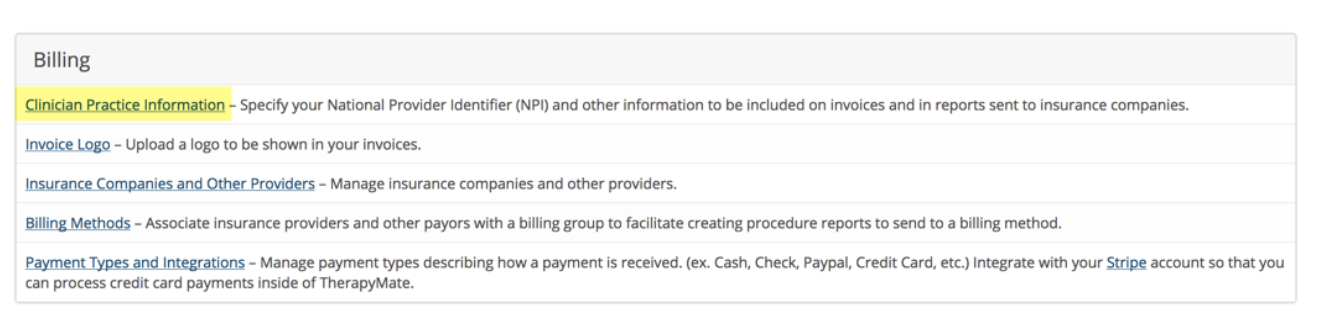
Click on the link and scroll down to the bottom of the Clinician Practice Information page. You will see two fields called Interchange ID Qualifier and Clearinghouse ID. Set them to the follow values for Office Ally:
Interchange ID Qualifier: US Fed Tax ID, Clearinghouse ID: 330897513

If there are multiple clinicians in your Practice, be sure to make these settings on each of their Clinician Practice Information pages. This completes the settings changes for Office Ally.
Creating a Clearinghouse Claims batch file
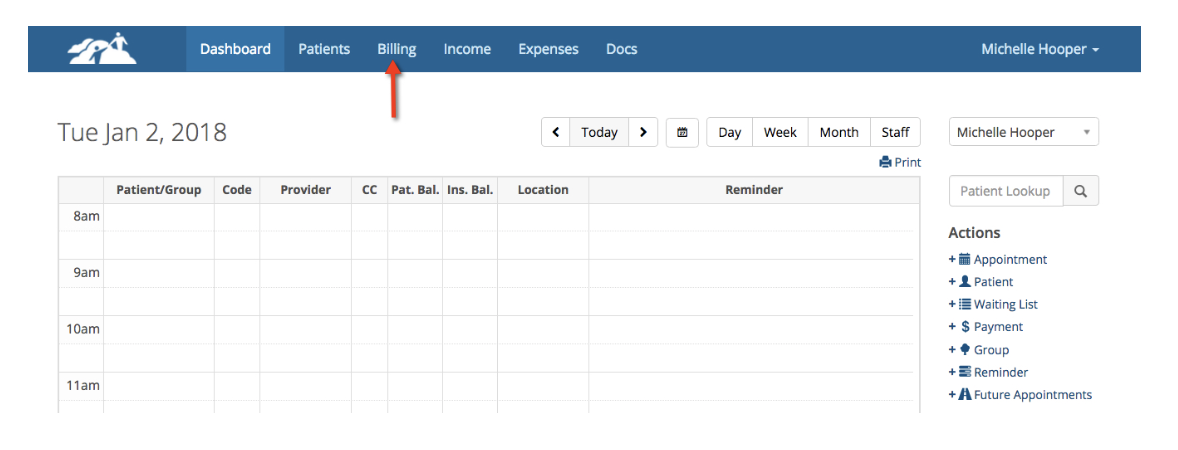
1. Click on the main Billing open at the top of your Dashboard shown on the next page:
2. Click on the Clearinghouse Claims tab as shown:
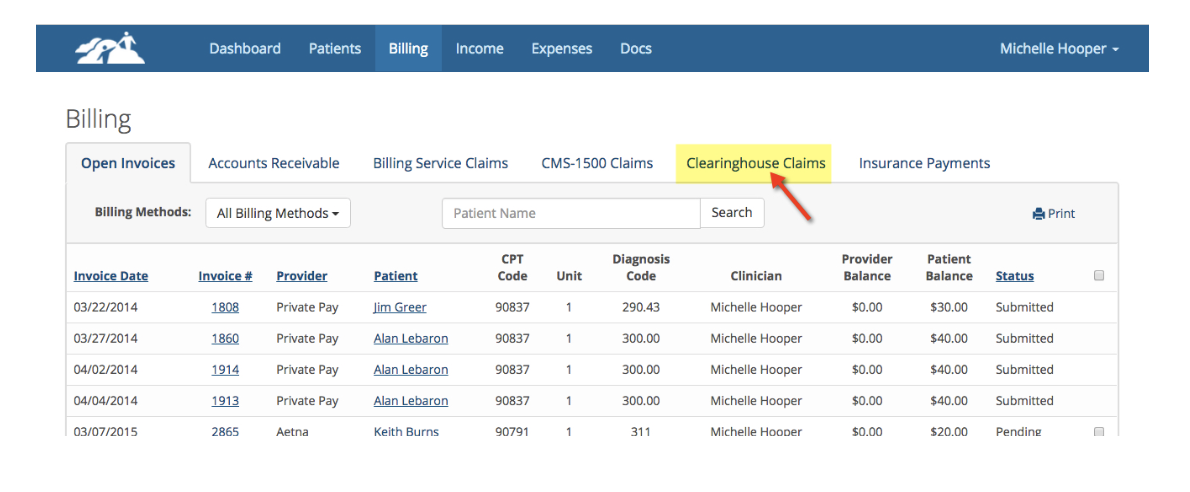
There are two Clearinghouse Claims tabs on the following page. For Office Ally you will use the once called Clearinghouse Claims-Batch Files.
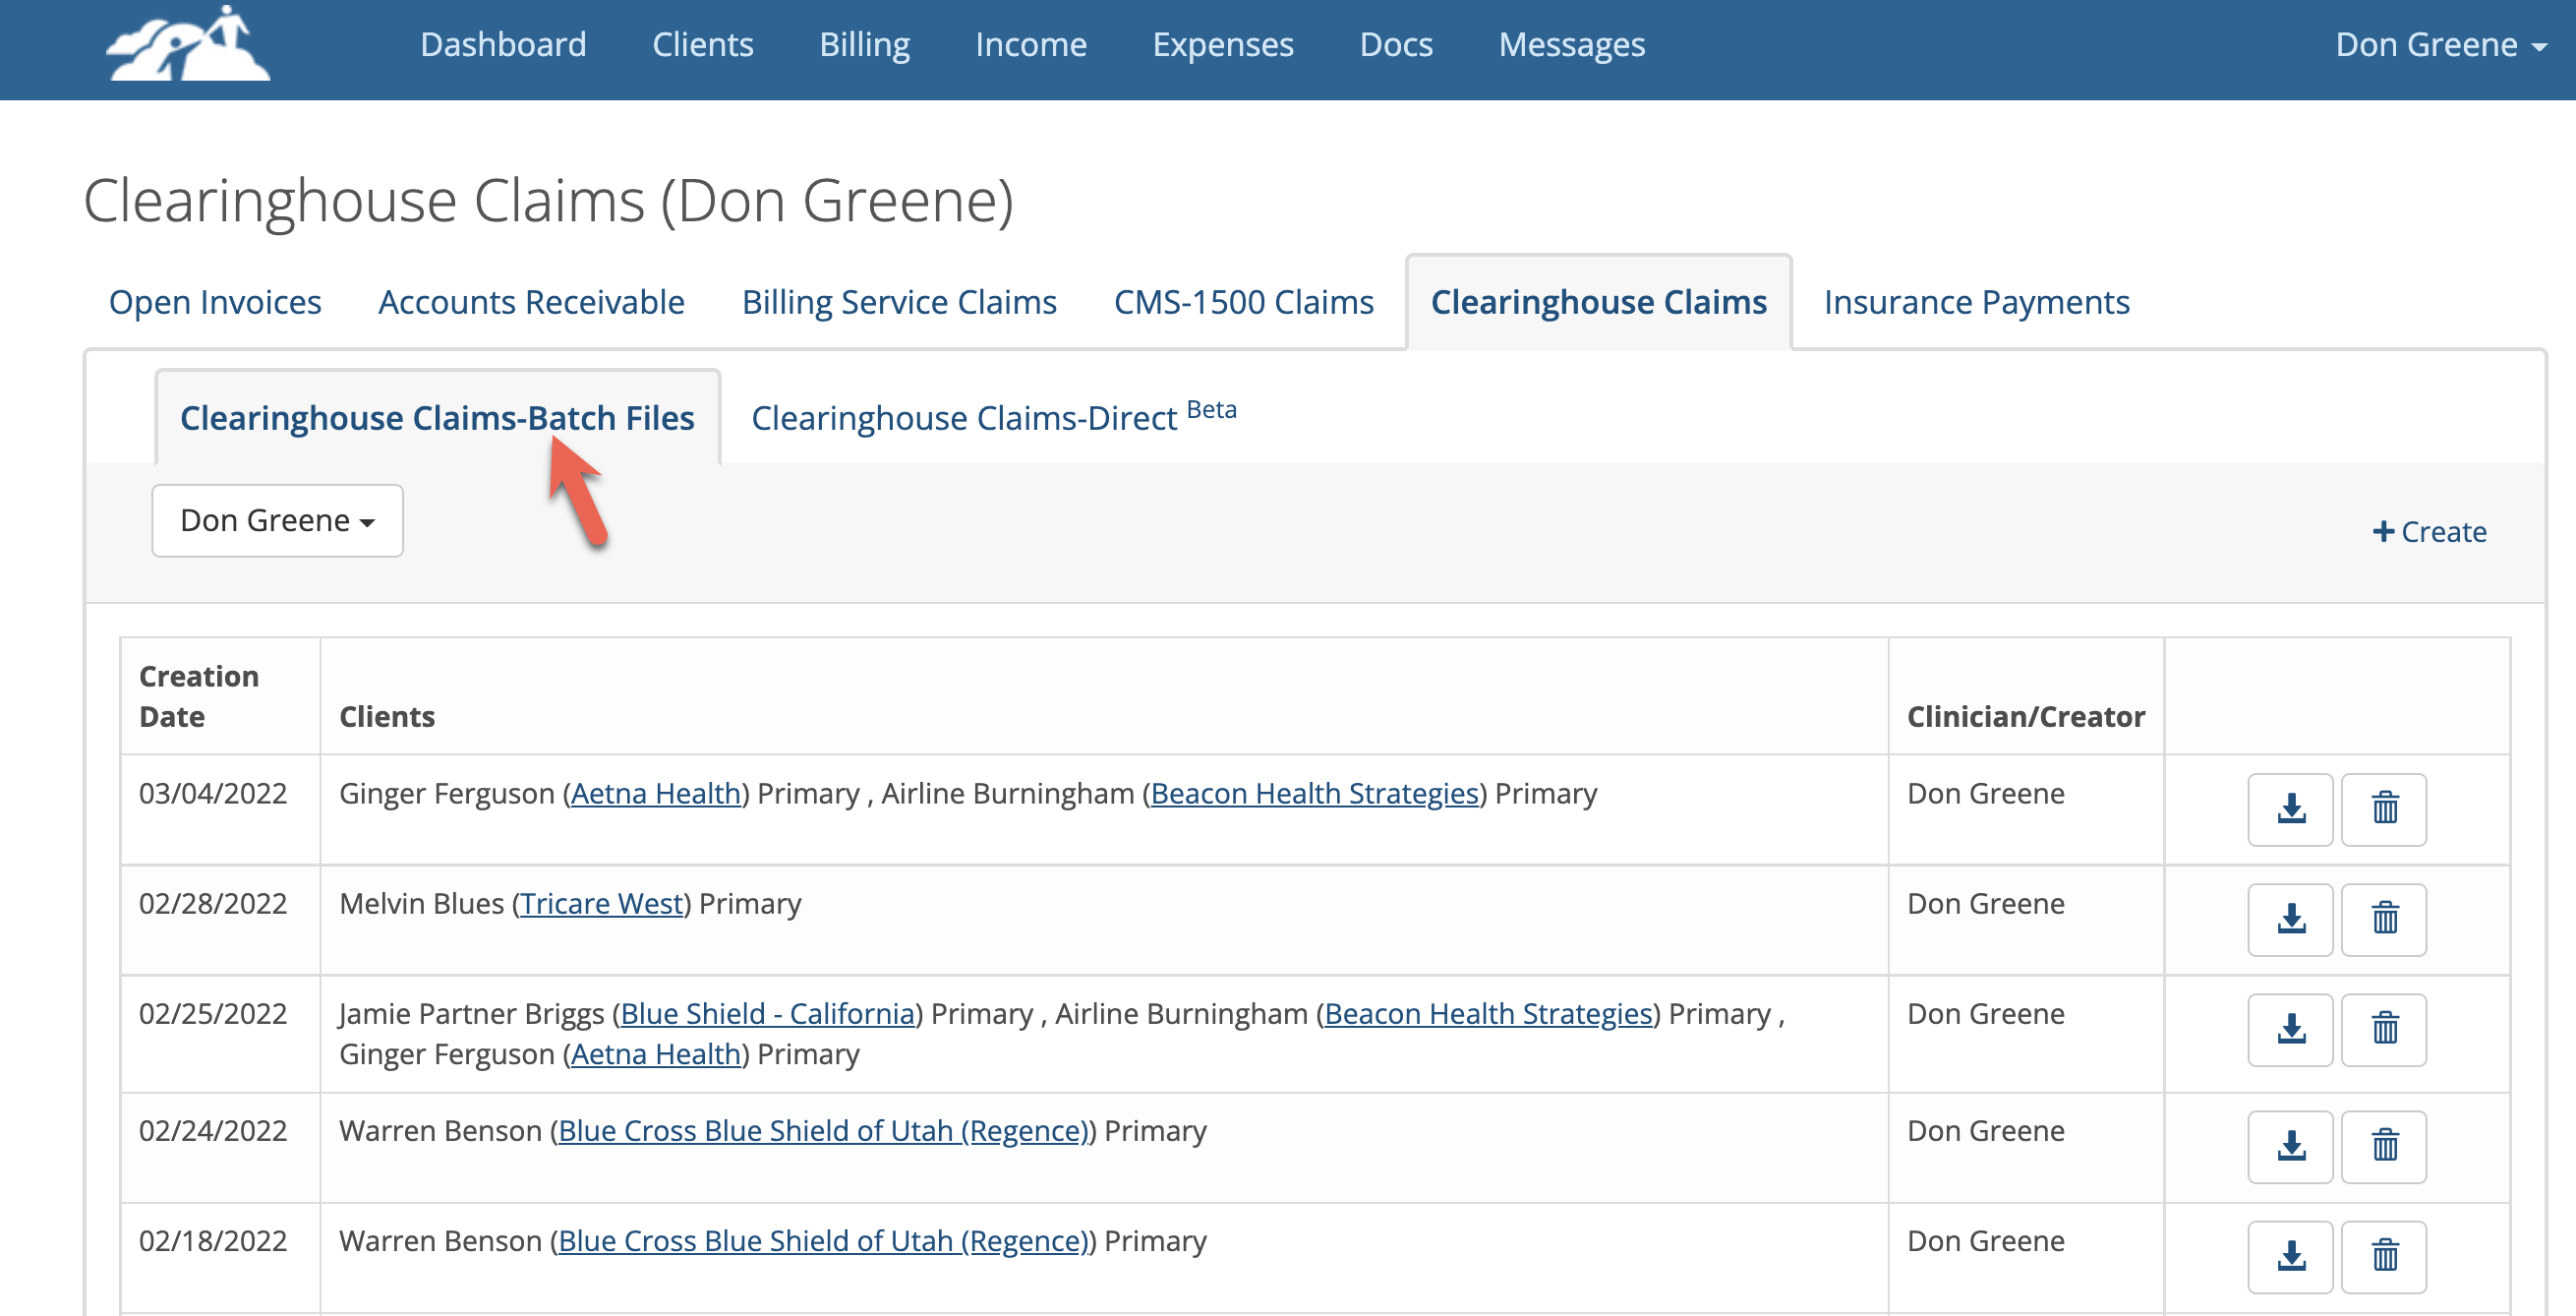
3. On the Clearinghouse Claims-Batch Files page you will see all of the Clearinghouse Claims that you submitted previously (see below). This page may be blank if you haven’t created any claims yet.
Please Note: Be careful not to delete claims on this page after you create them unless you have a reason to do so. When claims get deleted the status of an invoice(s) will return to “pending” in the patient’s chart. If you need to make corrections to a batch you can delete the claim file, make the corrections in the patient’s chart and create a new version of the file. Otherwise, just let them accumulate so you can maintain a history of your claims.
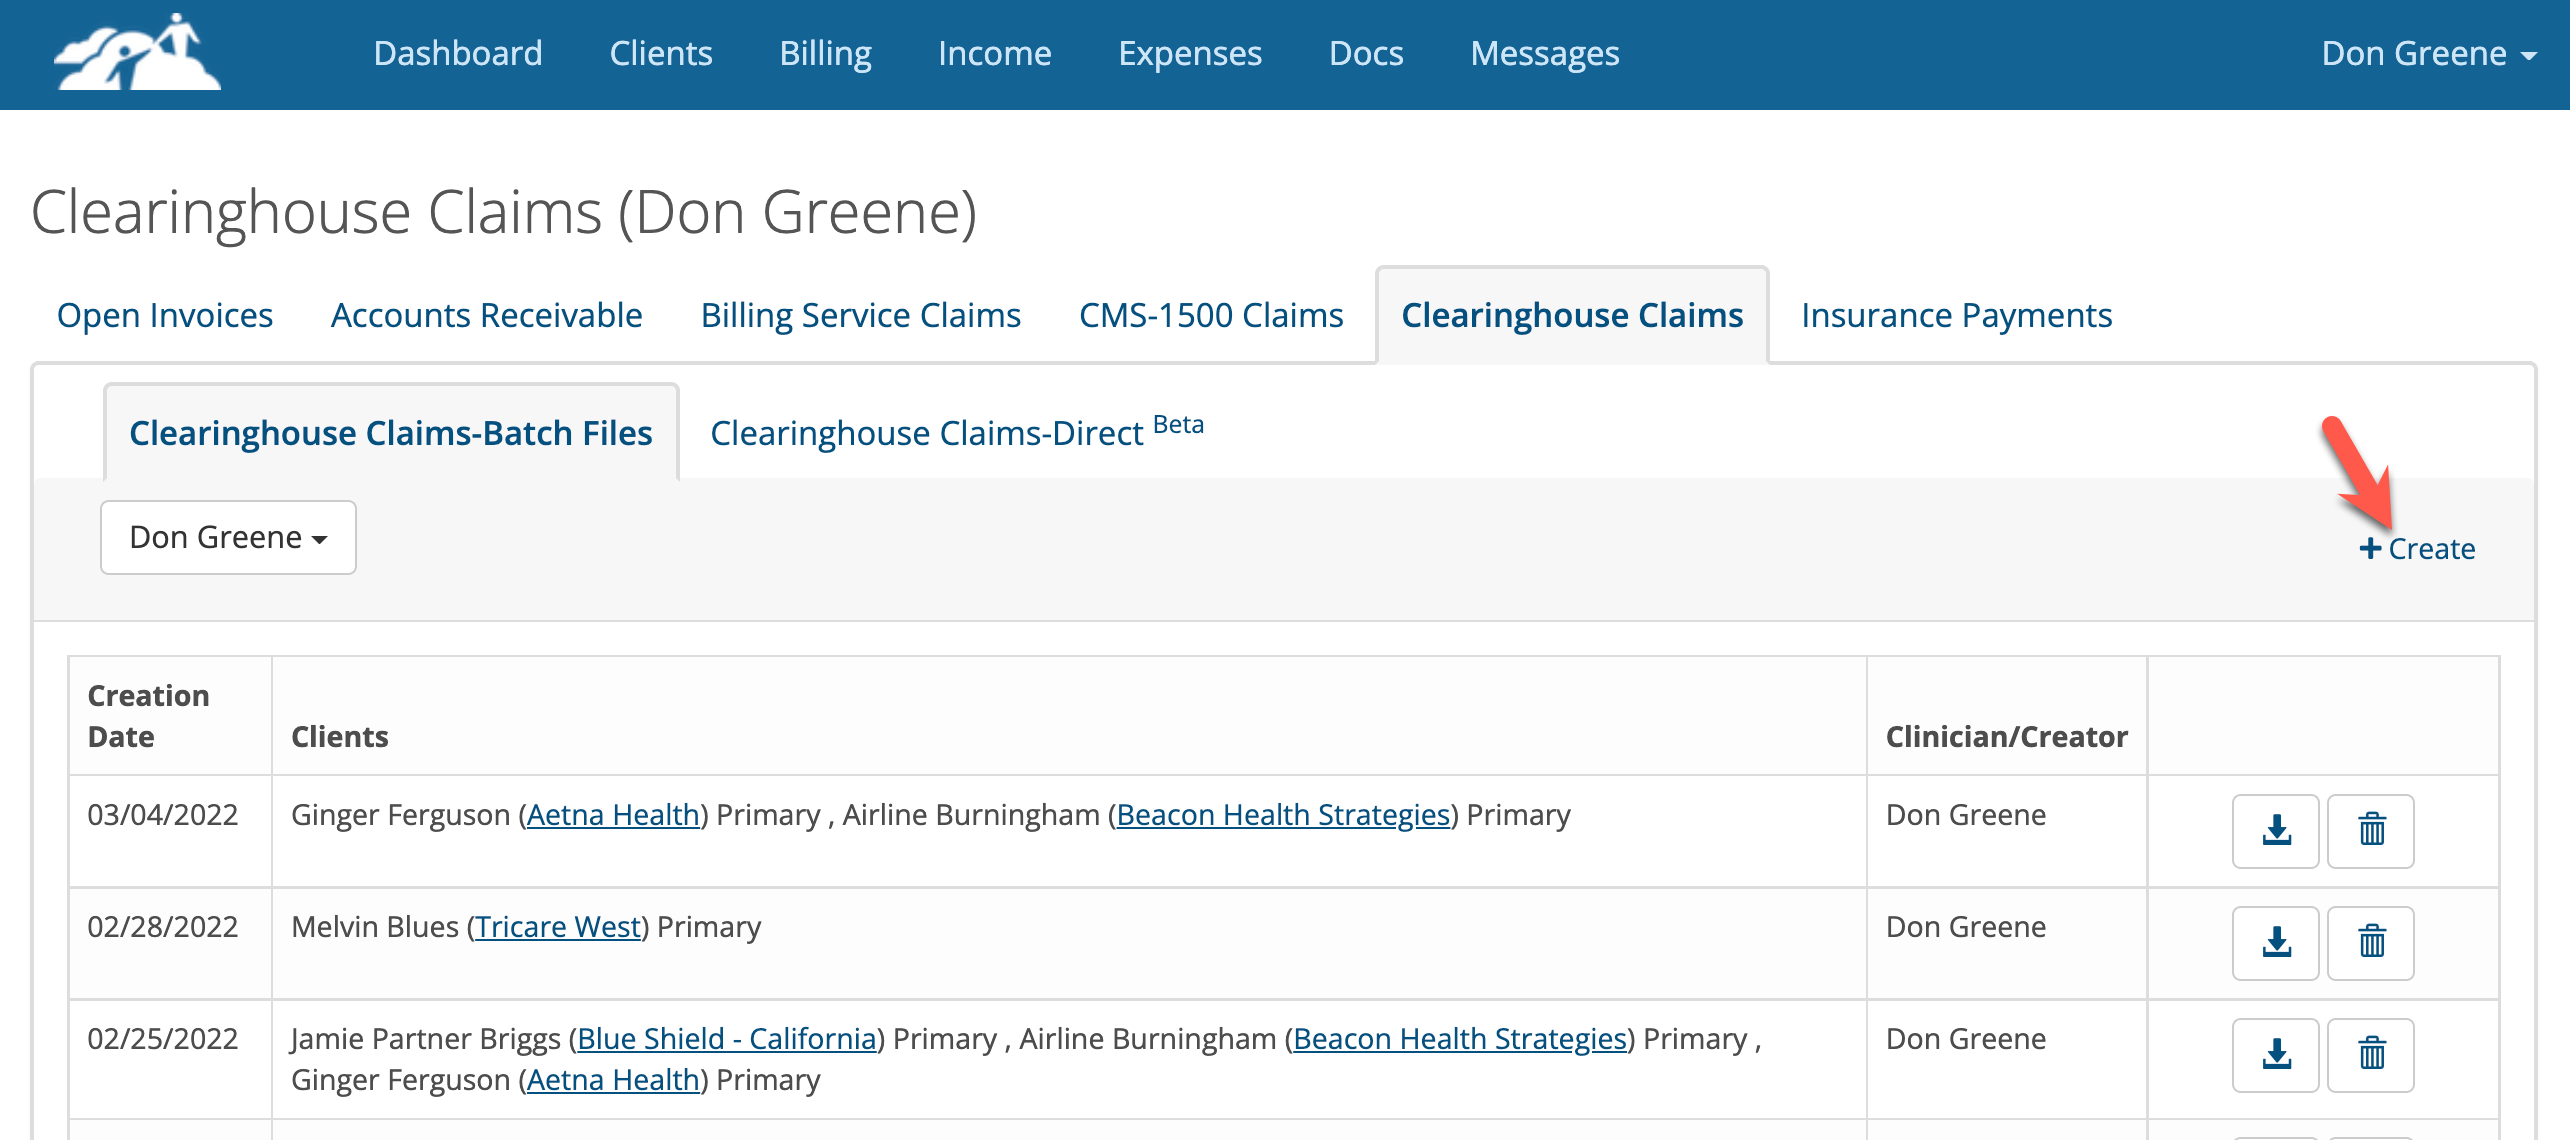
4. To create a new Clearinghouse claim click on the + Create button as shown below:
5. Check the boxes on the left hand side for the claim(s) that you wish to include in the Clearinghouse batch file.

6. Click the blue “Select” button to create a batch file. You will be return to the previous page where your claim files are located so you can download them to your computer temporarily.
7. In the following example, we created a Clearinghouse Claim file for Ginger and Airline. To download the file, click on the down arrow icon.
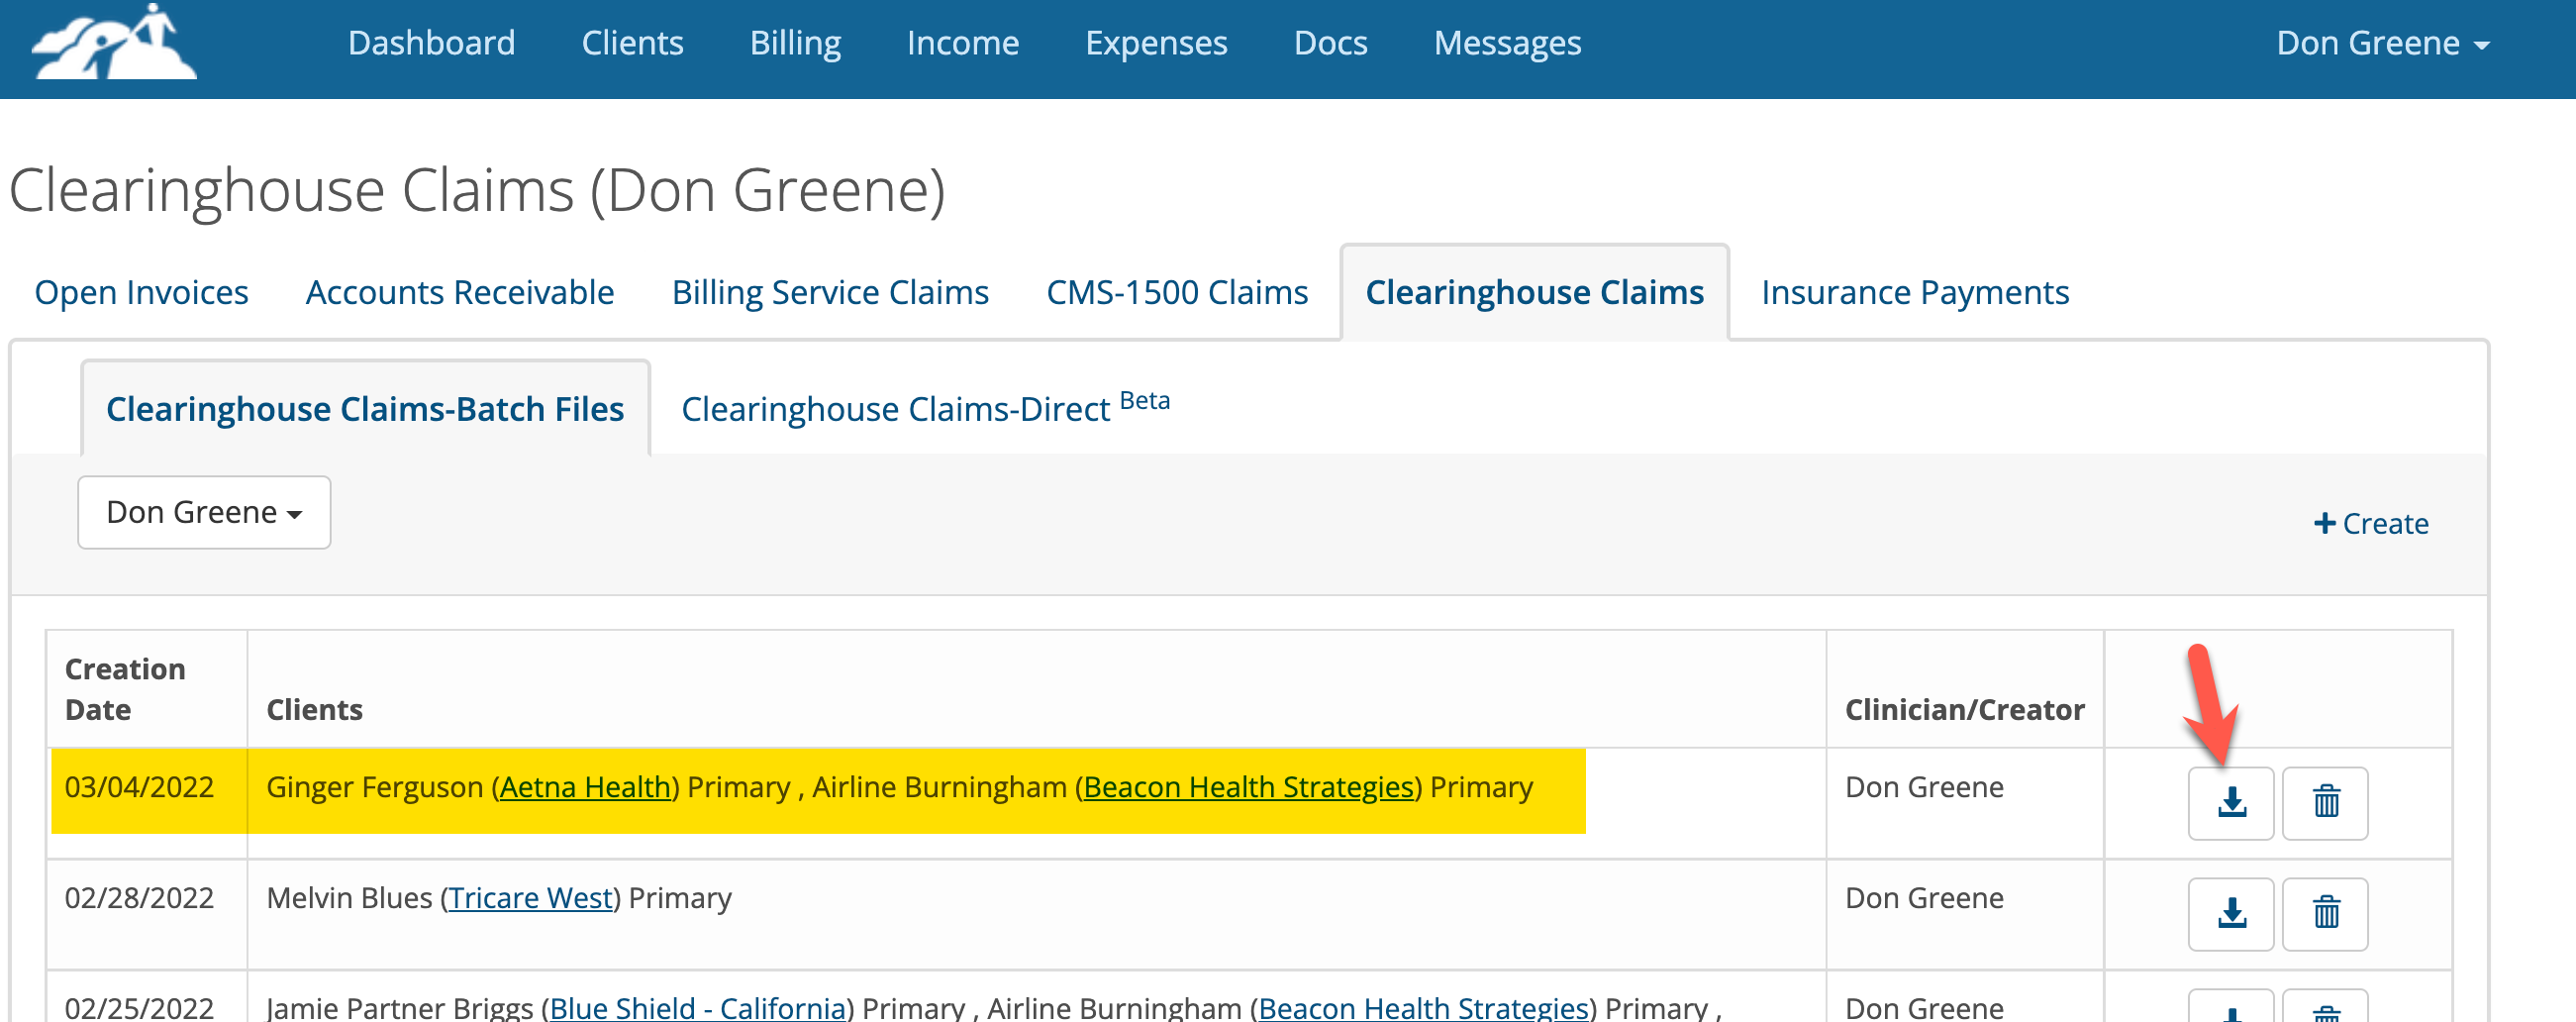
Important: Make sure your browser’s popup block is turned off. If it is turned on this will prevent you from downloading and saving the file to your computer. For information about turning off the browser’s popup blocker do a Google search or call us at 866-683-6886. Once your popup blocker is turned off you won't need to do turn it off in the future.
8. When you click on the down arrow icon, TherapyMate is going to do some error checking to see if any of the billing information is missing. If it finds something missing it will show you what needs fixing as in following example:
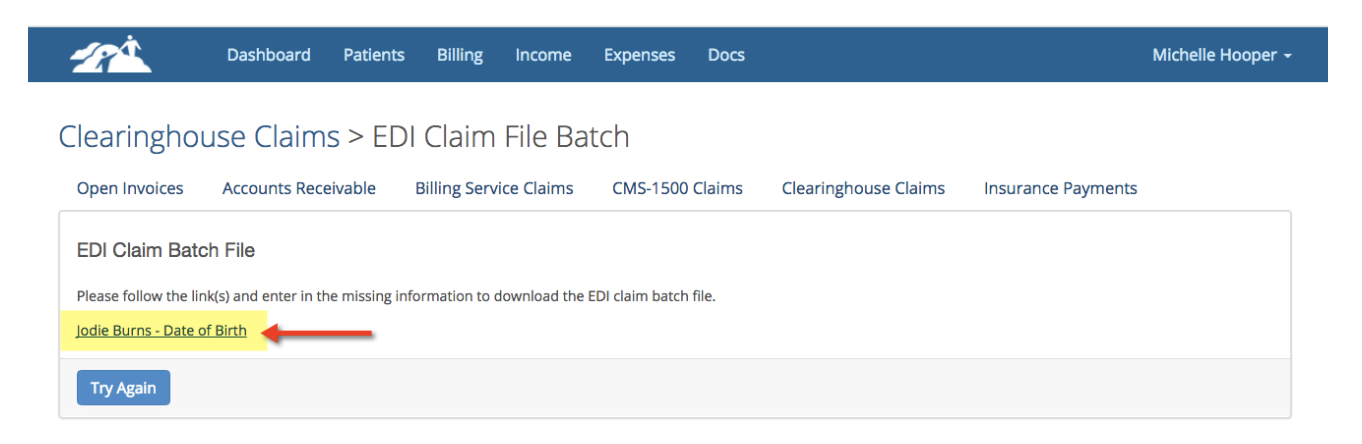
In this example the patient’s date of birth is missing. Click on the underlined error to fix the problem. When you do this a new browser window opens. Once you correct the error in the new browser window you can close it and return to the original browser window and try downloading the batch file again.
When all of the errors are corrected the file will download and will get saved to your “downloads” folder or other location depending on how you set this up on your computer's browser.
Please Note: If your popup blocker is turned on in our Internet Browser settings, it must be turned off or the batch file will not download.
The file name that gets downloaded and saved will be similar to the following example: edi_file_10492.txt. The numbers will increment each time you create another file. Don't rename the file.
The file name that gets downloaded and saved will be similar to the following example: edi_file_10492.txt. The numbers will increment each time you create another file. Don't rename the file.

You can now use this file and upload it to Office Ally using their Upload a File menu option.