AirPrint-enabled apps let you create and print full-quality documents and graphics without the chore of installing drivers or configuring the printer queue. The requirements are rather minimal — you need any model iPad as well as the latest version of iOS, Safari and an AirPrint- compatible printer with the latest firmware.
For a comprehensive list of all compatible devices check this link: Apple’s AirPrint basic support page,
Step 1 — Connect to Wi-Fi
In order to use AirPrint, both your printer and iPad must be connected to the same Wi-Fi network.
Step 2 — Select the printer
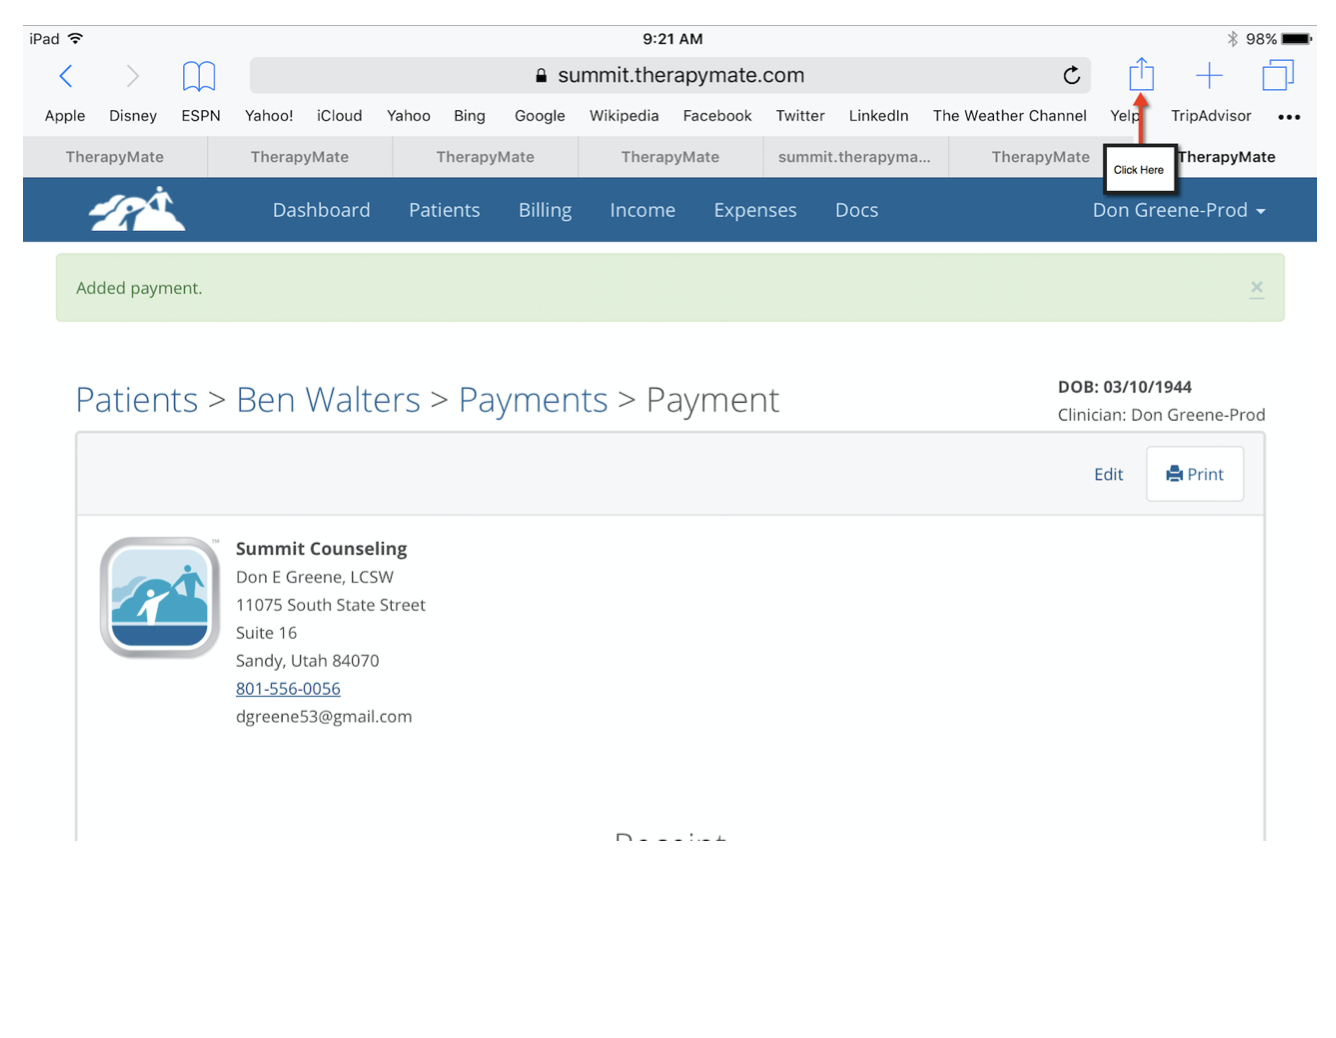
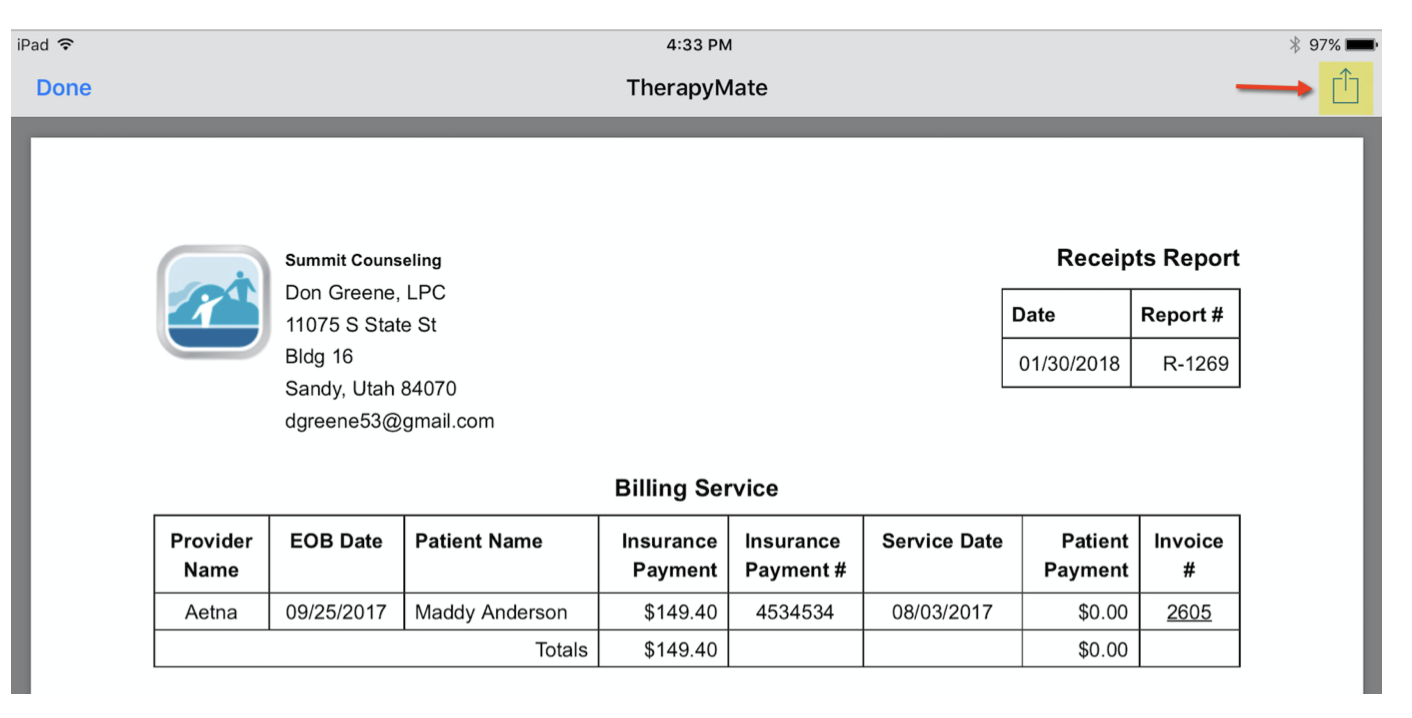
Check the connection between your iPad and the printer by opening Safari. You only have to do this step once to verify that your printer and iPad are connected. Click on the box that has the “up arrow” in it as shown below:
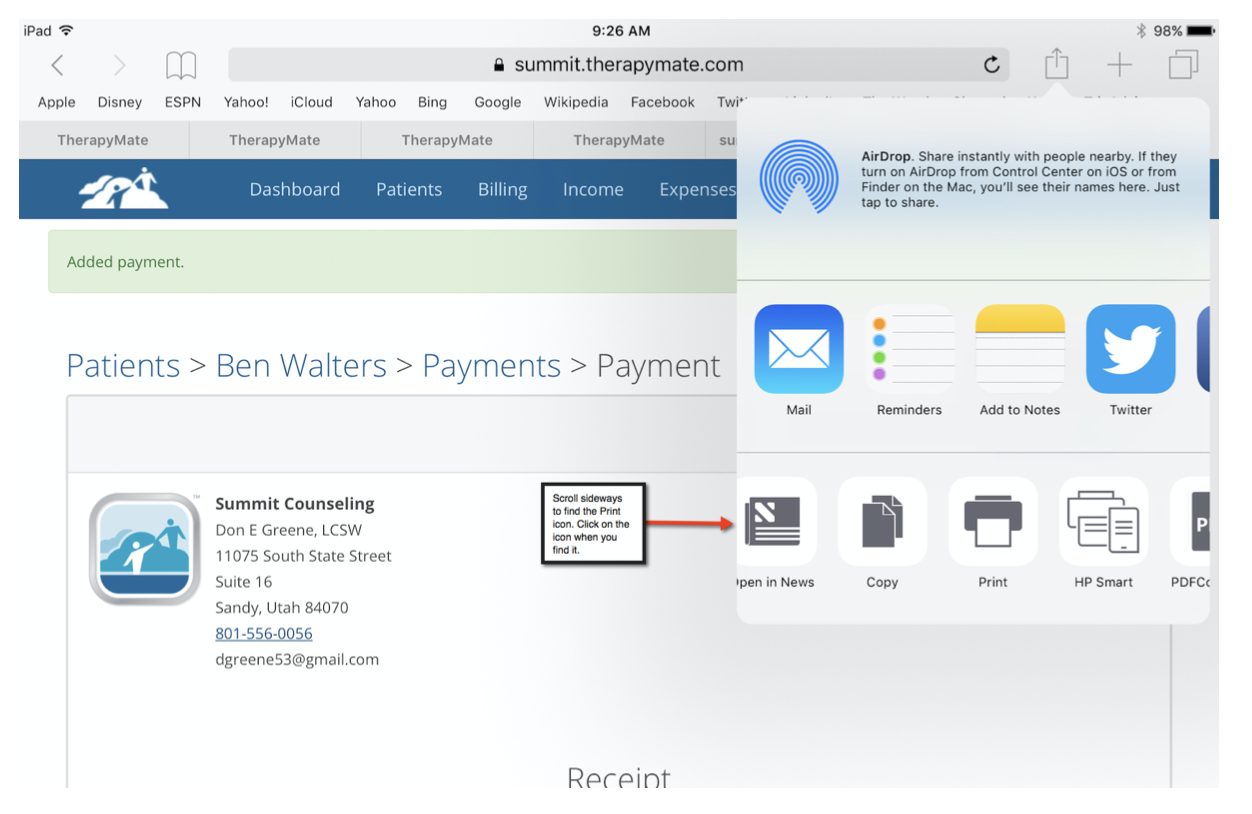
Scroll sideways to find the Print icon. Click on the icon.
Printing from an iPad using Safari and Apple AirPrint
Select the printer that you want to use. Remember, the printer must be on the same wireless network as your iPad.

Printing from an iPad using Safari and Apple AirPrint
If you can see and select your printer you can now use AirPrint on your iPad to print from TherapyMate.
Step 3 — Printing From TherapyMate
Using the Safari browser, login to TherapyMate. Select a document or receipt your wish to print by clicking the Print button. In the example below we are printing a payment receipt.
Printing from an iPad using Safari and Apple AirPrint
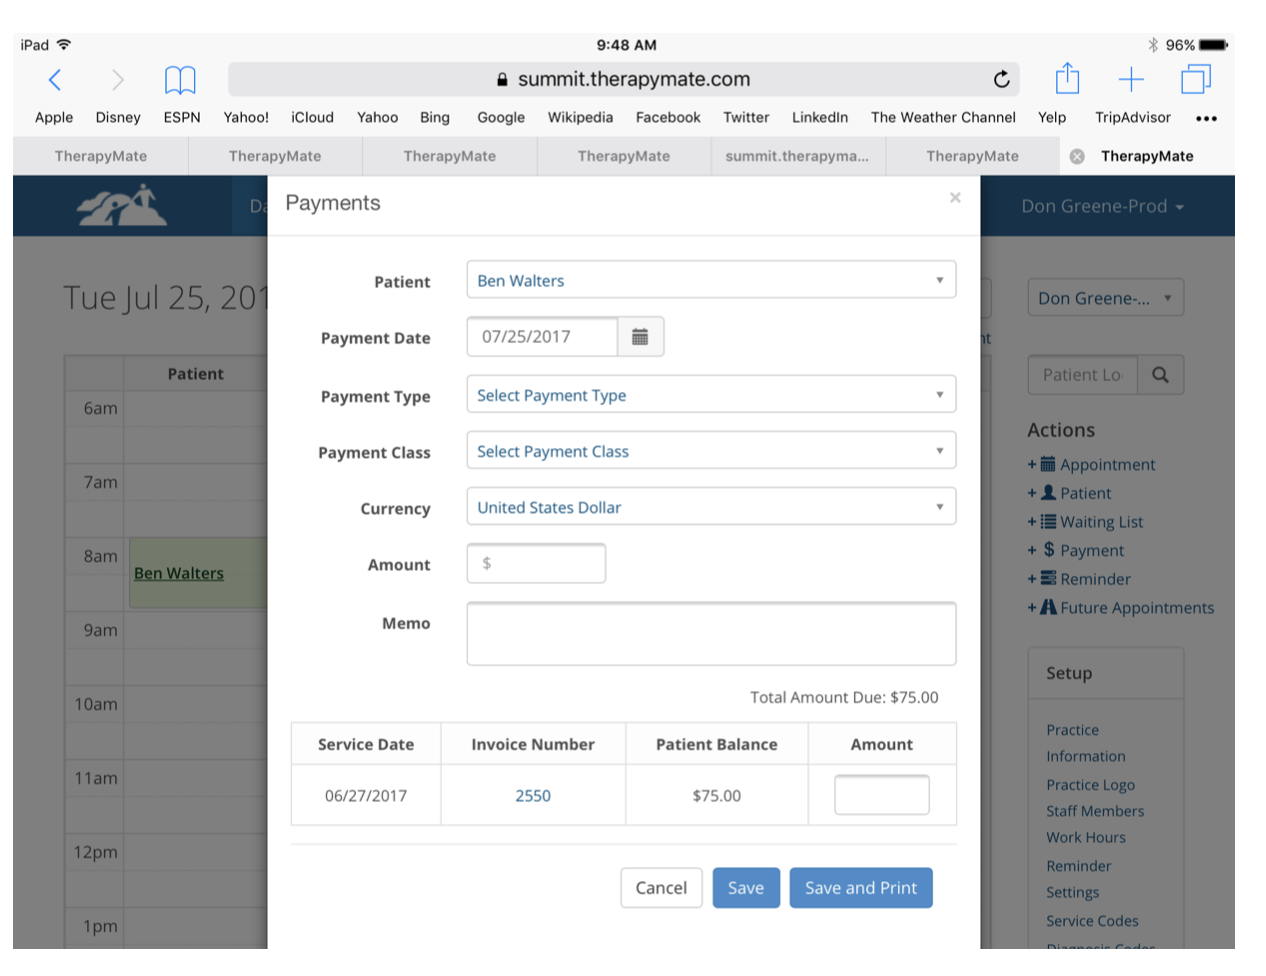
Fill out the payment window and click the Save and Print button.
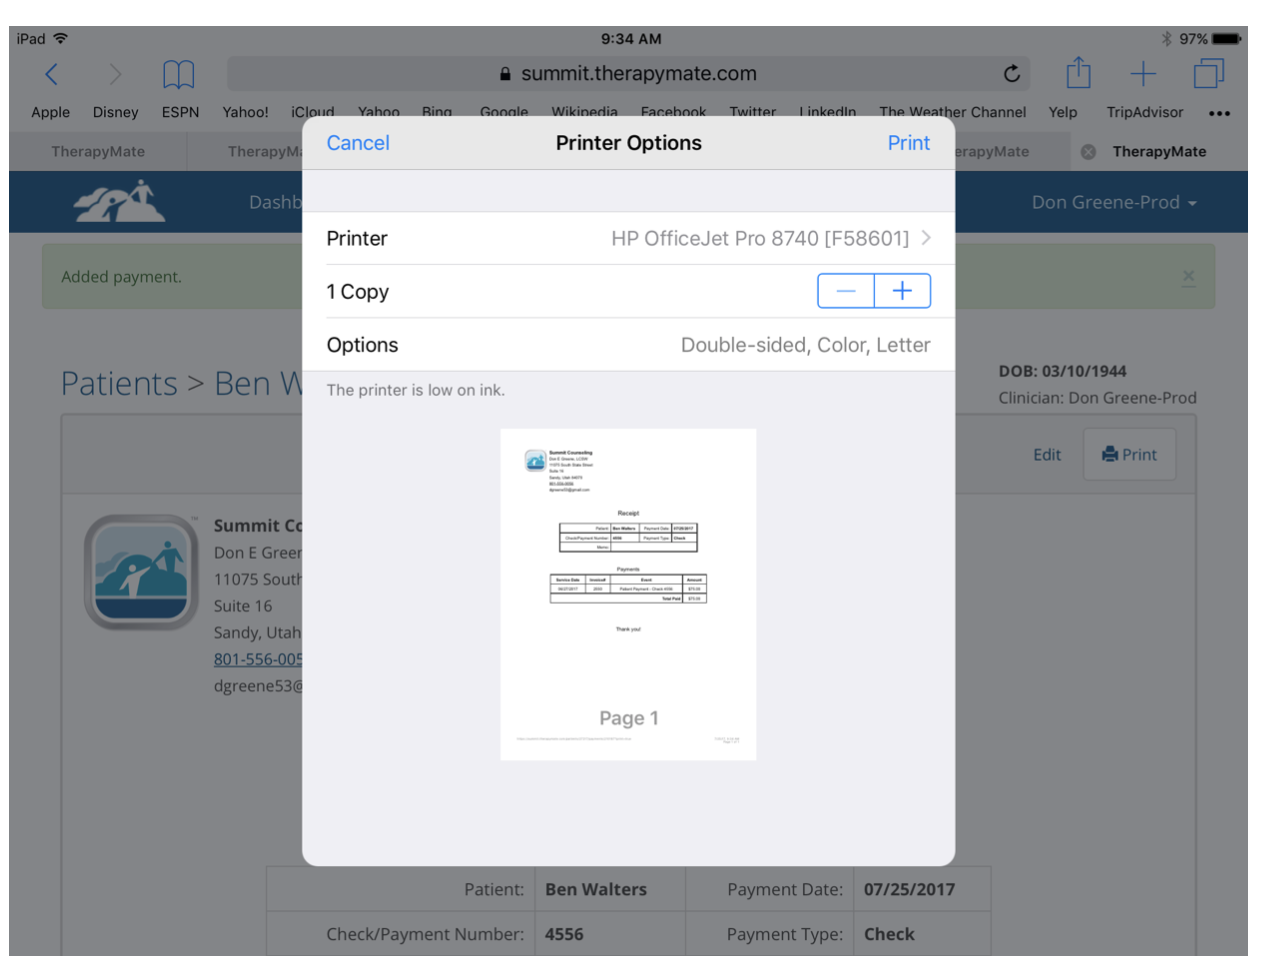
Verify that your printer is selected and choose the number of copies if necessary.
Click “Print” in the upper right hand corner. The receipt will now print to your AirPrint compatible printer.
Step 4 — Saving a Document to your iCloud Drive
If you want to store a PDF version of the document in your iCloud drive, click the print button in TherapyMate. When you get the Printer Options window (shown above), put two fingers together in the middle of the document preview and move your fingers outward while lifting them off the screen. This will open a new full screen preview of your document.
Look for the box with the up arrow in the upper right hand corner of the iPad screen.
Look for the box with the up arrow in the upper right hand corner of the iPad screen.
Printing from an iPad using Safari and Apple AirPrint
Click on the up arrow icon and select the icon called “Add to iCloud drive”. You will be able to save your document for use later or to attach to an email.