A Practice can enter receipts from merchants, landlords and other vendors to keep track of their expense throughout the year. At the end of the year a summary report shows all expense by each accounting category.
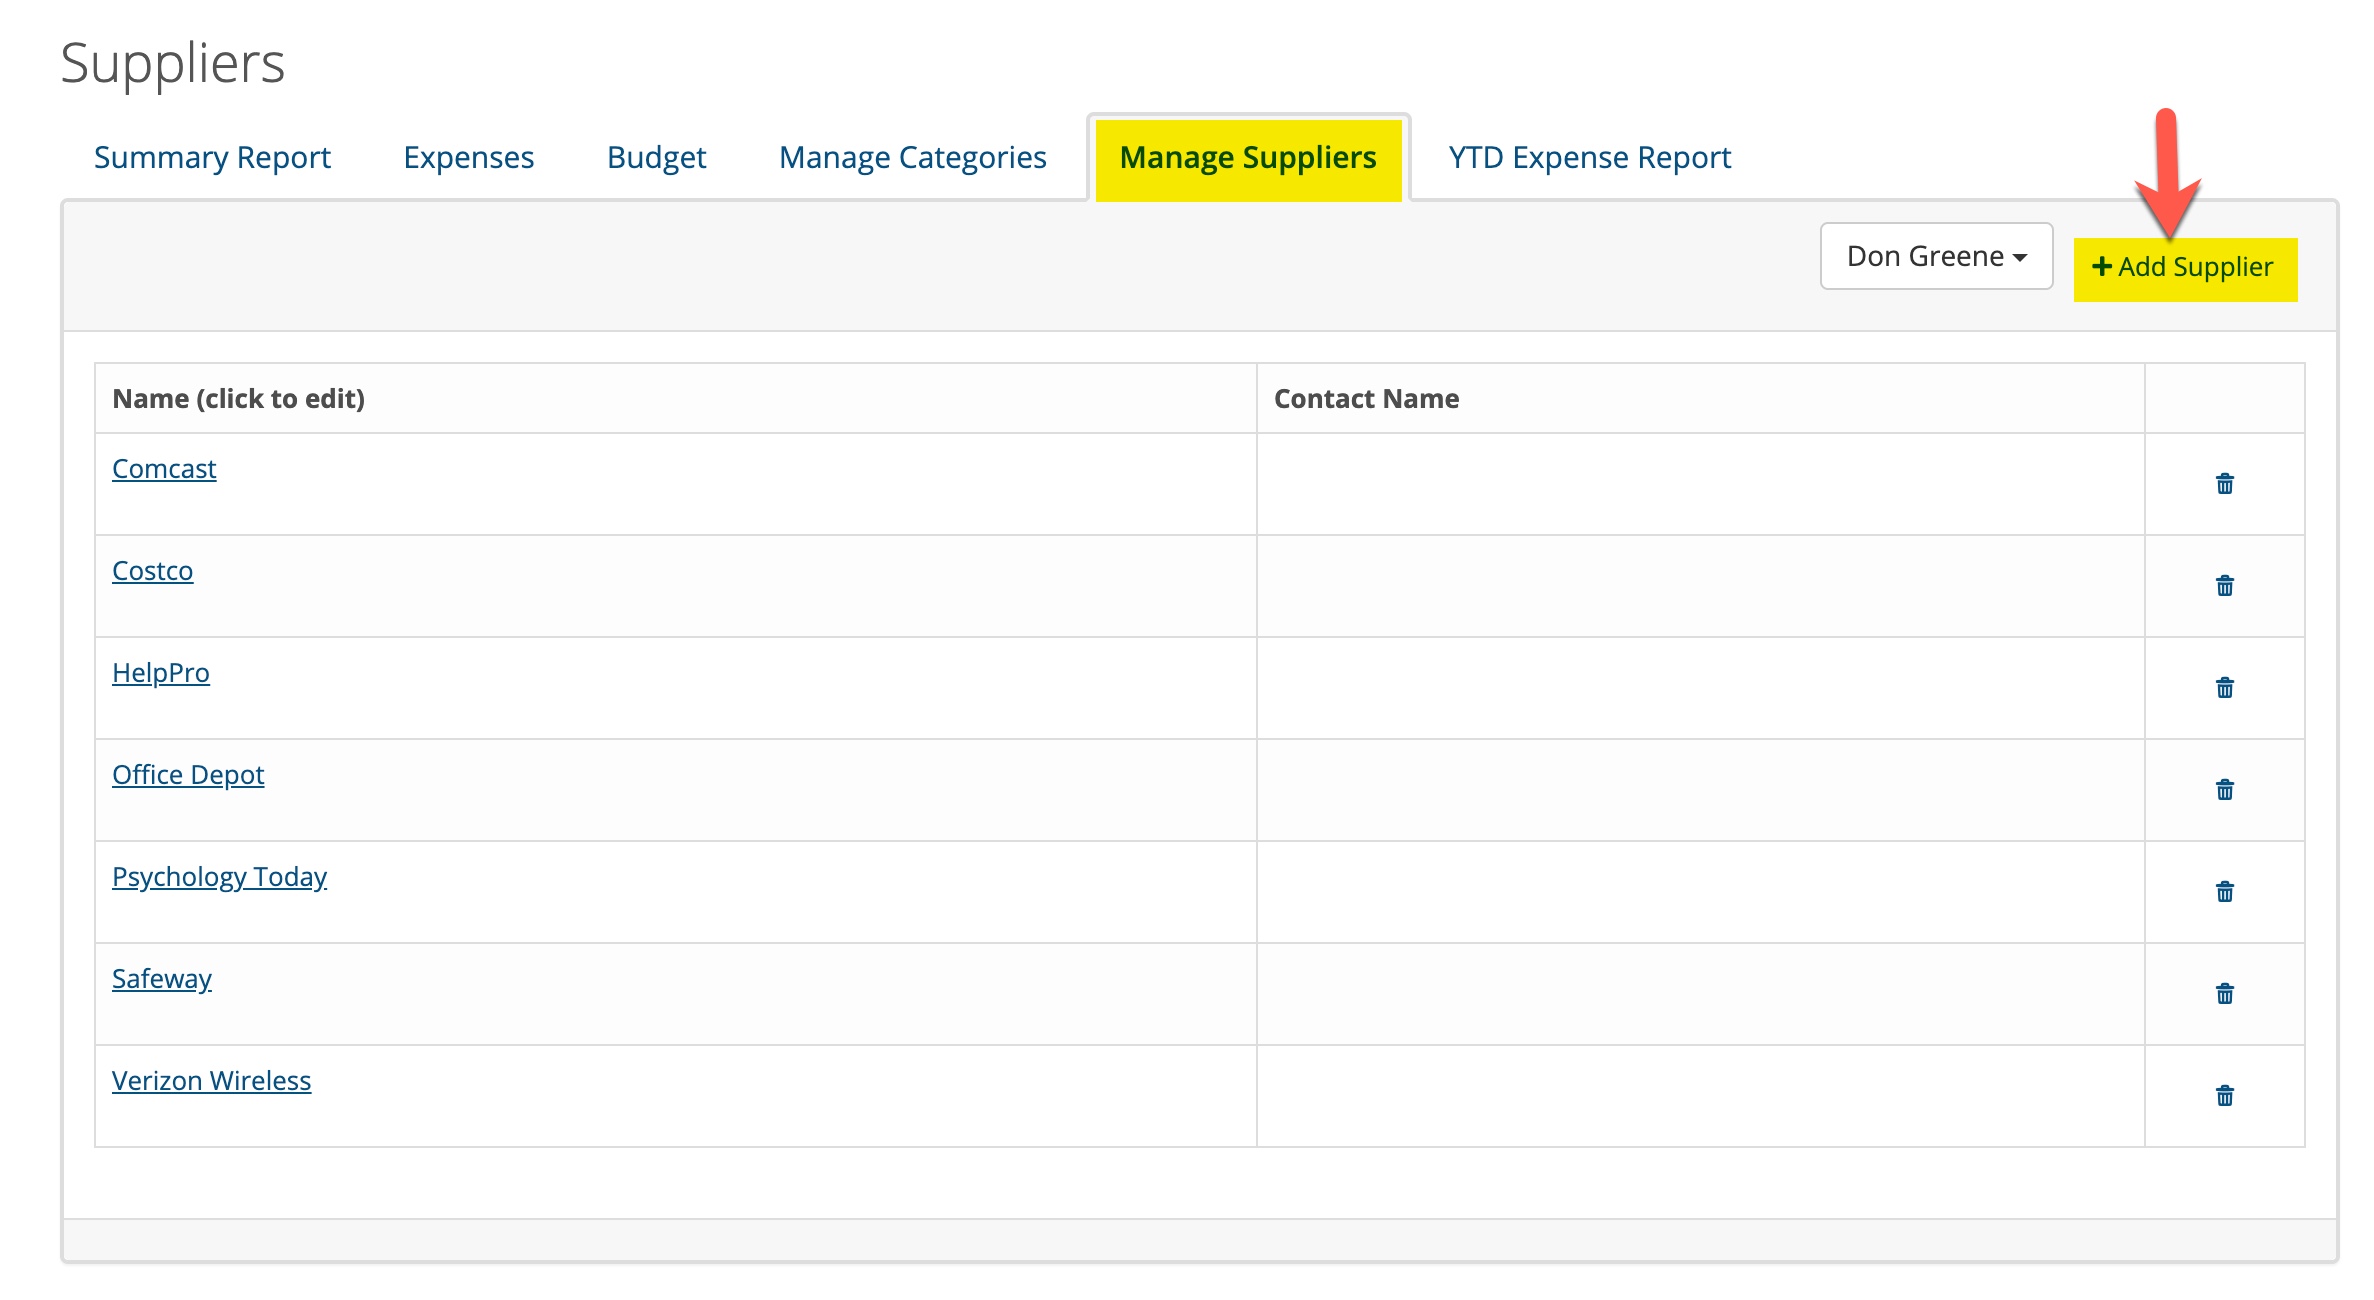
Before you can enter expenses, you need to enter the companies and people that you purchase goods and services from. Start by clicking on the Manage Suppliers tab.
Adding Suppliers
Before you can enter expenses, you need to enter the companies and people that you purchase goods and services from. Start by clicking on the Manage Suppliers tab.
Adding Suppliers
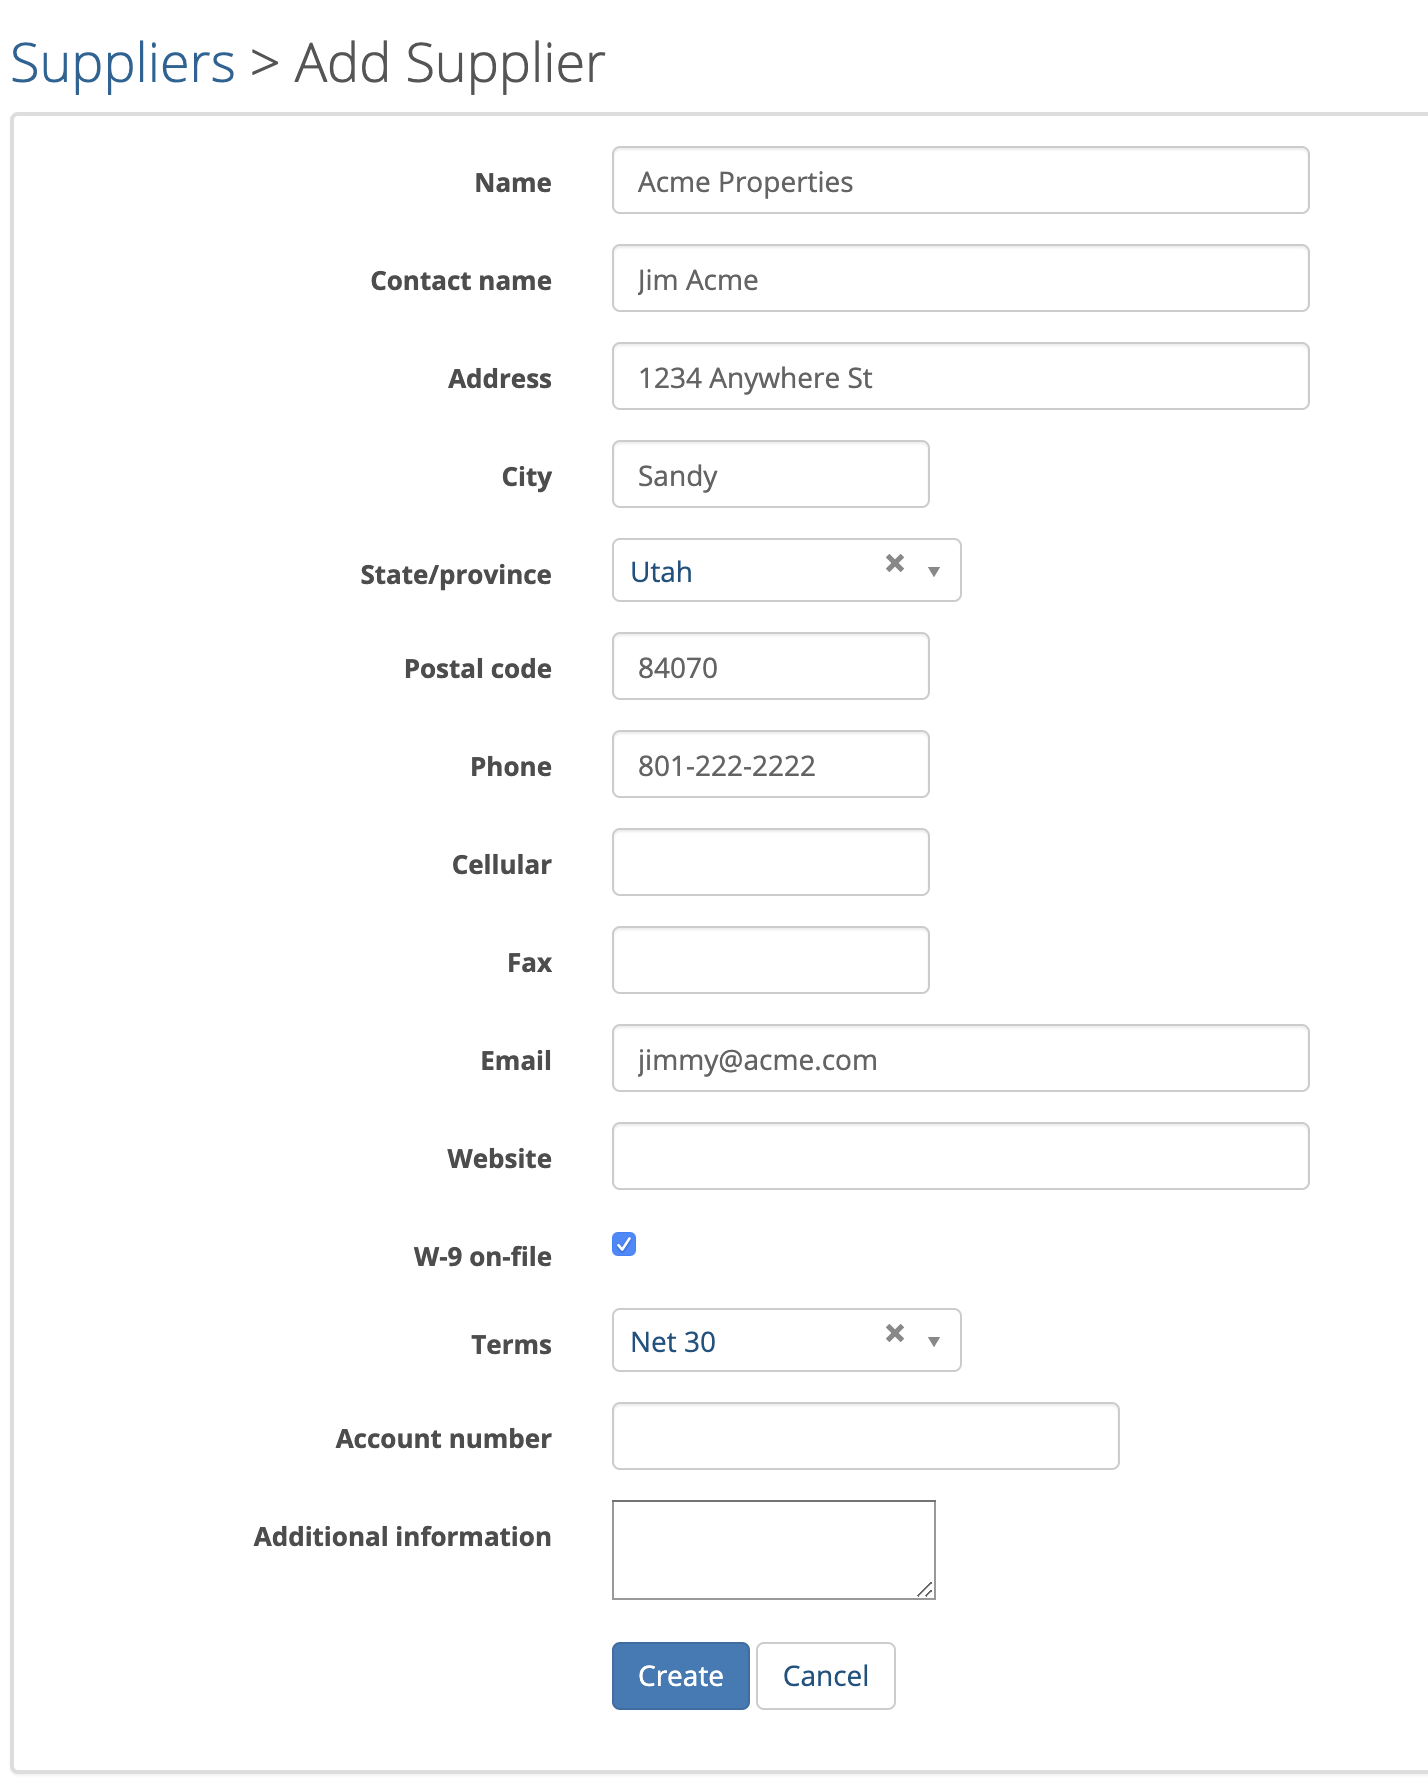
Fill out the following screen for the company you wish to add. Repeat this process for each company you purchase from. You can add companies throughout the year if needed. The company just has to be in this master list before you can record an expense from them.
Managing Account Categories
Here is a partial list of account categories that are supplied by default in your subscription. You can add additional categories as needed anytime by clicking the +Add Category button.
Here is a partial list of account categories that are supplied by default in your subscription. You can add additional categories as needed anytime by clicking the +Add Category button.
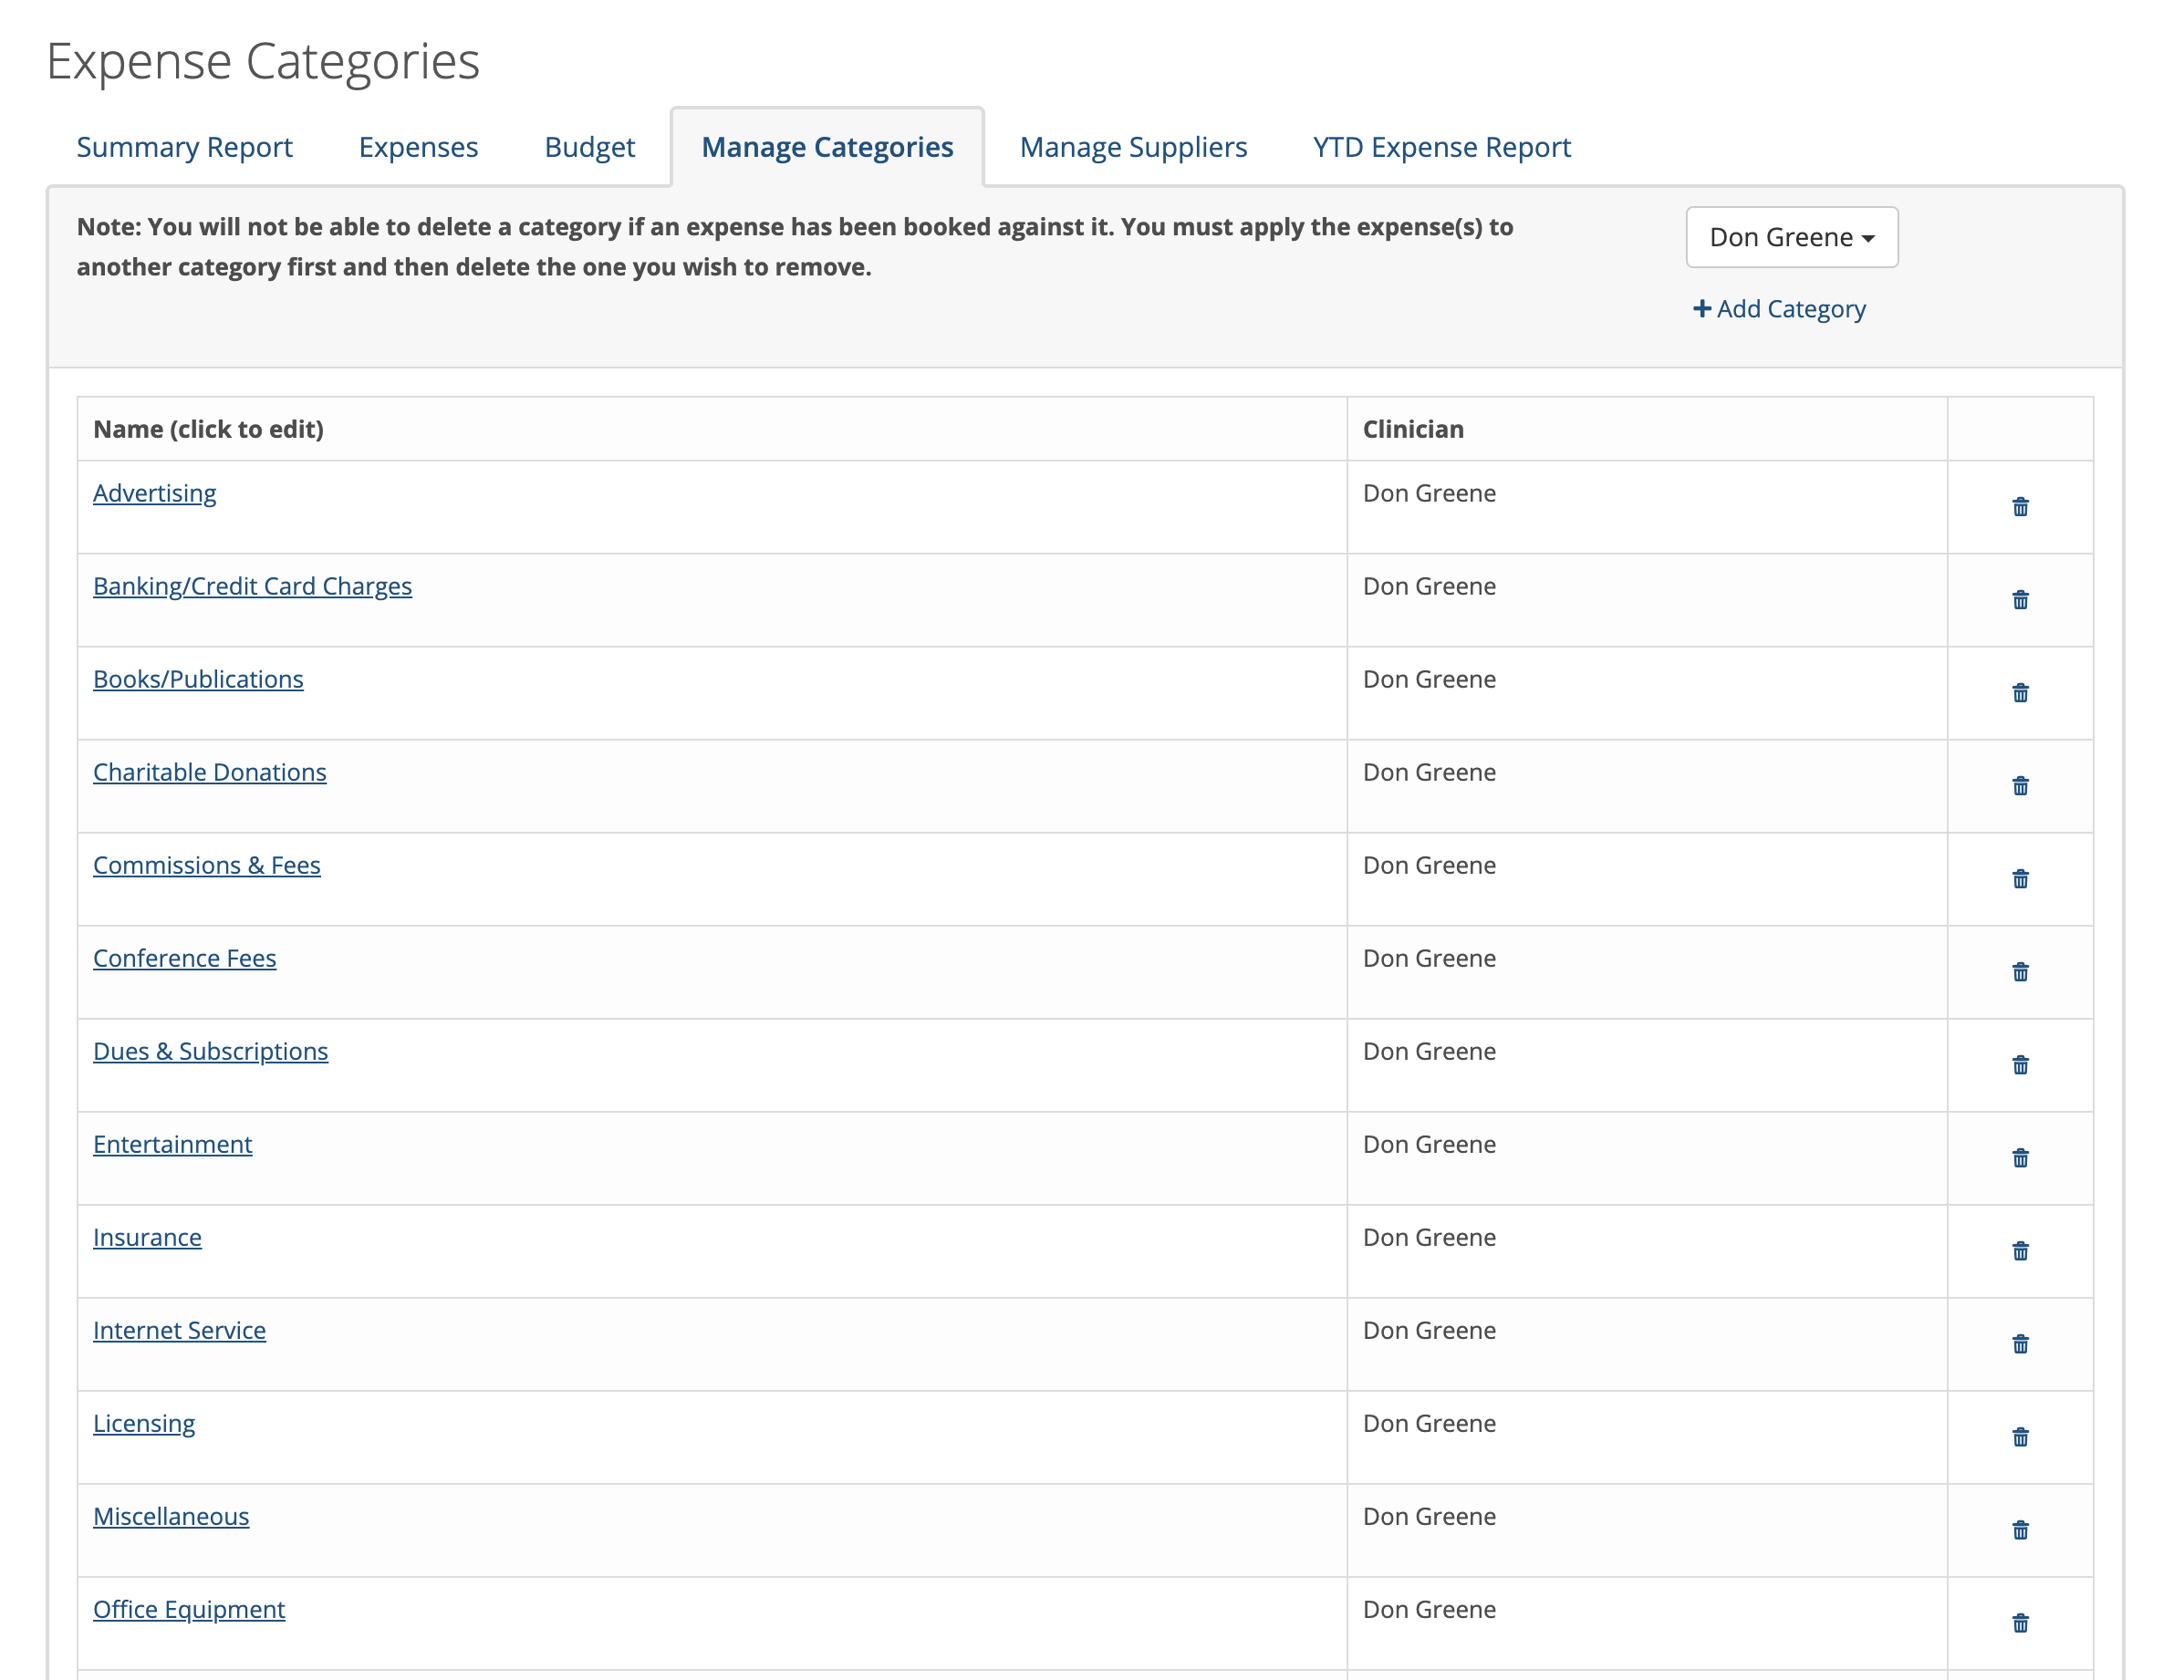
These categories help you group like expenses together and they are useful at tax preparation time.
Adding Expenses
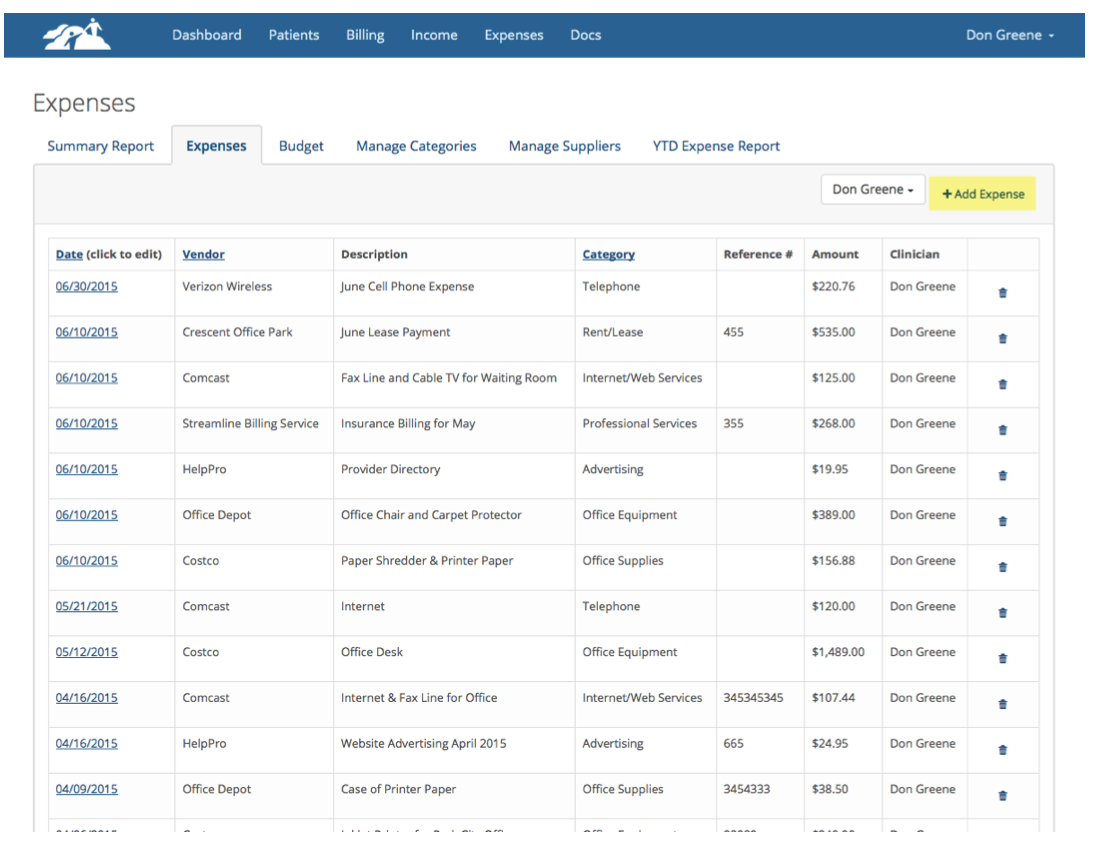
To add an expense click on +Add Expense as shown below:
To add an expense click on +Add Expense as shown below:
The following page will appear where you can select the supplier, category, payment type, date purchased and dollar amount. In the reference field you could enter a receipt number, check number or whatever number makes sense for you. Also enter a description to provide more detail if necessary.
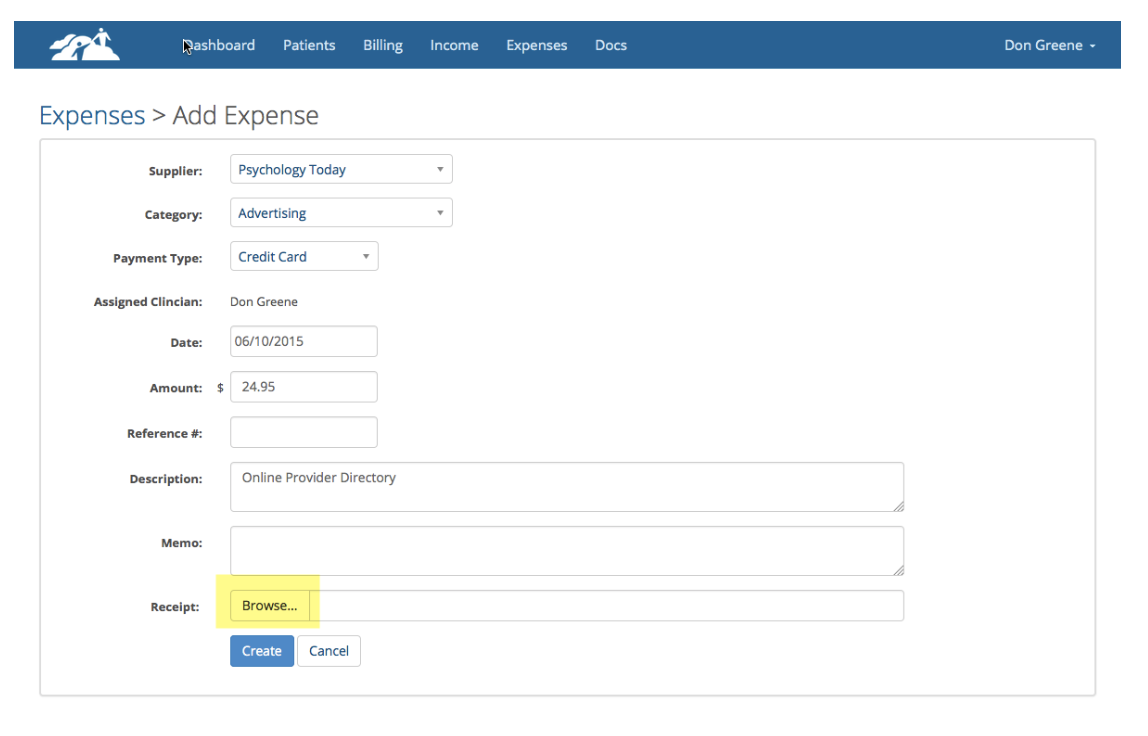
If you would like to keep a copy of the scanned sales receipt, scan the receipt and click the Browse button that is highlighted above.
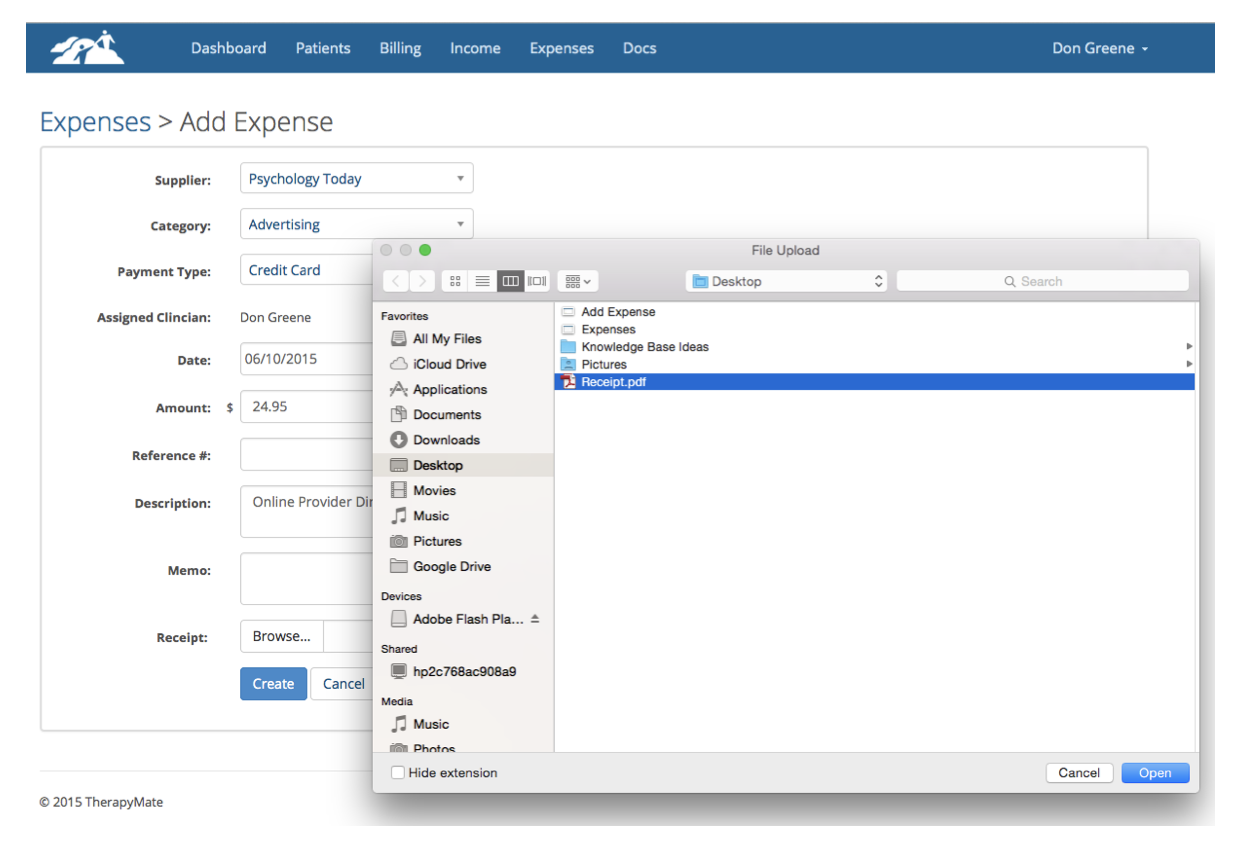
Choose the receipt file on your computer to upload and click the Open button.
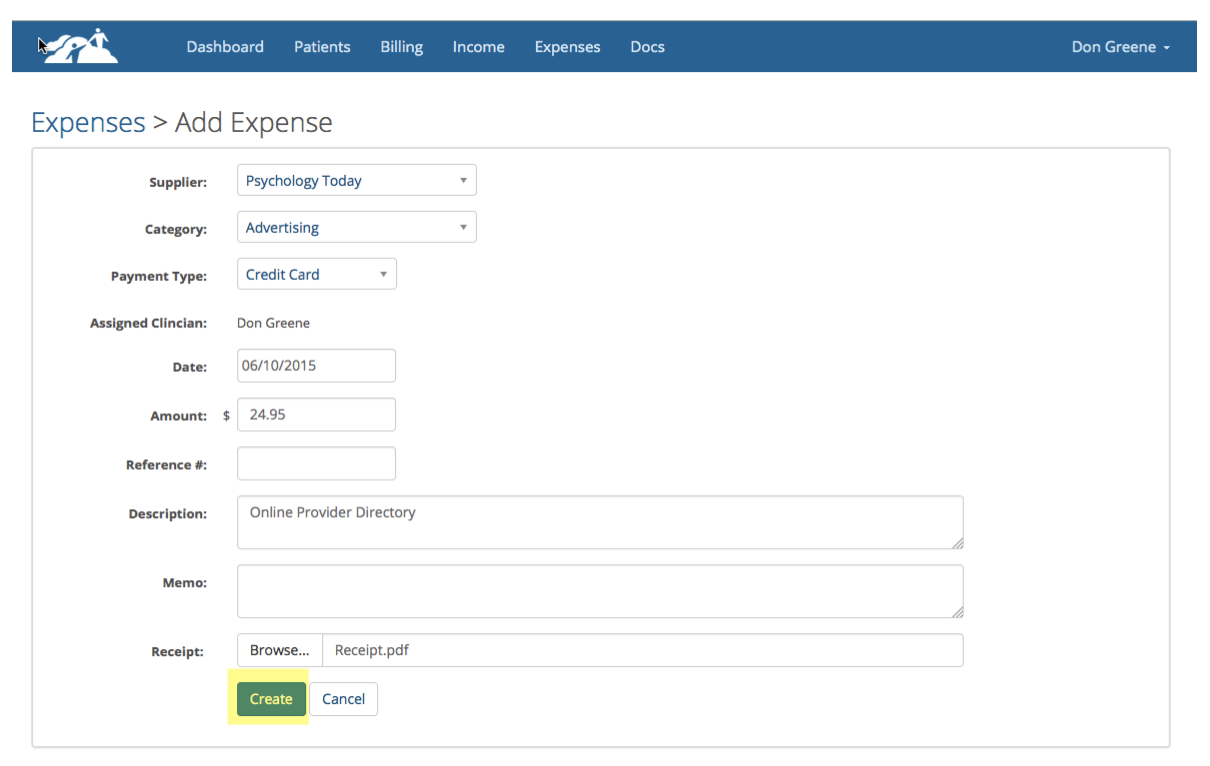
As the receipt file uploads you will see a blue progress bar appear. The bigger the file the longer it will take to upload. A single page receipt will upload in 3-4 seconds.
When the progress bar finishes click on the Create button to finish the process.
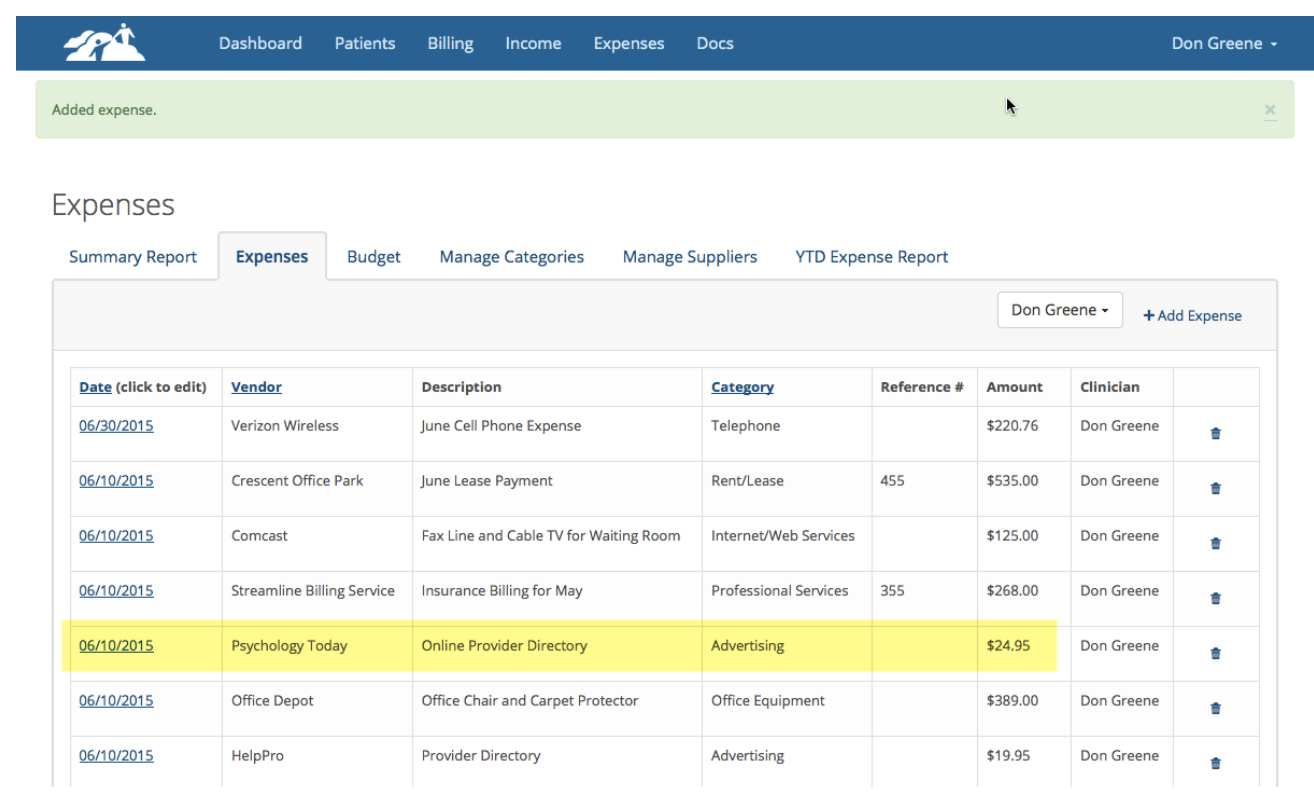
When the process is finished you will return to the Expenses page and you will see a message at the top of the screen confirming that the expense was added. You can also check by looking at the expenses table. See the example below:
When the process is finished you will return to the Expenses page and you will see a message at the top of the screen confirming that the expense was added. You can also check by looking at the expenses table. See the example below:
Creating a Budget
To learn more about establishing a budget see the related article called Establishing a Budget.
To learn more about establishing a budget see the related article called Establishing a Budget.